Do you like The Lord of the Rings?
It's literally my favourite saga of all times :D
This is a complement to my Nazgul Gauntlets desing, although it can be usefull also if you're looking just for an armored arm to your gauntlet. Check out my nazgul gauntlet design here: https://cults3d.com/en/3d-model/game/nazgul-gauntlets
In my original desing of the gauntlet, I came up with the arm's part in a way that it followed the style line of the whole gauntlet, making my own vision of how it could be for a regular nazgul or Ulaire.
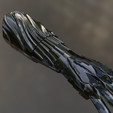
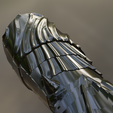
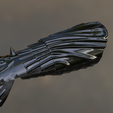
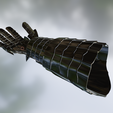
Now, with this new desing, I've tried to be the most accurate possible to recreate what we can see in the PJ's films, basing myself in a few fotograms from the movie, for the leader of Nazguls, the Witch King of Angmar
If you are one of my nazgul gauntlet purchasers, now you can convert your Ulaire Nazgul Gauntlet into the Witch King Gauntlet :). Just remove the arm part and put the new one.
HOW TO BUILD IT
First you have to print the pieces. Important: Set them vertically on the base to avoid using supports, as they are designed to avoid post processing. No supports needed :). Summarizing, you have to print:
x1 armpiecetop1
x1 armpiecetop2
x1 armpiecetop3
x1 armpiecetop4
x1 armpiecebottom1
x1 armpiecebottom2
x1 hingeA_V2
x1 hingeB_V2
Once you printed all, you have to join the hand pieces together. Notice that each piece has holes in it. The idea is to use these holes to attach the pieces together using nails or screws. If you don't have it or just don't want to buy them, don't worry, you can make your own nails to join the pieces, using filament! It's very easy and I did my gauntlet this way. Yoy have to cut a small piece of filament (like 1-2cm). Then, using a soldering iron, melt one side making a little bit of pressure, gently. This is going to conform the head of the nail. Once you have that, pass the nail through the hole of the two pieces to join. Finish melting the other side of the nail, making another head, so it can´t get out. And that's it! I also made a video on instagram to show you exactly how to do it (this is for the gauntlet itself, but the process is exactly the same), check it out!: https://www.instagram.com/p/Cz9csLeKnBE/
To join together the armpiecetop section and the armpiecebottom section, I printed 2 hinges and place them in one of the sides so I could open and close the arm body and put myself easily the gauntlet. Didn't make holes in the 3D desing for the placing of these hinges because I think maybe some of you would prefer not to use this system, make it in another way, or directly don't print the back side of the arm (that is optional). So, what I did instead is to print the piece and made the holes easily with an screwdriver to place the hinges exactly where I wanted. I also made another two holes to place an old watchband that I had, one part in the front piece, one in the back, so I could close the arm body.

