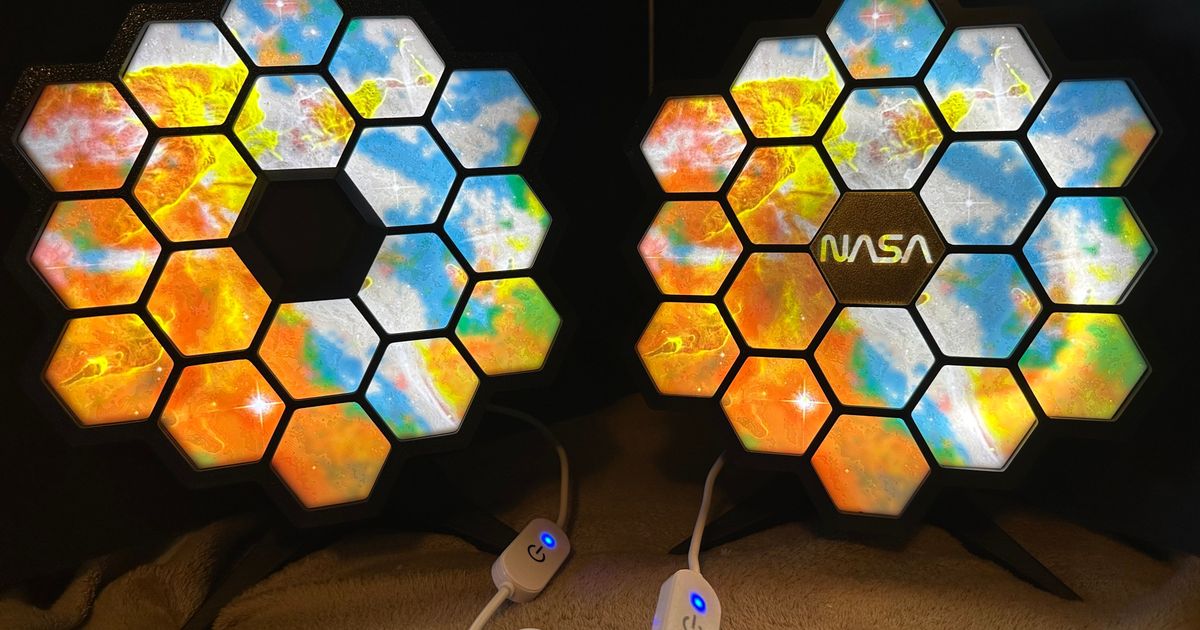
James Webb Space Telescope LED Lightbox
James Webb Space Telescope LED Lightbox
Print Profile(1)

Description
James Webb Space Telescope LED Lightbox

Important Notice!!! I cannot guarantee this lithophane will print on anything other than the Bambulab X1C with AMS This is proprietary 3MF Project file that includes settings and custom designed modifiers. There is a Zip file with the basic STLs in the Other files section. you are welcome to try using those files to print on your own.
I had found a couple of James Webb Space Telescope lights that used acrylic plate custom cut and a transparent color picture inserted. I decided I wanted to remove the custom cut acrylic and transparency and print it as a lithophane on my BambuLab X1CC.
Basically, I created a color lithophane on the Lithophanemaker.com website at 250x250mm in size. This provides you with five STLs each labeled for a specific color, CMYW(Cyan, Magenta, Yellow, and White). I then opened each color STL individually in Windows 3D Builder and overlayed the Hex Grid STL and subtracted that hex grid from each STL panel. Then I had to remove the surrounding pixels that were left outside of the subtracted hex grid by ungrouping all, deleting the pixels not wanted, and then regrouping all pixels and saving as a new STL. This is not an easy process and took a lot of time and experimentation. 3D Builder does not allow individual STLs to be exported even when ungrouped(unassembled) and I could not simply import into Studio and then export as single STLs because they are all placed on the bed automaticlly. Also, because you are cutting pixels in the lithophane when subtracting the hex grid, you have to repair the STL which re-orientates that STL to the flat on bed position 3D Builder. So I had to import the new five STLs into Studio as one object and then relocate their individual layers heights to match the original locations to print properly.
I also recommend using your favorite 3D Print glue rather than the original designed using screws to assemble.
Forgot to list filaments I used!
I used BL Jade White, BambuLab Red PLA, Dikale True Blue, and GST3D Yellow.
The COB LEDs are USB 5v with switch generic from AliExpress, or you can wire your own if so inclined.
Printing:
Printing is controlled by Object Properties not by Global Properties. This means that the Profiles included as Globe Profiles, .2 Layer and .1 Layer, are applied per object and per plate and changing that profile will not change the objects print profile. IE the lithophane will print using the settings in the .1 Litho Profile and the bare, cover, and stand will all print using the .2 Layer Profile. Just select the plate you want to print and send to printer, just make sure you match your filament slots to match the filaments assigned on each plate.
The black Center Hexagon is used in place of the NASA Center Hexagon if you don’t want the logo.
The NASA Backplate covers the screw holes on the stand if don’t them showing.
The Rectangle Negative part on the Hexagon Cover Plate is to allow the leds to backlight the NASA center logo. It shows you how to use a modifier part rather than having to preeminently edit an object in AutoCad etc.
Edit: By request I have uploaded a Solid Version of the Stand with it the screw holes Stand_Solid.stl


