There are a few customizable gasket molds on Thingiverse, but none of them offer the features I was looking for, so I made my own. Hit the Customizer (https://www.thingiverse.com/apps/customizer/run?thing_id=2287689) button to make your custom gasket mold.
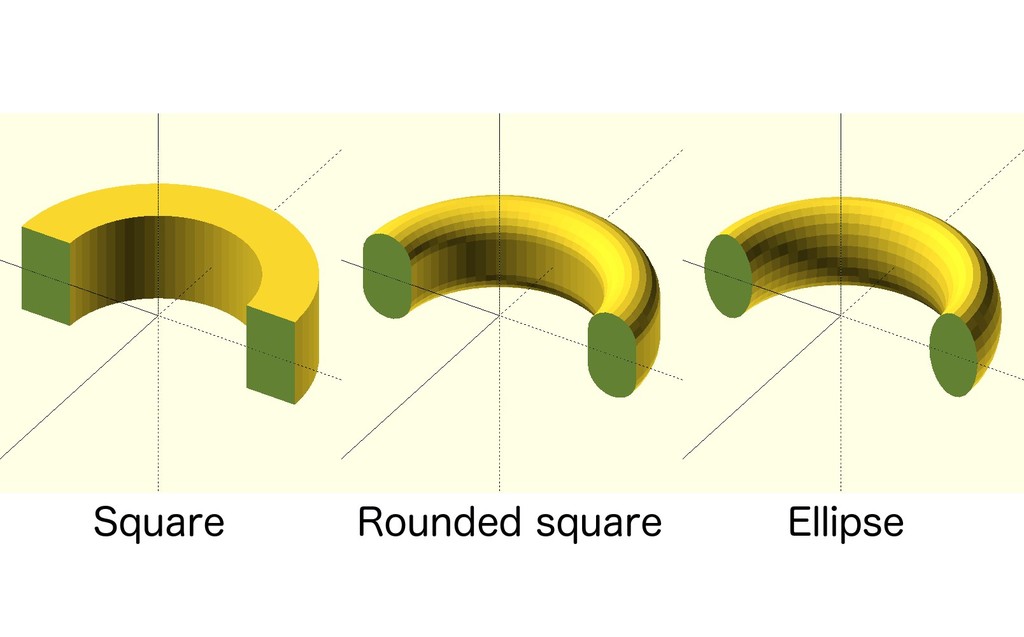
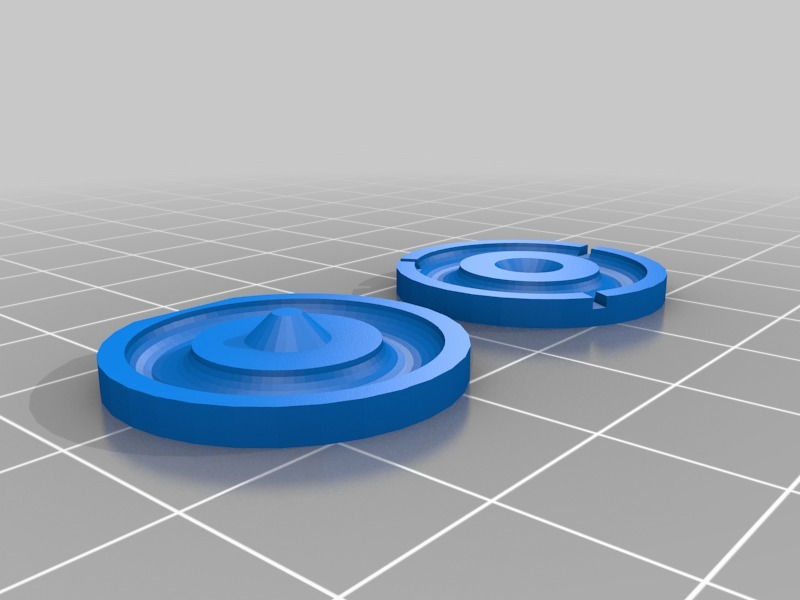
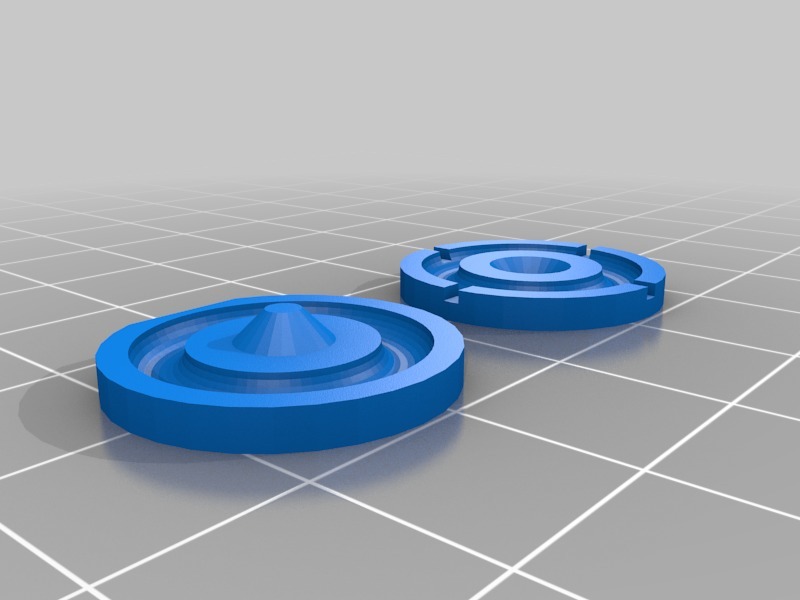
Parameters are the inner and outer diameter, the thickness, and the shape of the cross section (see image). If you use the rounded square or ellipse cross section, with thickness set to (Outer diameter - Inner diameter)/2, then you will get a standard O-ring with perfectly circular cross section.
To speed up curing, you can opt to have little venting holes in the mold. It is recommended to use more and/or larger holes in larger molds, otherwise it may take extremely long for the compound to cure inside the mold. In theory you can also use these holes to do injection molding: if you set the number of holes to 2, and make them large enough, you can inject silicone through one of the holes until it comes out through the other hole. I tried it and it works, but this will probably only be practical for small gaskets.
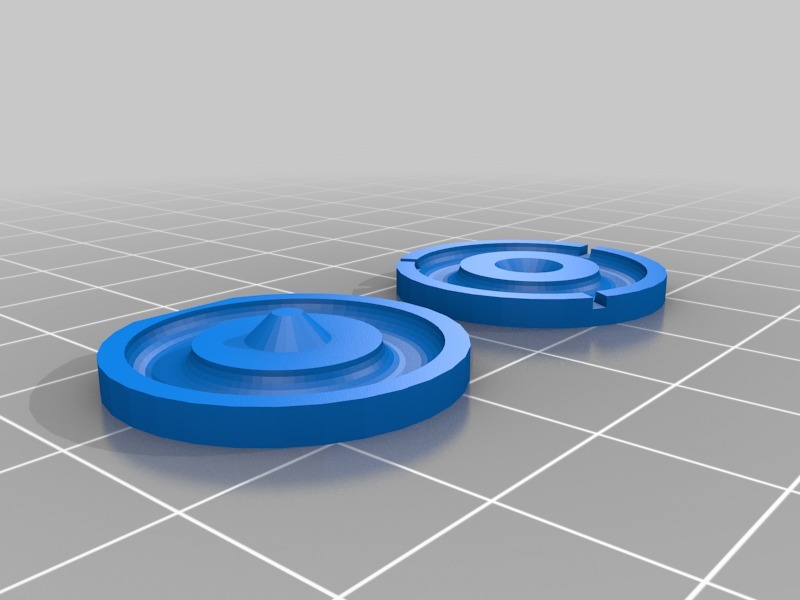
The mold relies on a cone to align the two halves. In the ‘advanced’ settings you can tweak the tolerance between the cone and the alignment hole. Ideally, there should be neither horizontal play nor a visible gap between the two halves. The default tolerance works OK for my printer.
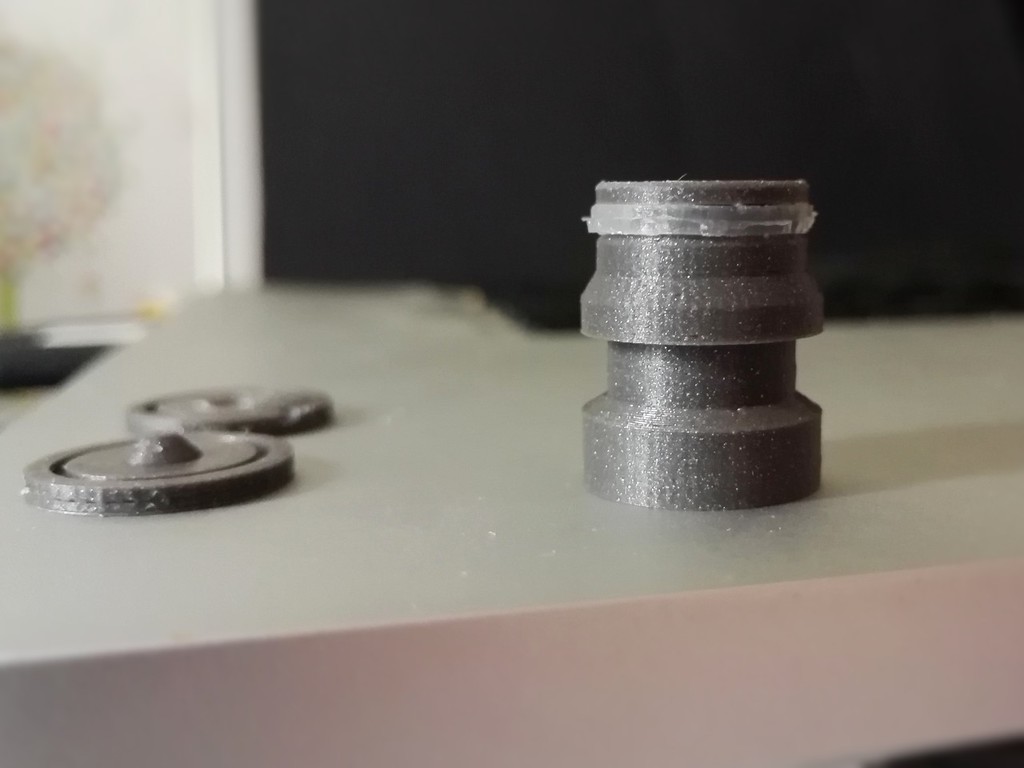
Molds for larger gasket inner diameters have hollowed-out spaces, not only to save filament and printing time, but also to allow excess silicone to spill into those spaces instead of being sandwiched between perfectly flat surfaces which can make it difficult to pry open the mold.
ABS seems the best choice for printing the molds. Avoid PLA, it sticks to the silicone too well. See the Print Settings section for more details.
As for the silicone material, your best option is probably RTV silicone specially intended for making gaskets, which is available in small quantities (typically from automotive stores). It also exists as a two-component mixture (with separate curing agent) which is ideal for this application, because it cures in a predictable time span even when enclosed. However, such mixtures usually are not available in small quantities.
Regular household silicone compound can work as well and I have successfully used it, but it depends on the specific brand and type. I've had the best results so far with neutral cure silicone. An attempt with acetoxy silicone ended up in failure because it was way too sticky.
How to mold a gasket
The standard method is to print a closed mold in two parts, fill them both, and squeeze them together while gently twisting to reduce the risk of trapped air bubbles. An alternative is to print a single (open) mold, fill it, and scrape off the excess. This limits the gasket shape to being flat (and a bit rough) on one side, but the silicone will cure a lot faster than in a closed mold.
Before injecting the silicone, you should apply grease to the mold to reduce the risk of the gasket ending up stuck to the mold. The grease should not be able to dissolve the plastic nor the compound, or migrate into it. For RTV silicone, grease may not be necessary: check the instructions, or just try out to see what works best. Due to all the possible variations between plastics and silicone types, experimenting will be required.
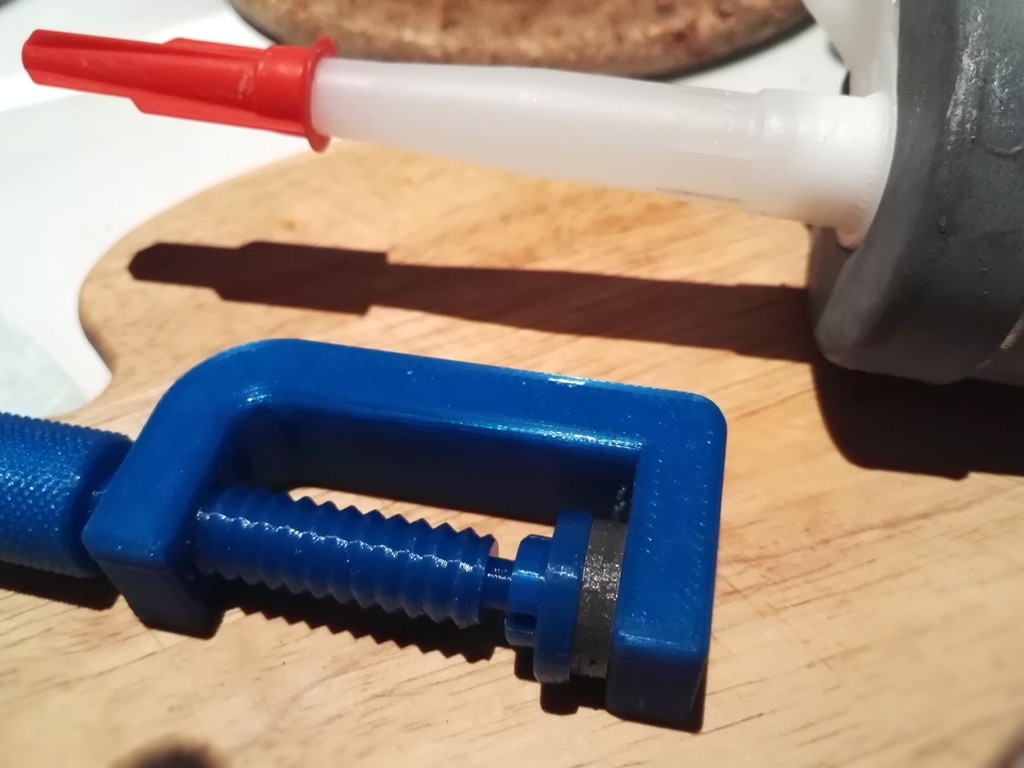
If you want to be really sure the mold stays together, you can use a gluing clamp or a printable G-clamp (http://www.thingiverse.com/thing:1673030), but this is generally not necessary.
Unless you're using two-component RTV silicone, you will need some patience to let the silicone cure sufficiently before opening the mold. Single-component compound cures due to contact with humidity. Due to the enclosed shape, contact with moisture in the air will be limited. There are a few things you can try to allow moisture to migrate into the compound more quickly:
1. Soak the empty mold for several hours before filling, so the plastic itself is already saturated with humidity.
2. Place the filled mold in a humid environment, for instance a plastic bag or box with a bit of water (do not keep the mold submerged though). To further speed up curing, the environment should be kept warm (around 50°C or 120°F, which is too hot for PLA molds, but as mentioned in the print settings section, PLA is not a good material for these molds anyway).
Even when taking these precautions, it usually takes at least 24 hours for single-component compound to cure. I recommend to wait at least twice the curing time mentioned in the compound's instructions, especially for neutral cure silicone which usually cures much more slowly. Larger molds or thick gaskets will take even longer.
After removing the gasket from the mold, single-component compound will most likely be too soft for immediate use, and you will need to wait a few more days for it to become sufficiently tough. Again, exposure to moisture may speed up this process.
Depending on the compound, the gasket may shrink significantly while becoming fully cured over the course of days or weeks. If this is the case, and accuracy is important, you should scale up the dimensions a little bit to compensate.
I only tested this for small gaskets. If the model proves unpractical for larger gaskets, contact me and I'll see how I can improve it.
:format(webp)/https://fbi.cults3d.com/uploaders/19896799/illustration-file/15a02b40-d75d-4f84-87c5-ae73f5ae489e/gaskets0.jpg)


/https://preview3d-images.cults3d.com/v7gxibsqdgcs2xrcjn3fk4ga2x2i)
/https://preview3d-images.cults3d.com/d12tmsbvg18xirulvra4r118t2bp)
/https://preview3d-images.cults3d.com/a58e8f53k5yjjwncq6t12ycd1v84)
/https://preview3d-images.cults3d.com/t36jx5wuiu58keqq2kx57i3y80xa)
/https://preview3d-images.cults3d.com/h1lzj2899g6urrzg7v3t2sv48hql)


