Skip to content

Simple Bench Power Supply

Advertising
Advertising
?
Creation quality: 5.0/5 (1 vote)
Evaluation of members on the printability, utility, level of detail, etc.

  • 753 views
  • 1 like
  • 9 downloads

License
3D design format
Folder details Close
  • back.skp
  • back.stl
  • box-bottom-sh.skp
  • box-bottom-sh.stl
  • box-bottom.skp
  • box-bottom.stl
  • box-top-sh.skp
  • box-top-sh.stl
  • box-top.skp
  • box-top.stl
  • cable-clamp.skp
  • cable-clamp.stl
  • front-3.3V.skp
  • front-3.3V.stl
  • front-5v.skp
  • front-5v.skp
  • front-5v.stl

Learn more about the formats

Publication date 2022-10-04 at 20:08
?
Published to Thingiverse on: 2020-02-02 at 10:59
Design number 872009

3D printer file info

3D model description

Simple Bench Power Supply

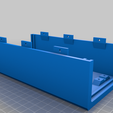
It is great to have a bench power supply that provides 4 different voltages at the same time (see my other thing, 'Another ATX bench power supply' here)... BUT if you only need a simple power supply AND you happen to have an old Dell 19.5V laptop power supply in your drawer... then this is a simple - easy to build - bench power supply for you.

Description

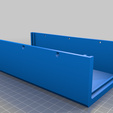
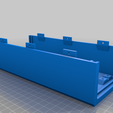
I installed everything in a 3D printed box (bottom, top, front and back panel plus a small cable clamp). This box has the same 'footprint' as the ATX power supply mentioned above. I added a couple of extra elements :

Parts needed for this project

Dell 19.5V laptop power supply here or in your drawer.
DPS5005 adjustable power supply here.
LM2596 buck convertor here.
Switch (230V) like this one
Binding posts (2 red - 2 black) here.
Terminal/choc block (at your local DIY shop)
Rectangular LED (2x5x7 mm) and a 220 Ohm resistor here.
10 M3x10mm bolts (6 to assemble top and bottom of the box, 2 for the cable clamp, 2 for the LM2596)
Some wires, soldering iron, heat shrink tube, glue gun, screwdriver, multimeter.

Instructions

You will need to cut the power cable of the Dell power supply to be able to install the switch at the back of the box.
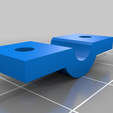
First secure the cable with the cable clamp to the bottom of the box, then mount the switch above it.
Use some glue to fix switch, terminal block, DPS5005 and LED.
Make sure you only work on the wiring, connections and soldering with the power supply unplugged !
The LM2596 module will bring the 19.5V down to 5V for the binding posts on the left of the front panel - adjust the potentiometer so you have exactly 5V on 'OUT'.
The DPS5005 will provide a second - variable - voltage (between 0-19.5V) for the binding posts on the right.
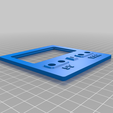
In case you mainly work on projects that need 3.3V, you could adjust the potentiometer on the LM2596 accordingly (I included a front-panel with the text "3.3 V" ).
In that case you don't need the 220 Ohm resistor.
Be carefull when you mount the back panel so it's not inside-out, the round hole should line up with the cable clamp.

Printed with 25% infill, 0.15mm layer height, no supports.

Enjoy!

Update March 2021 :
Uploaded 3cm shorter version of box top and bottom (not tested!)

3D printing settings

-

Advertising


Issue with this design? Report a problem.

Would you like to support Cults?

You like Cults and you want to help us continue the adventure independently? Please note that we are a small team of 3 people, therefore it is very simple to support us to maintain the activity and create future developments. Here are 4 solutions accessible to all:

  • ADVERTISING: Disable your banner blocker (AdBlock, …) and click on our banner ads.

  • AFFILIATION: Make your purchases online by clicking on our affiliate links here Amazon.

  • DONATE: If you want, you can make a donation via Ko-Fi πŸ’œ.

  • WORD OF MOUTH: Invite your friends to come, discover the platform and the magnificent 3D files shared by the community!


Sharing and downloading on Cults3D guarantees that designs remain in makers community hands! And not in the hands of the 3D printing or software giants who own the competing platforms and exploit the designs for their own commercial interests.

Cults3D is an independent, self-financed site that is not accountable to any investor or brand. Almost all of the site's revenues are paid back to the platform's makers. The content published on the site serves only the interests of its authors and not those of 3D printer brands who also wish to control the 3D modeling market.

100% secure payment by credit card, PayPal, Apple Pay, Google Pay, etc.
View all payment options.