Skip to content

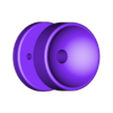
Photographic Tripod Ball Head

Advertising
Advertising
?
Creation quality: 5.0/5 (1 vote)
Evaluation of members on the printability, utility, level of detail, etc.

  • 1.7k views
  • 5 likes
  • 53 downloads

License
3D design format
SCAD and STL Folder details Close
  • Ball.stl
  • BallHead.scad
  • Body.stl
  • Carrier.stl
  • LatchHandle.stl
  • Plate.stl
  • Wedge1.stl
  • Wedge2.stl

Learn more about the formats

Publication date 2022-11-05 at 20:34
Design number 912623

3D printer file info

3D model description

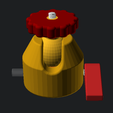
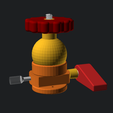
A photographic ball head to accomodate mid-sized and mirrorless cameras.

The ball head uses a large 35mm ball to allow support and smooth control of medium sized cameras. Thus includes most mirroless systems and smaller DSLR cameras without the heavier lenses.

Uses standard 1/4"-20 threads top and bottom.

3D printing settings

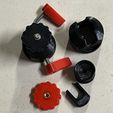
There are seven parts to print for the ball head. Recommend using 0.4mm or smaller nozzle for good detail and a material with a high glass point such as ABS to avoid distortion if it gets hot (such as in a car).
The design is sensitive to dimensional changes due to printer settings and material shrinkage. The current version works well with ABS and a 0.4mm nozzle on my Ender 6. Scaling of the wedges is the usual fix, a few percent larger or smaller if they do not fit snugly. Adjustment is easy as these are small, quick parts to print.

Settings...

Wedge 1: Slice with 100% infill, use support
Wedge 2: Slice with 100% infill, no support
All other parts: Use thick walls (4 or 5 line count) and high infill around 40%. Use support to print the Ball and the Carrier.

Required parts...

  • 1/4"-20 1-1/2" stainless steel socket head machine screw
  • 1/4"-20 3/4" stainless steel socket head machine screw
  • 3x 1/4"-20 brass threaded inserts
  • #6-32 1/2" stainless steel flat head machine screw
  • #6-32 brass threaded insert

Assembly requires a couple tricks...

  • Set a 1/4" insert into the plate, use the plate press technique
  • Set a 1/4" insert into the body
  • Set a 1/4" insert into the wedge carrier
  • Set a #6 insert into Wedge 2
  • Insert the ball into the body and secure the plate to the ball with the 1/4"-20 1-1/2" screw. The insert should be on top (away from the ball). The screw should protrude about 4mm above the plate top.
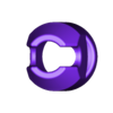
  • Assemble the two wedges into the wedge carrier by sliding from either side. The smaller Wedge 1 should be on top (the cup side).
  • Insert the carrier into the body through the bottom opening as far as it will go. Use a tool (a small screwdriver or allen wrench) to press the carrier and wedges into the body if needed.
  • Insert a small tool (screwdriver or allen) into one of the assembly holes in the bottom of the carrier to rotate the wedge assembly 90 degrees into place.
  • Insure the threaded insert on Wedge 2 is lined up the the countersunk hole in the body, use the #6 screw to lock the wedge assembly into place.
  • Thread the 1" screw into the knob and secure with a drop of epoxy or cyanoacrylate glue.
  • When the epoxy has cured thread the knob into the body.

Disassembly is the reverse of the assembly directions above, once the wedge assembly is rotated to line up with the opening press down on the plate and ball to remove.

Motion of the ball head will be rough at first due to the finely ridged surface of the 3D prints. This quickly smooths with use as the ball wears against the socket resulting in a nice feel. No lubrication should be used in the head, the plastic surfaces will do.

Advertising


Issue with this design? Report a problem.

Would you like to support Cults?

You like Cults and you want to help us continue the adventure independently? Please note that we are a small team of 3 people, therefore it is very simple to support us to maintain the activity and create future developments. Here are 4 solutions accessible to all:

  • ADVERTISING: Disable your banner blocker (AdBlock, …) and click on our banner ads.

  • AFFILIATION: Make your purchases online by clicking on our affiliate links here Amazon.

  • DONATE: If you want, you can make a donation via Ko-Fi πŸ’œ.

  • WORD OF MOUTH: Invite your friends to come, discover the platform and the magnificent 3D files shared by the community!


Sharing and downloading on Cults3D guarantees that designs remain in makers community hands! And not in the hands of the 3D printing or software giants who own the competing platforms and exploit the designs for their own commercial interests.

Cults3D is an independent, self-financed site that is not accountable to any investor or brand. Almost all of the site's revenues are paid back to the platform's makers. The content published on the site serves only the interests of its authors and not those of 3D printer brands who also wish to control the 3D modeling market.

100% secure payment by credit card, PayPal, Apple Pay, Google Pay, etc.
View all payment options.