A friend who recently lost a finger in a woodworking accident contacted me, asking if I could print Mat Bowtell's brilliant "Kinetic Finger" for her. During the process of printing, assembling, and testing the device I came up with some improvements making both assembly and operation easier.
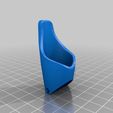
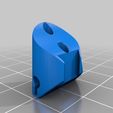
I found it very difficult to install the TPE hinges into the PLA phalanges, using Mat's models. This may be due to printer or settings variations, but I'm using a Raise N2, which is generally regarded as fairly accurate. In any case, I solved the problem by enlarging the holes and slots in the phalanges into which the hinges go, and now it's very easy. I also slightly enlarged the hole in the distal phalanx into which the rubber grip "post" is inserted to ease assembly. We found that the "ring finger" phalanx works better for her, so I haven't modified the "index finger" model.
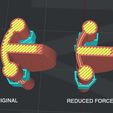
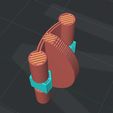
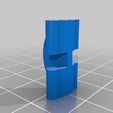
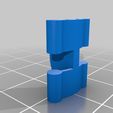
In testing the first iteration using the hinge models as published by Mat, the subject had a lot of difficulty closing the finger completely, and I noticed that the force required to close it was so great that it was really pulling on and displacing the wrist strap and tendon anchor, which in turn resulted in even less movement of the finger. I measured the pull force on the tendon required to achieve full closure of the finger, and it was around 60 ounces, which seems unnecessarily high. To reduce the spring return force of the hinges, I thinned out the arc sections that join the phalanges, as can be seen in the accompanying photos. The closure force was reduced to 19 ounces, less than 1/3 of what it was previously, with the subject commenting that it is "vastly improved". She can now close it fully and pick up objects, as can be seen in this video she made just after receiving the new prototype:
https://youtu.be/vrRkMD1v8JY
I may have gone a little too far in weakening the distal hinge and may try widening it one more extrusion width in the next iteration so that the fingertip self-straightens better.
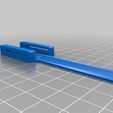
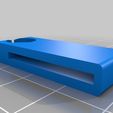
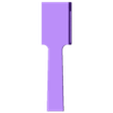
Mat states that the tendon guide and "clip" accept 1-inch Velcro, but that's not actually the case, so I enlarged the slot in both parts to in fact accept 1" Velcro, which should help stabilize the anchor on the wrist and result in less wasted motion. I also narrowed the slot thickness to be tighter on the Velcro, again to reduce the possibility of any wasted motion.
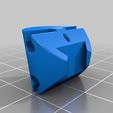
Mat's "tendon clip" has two countersunk holes in its underside, but no explanation is given as to how they're to be used - presumably they're for somehow anchoring the tendon, but it's not clear how, and having this function in such an inaccessible location seems sub-optimal to me, so I extended the rear of the anchor assembly and added a screw-down anchor for the tendon line. As the tendon length is critical, it's nice to have this adjustment available, and no knot tying is required - just wrap the cord around the M3x4 screw under a washer, and tighten. A threaded insert is used for the screw, which can be purchased here:
https://www.mcmaster.com/94180a331
Although these inserts are officially supposed to be heat-set, I find that just press-fitting them works fine. Note that a washer under the screw is necessary; the screw alone doesn't seem capable of securing the tendon.
The "distal anchor" is just a tiny part to help anchoring the tendon line at the distal end so that fewer knots are required. Pass the line through it and tie, then it goes inside the hole already provided in the distal phalanx.
Be aware that there's a lot of variation in braided line. My first attempts were with Kastking "Extremus", which is extremely soft and difficult (but not entirely impossible, with patience) to push through the tendon path. There are "coated" types, which are stiffer; I've now tried Berkley "FireLine", which is quite stiff, to the point where it's difficult to get it around the S bend, and Piscifun "Onyx", which is a little softer than Fireline and seems to go through the bend more easily. The downside of coated line is that it adds drag, increasing the effort required to operate the prosthesis. I hope to find time to quantify the added drag to know whether the differences in drag between types of line is significant.
I did the modeling and modifications in Tinkercad; the models are editable here:
https://www.tinkercad.com/things/aanXOMr6j3G-kinetic-finger-proximal-hinge-weaker
https://www.tinkercad.com/things/7pgNi2R4VbQ-kinetic-finger-distal-hinge-weaker
https://www.tinkercad.com/things/gAf2gP5y0bg-proximal-phalanx-ring-enlarged-hinge
https://www.tinkercad.com/things/eOv2j2Z4g8N-kinetic-finger-middle-phalanx-improved
https://www.tinkercad.com/things/foYVB5xIY18-kinetic-finger-distal-phalanx-improved
https://www.tinkercad.com/things/bKDzCZf2utP-kinetic-finger-tendon-anchor-assembly

/https://fbi.cults3d.com/uploaders/13358315/illustration-file/30e4d229-3e12-44b8-b2ba-3ad210347925/reduced_force_hinge_comparison.jpg)
