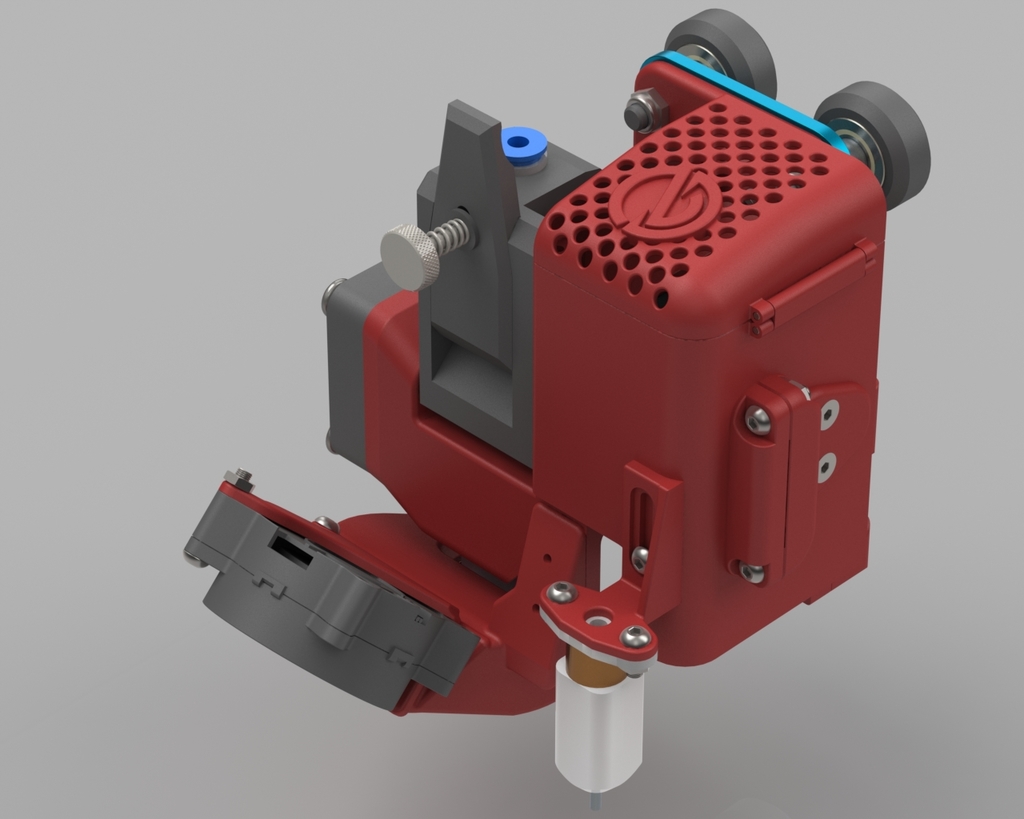
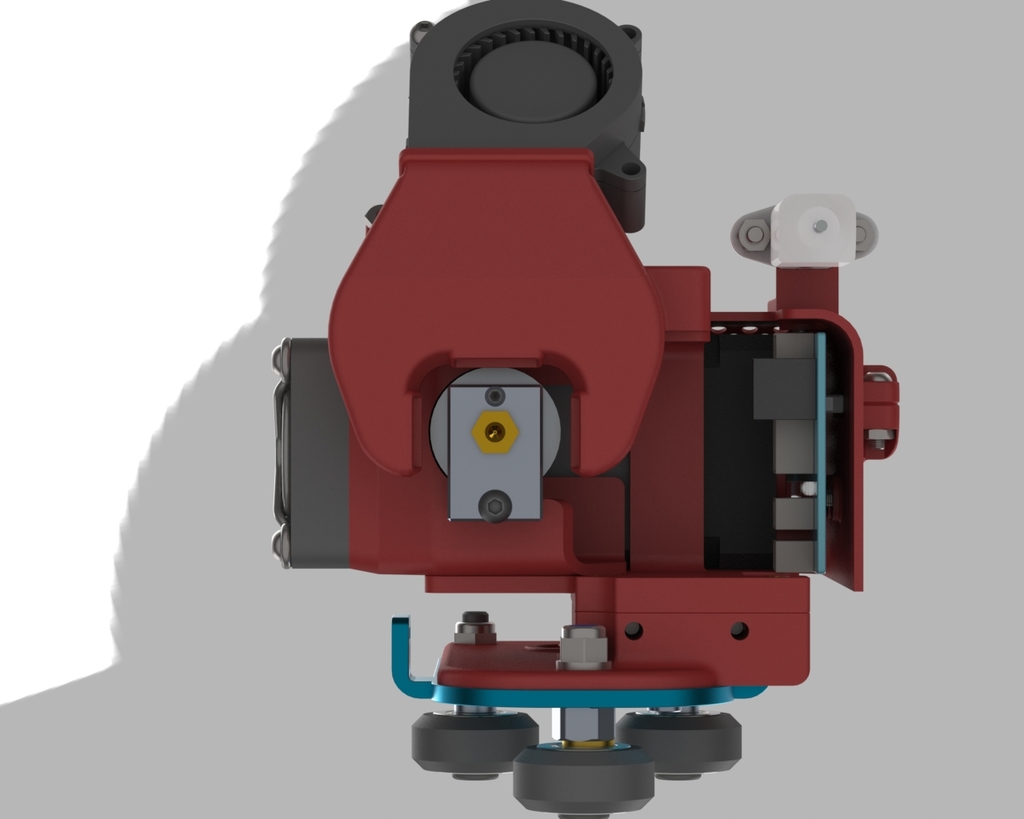
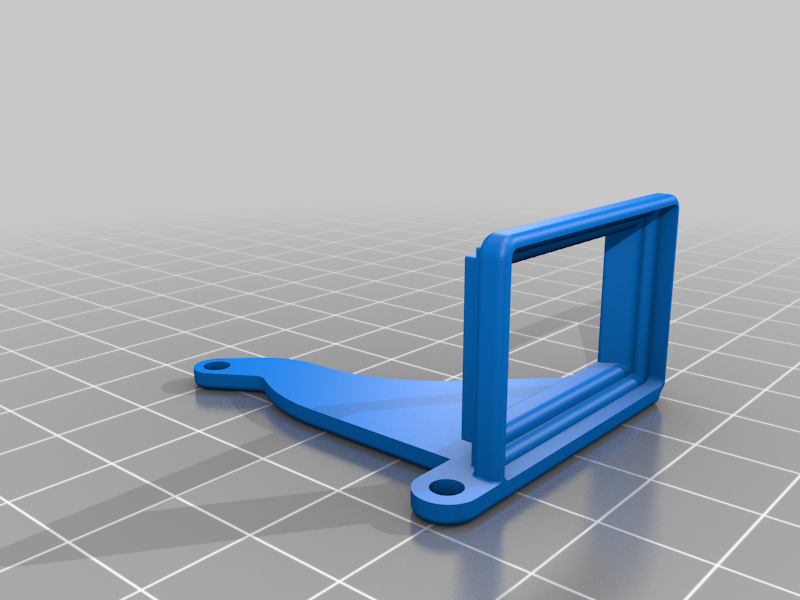
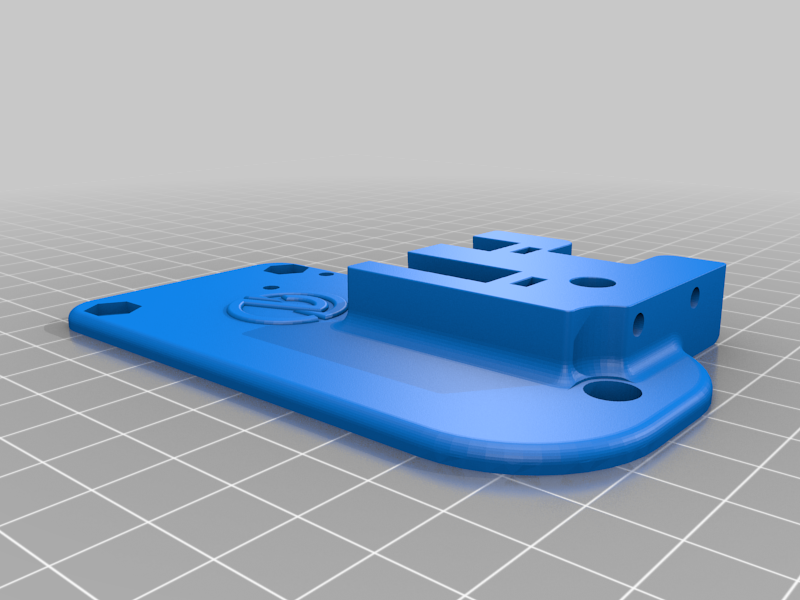
Il kit di ha lo scopo di rendere l’installazione del BMG TRIANGLELAB/BONDTECH o similari (hanno gli stessi attacchi) più versatile e al tempo stesso adattabile a diversi componenti come fan 4020 – 4010 - 5015, blocco V6 e Volcano, in più comprende sistema di attacco per BL-touch. Ciò permettere di adottare diverse configurazioni con delle semplici regolazioni e cambio minimo di adattatore.
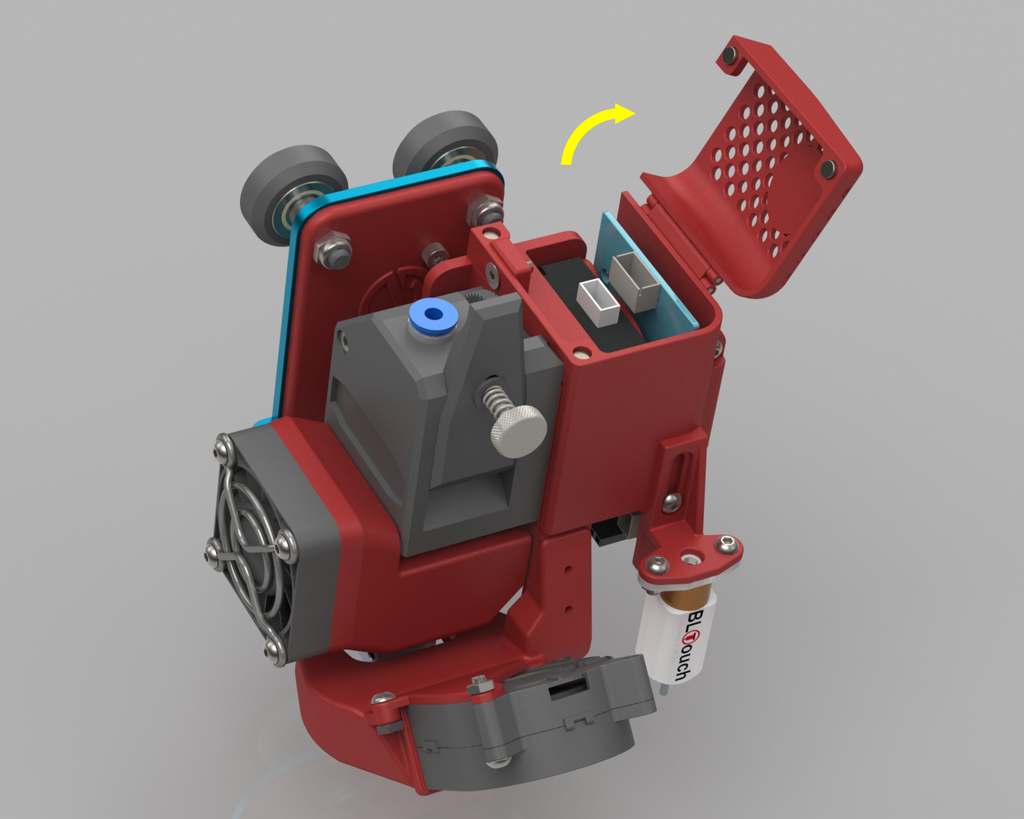
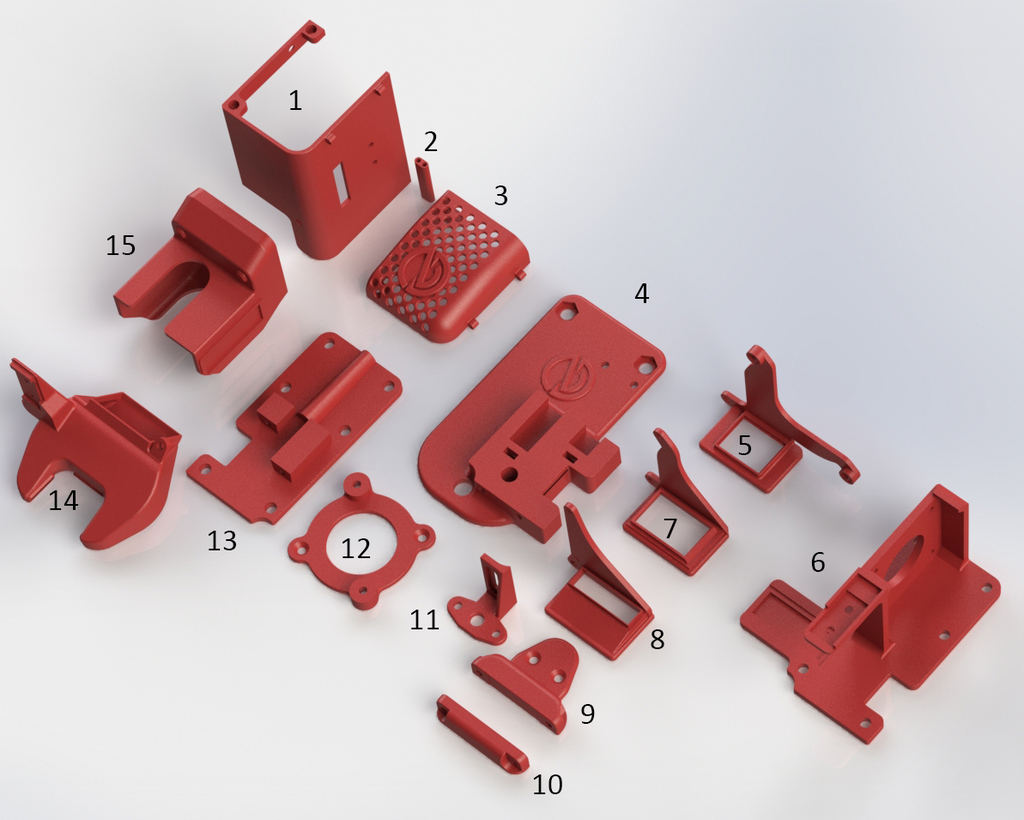
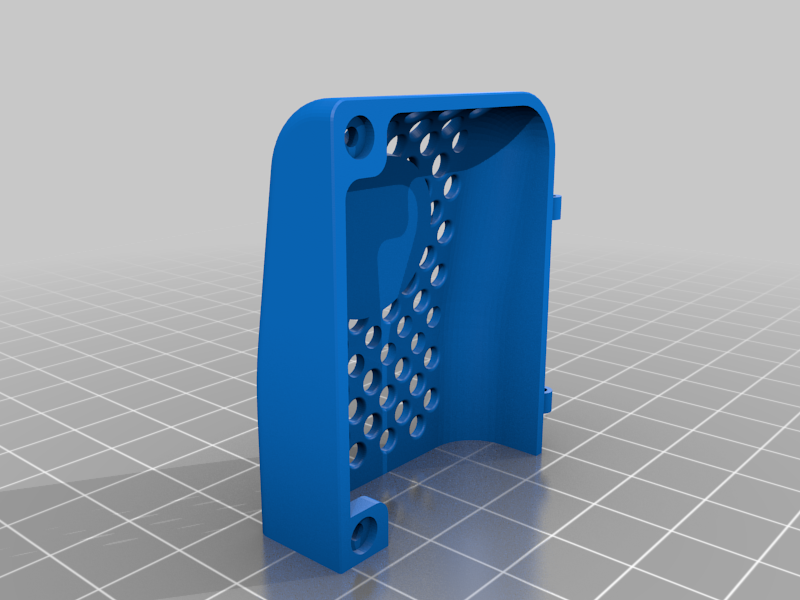
Perché NANO 2? Segue il modello “NANO 1” (supporto per matrix/hemera già pubblicato). oltre al nome e logo (concedetemelo) condividono lo stesso componente “BASE DI SUPPORTO” come base fissa, e con lo sgancio rapido (solo 2 viti) adattare in futuro il componente “SUPPORTO MOTORE E ESTRUSORE” con kit per altri estrusori (tempo e denaro se disponibile), riducendo al minimo lo smontaggio e rimontaggio del gruppo, inoltre ho voluto inserire per “FAN HOTEND” e “FAN DUCT”, un sistema di magneti N52 come sgancio e aggancio, e regolazione, in modo da adattare ai vari hotend (in caso di necessità lo spessore sottile permette di sagomare il supporto con un cutter),
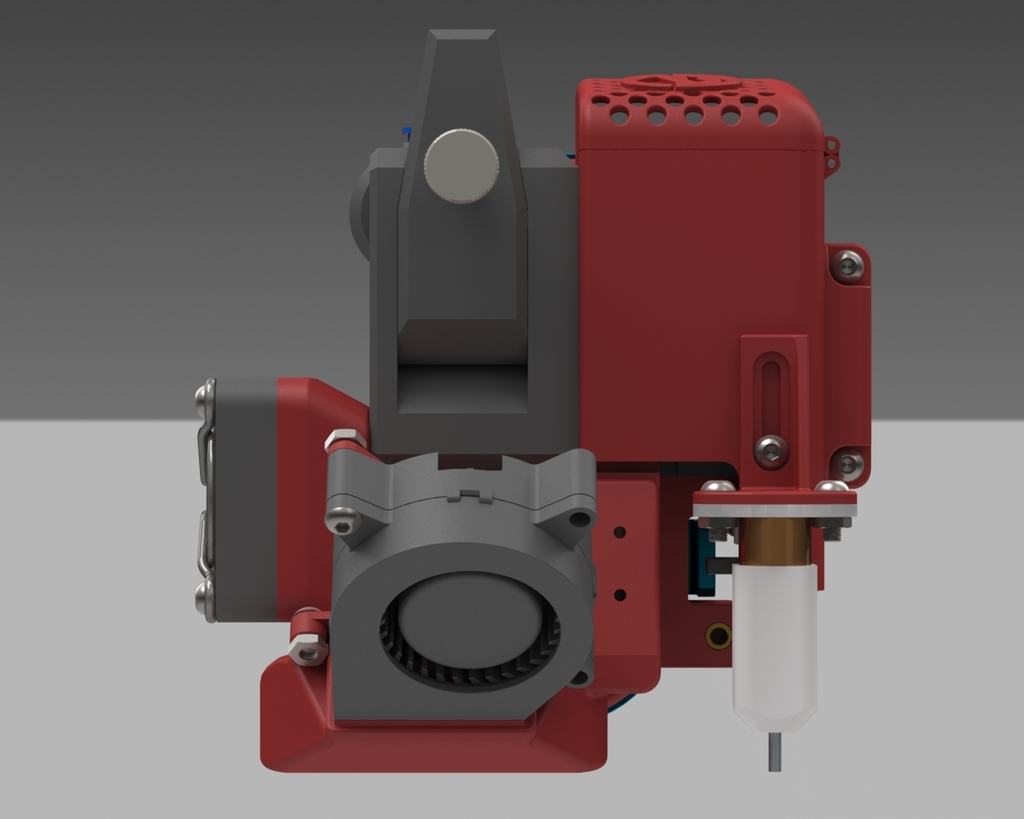
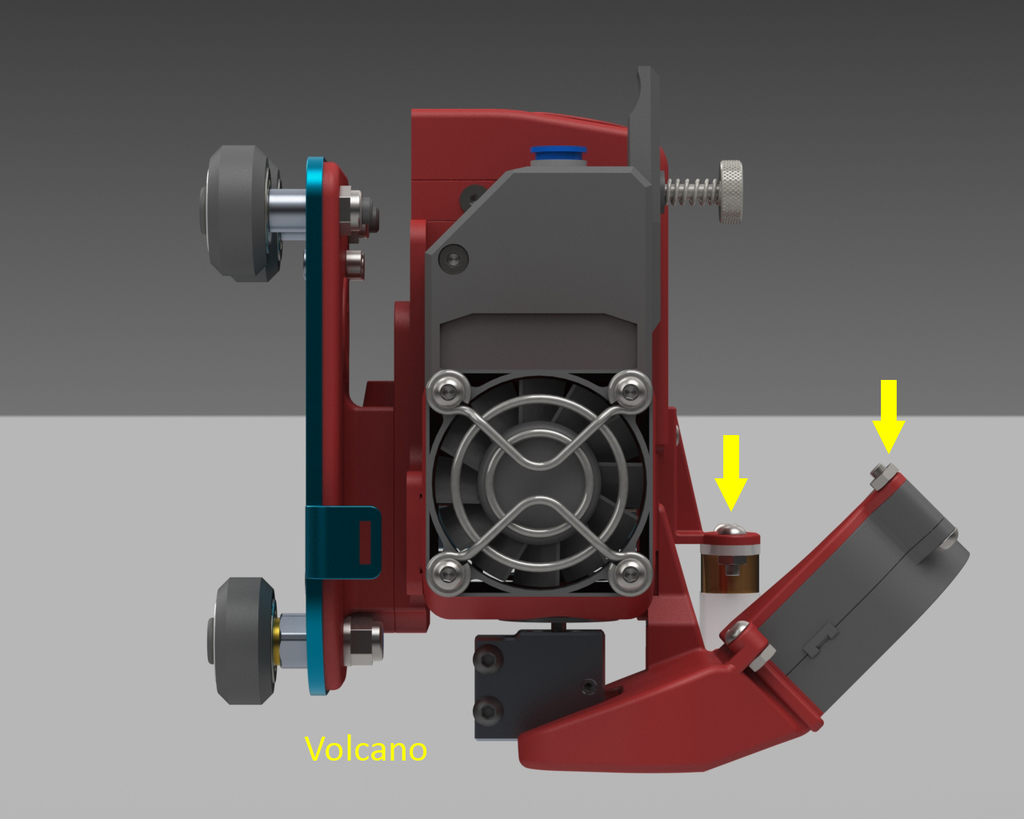
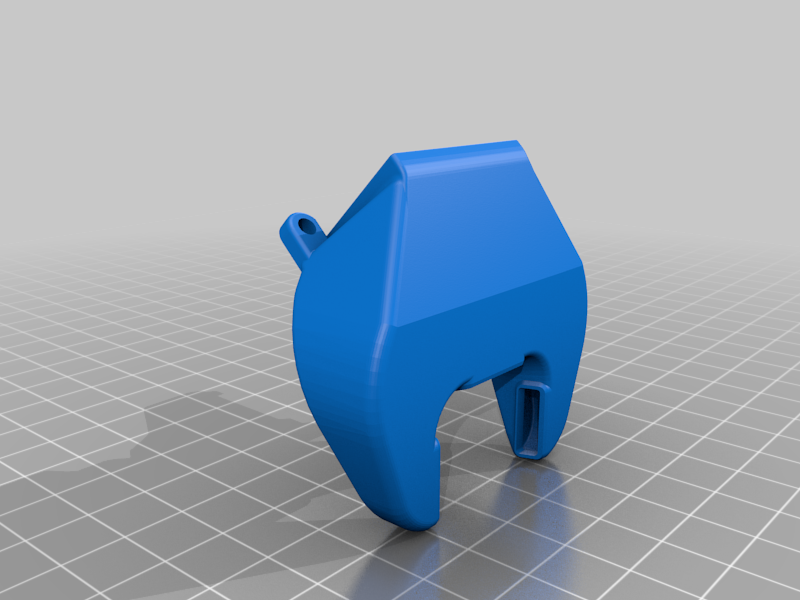
Ho cercato di allineare la bocca del nozzle con le stesse misure del gruppo stock Artillery lasciando come differenza di altezza fan-duct e bocca del nozzle 1,5mm, sia che si usi V6 che Volcano.
L’aria fuoriesce da 3 fori fino al nozzle e crea in fase di scontro una colonna di aria verso il basso (ho fatto alcune simulazione con solidworks).
Le tolleranze dei fori del kit sono minime per mia scelta, sono comprese tra 0,1 - 0,15mm compensando eventuali calibrazione sulla stampa dei pezzi, pertanto se occorre, in certi fori svasare i bordi, mentre in altri è comodo perché non si usano i dadi.
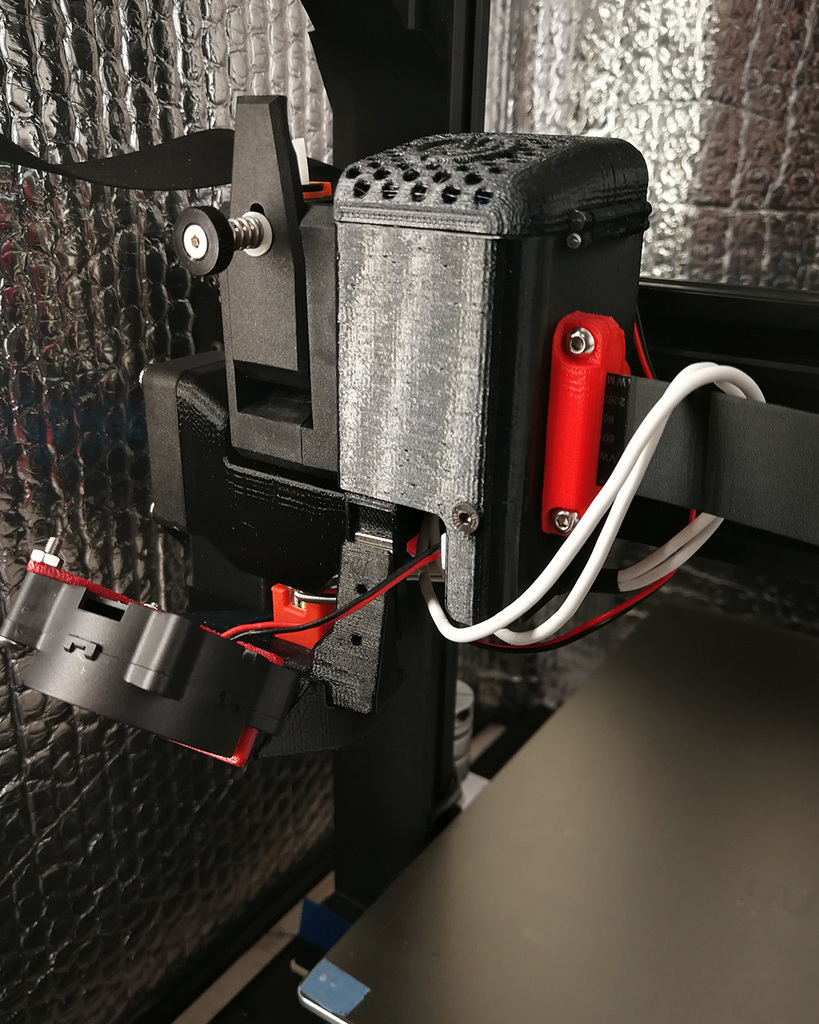
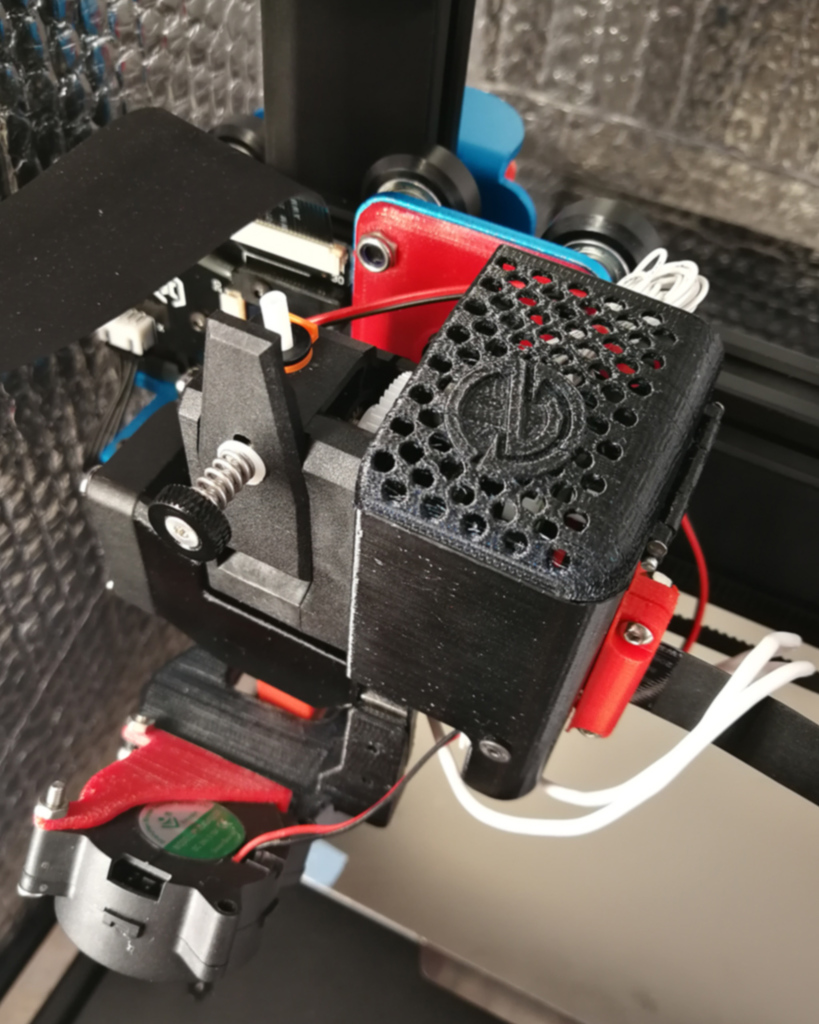
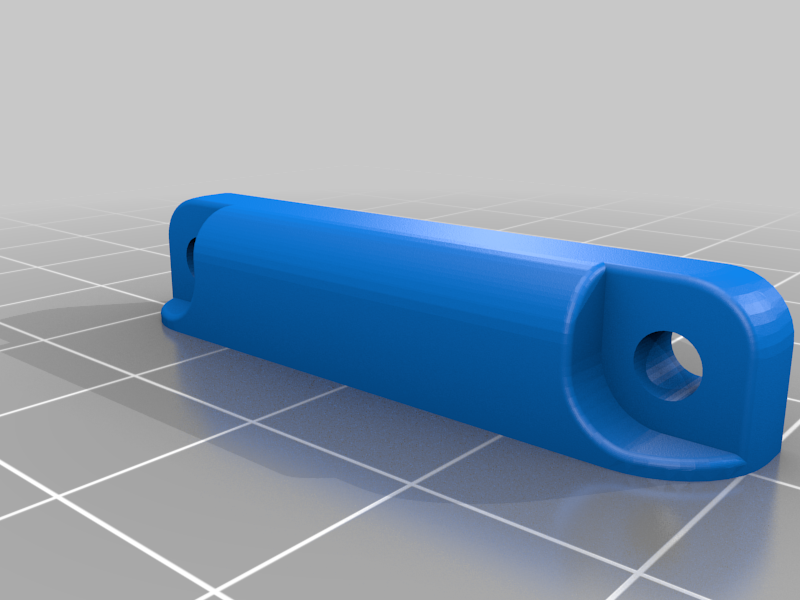
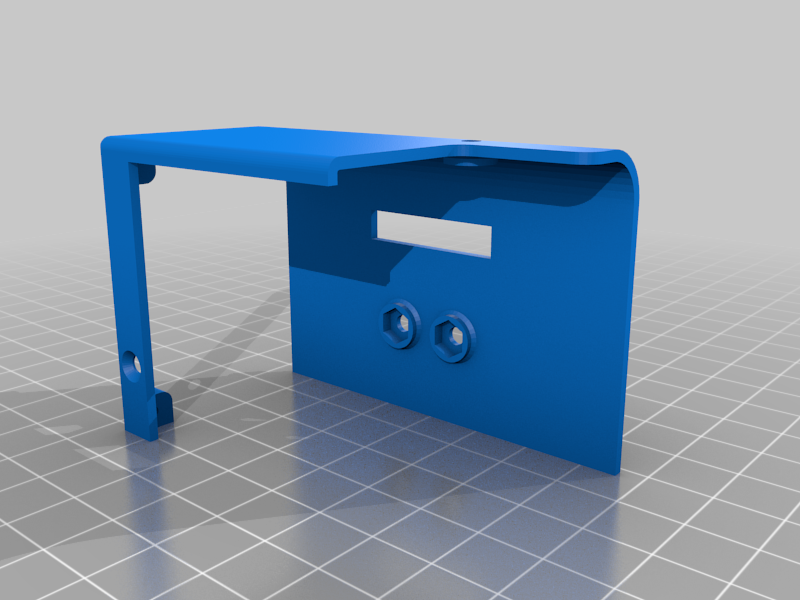
Ho creato un aggancio per evitare sollecitazioni al cavo flat, ed infine giusto per estetica una cover, ma sul lato alto della cover c’è una copertura apribile e richiudibile sempre con sistema a magneti N52, per nascondere (in parte) eventuali eccedenze di cavi.
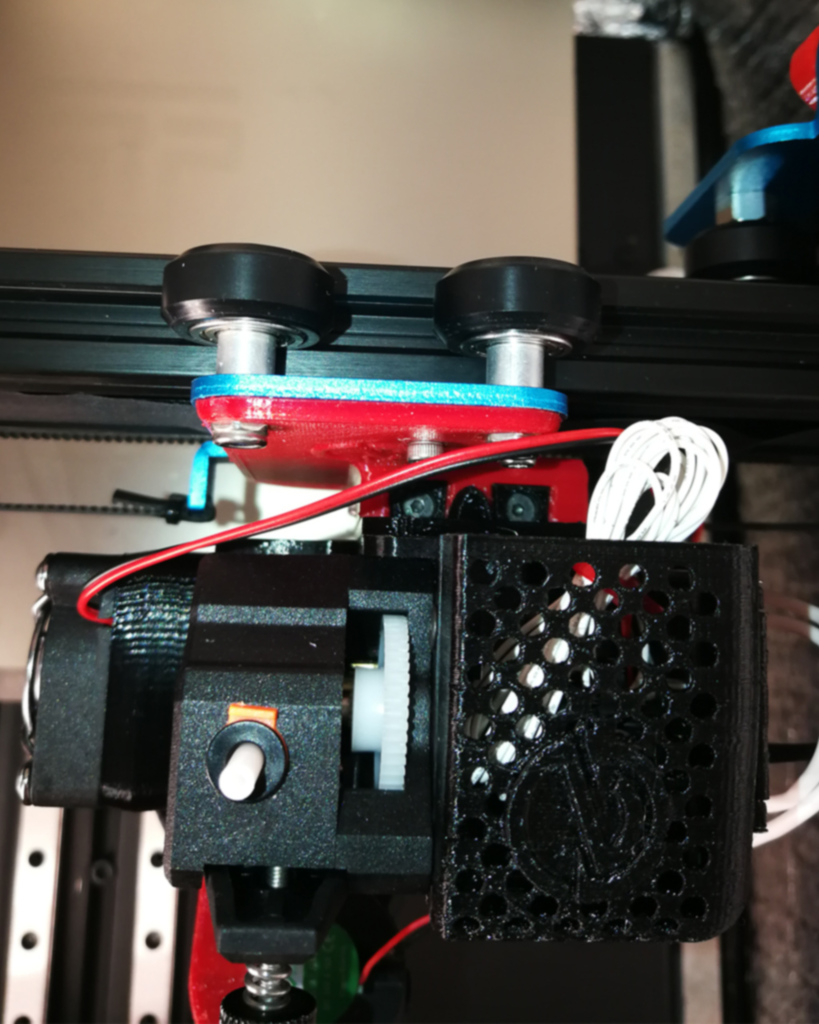
Alcune indicazioni per il montaggio. Nel kit del BMG quando arriva al destinatario sono compresi diversi componenti tra qui cartuccia riscaldante, termistore, e una busta con viti (fatti per BMG) e rondelle. Non è possibile usare cartuccia e termistore di stock per le distanze dal pcb, anche la fan2 dell’hotend ha bisogno di riadattare il cavo; la ventola è quella stock artillery 4020. Se usate cartuccia riscaldante e termistore comprese nel pacco o di terze parti, ricordatevi di apportare le modifiche al firmware, e rifare la calibrazione del PID, (in questa guida ho montato quasi tutto con componenti di stock compresa la ventola fan duct così da facilitare chi segue). Le viti per effettuare la maggior parte del montaggio hanno tutte dimensioni “M3” compresi tra 6 e 12mm ). Per montare il BMG sul supporto NANO2 in base alla configurazione effettuare un controllo iniziale della bulloneria, tenere a disposizioni dadi M3, viti a testa bombata o testa svasata sempre M3, con misure comprese tra 6 e 14mm, molto importante 2 viti di queste devono essere sempre M3 25mm che serviranno per l’attacco principale della slitta al supporto principale dell’artillery sull’asse X.
Fatto questa introduzione cercherò di riportare in dettaglio con delle foto la fase di montaggio del BMG senza soffermarmi sulla misura delle viti da usare (si vedono molto chiaro quali servono) tenendo conto che fisicamente ho effettuato le prove di tolleranza e il tutto (a parte il supporto BL-Touch) è stato usato per quasi 1 mese come verifica in caso si sarebbero verificate deformazioni o altro. Prego chi riscontrasse problemi, di avvisarmi per apportare le modifiche. Grazie buona lettura.
Nella pubblicazione sono compresi: guida montaggio con foto e lista dei materiali, file solidworks, file stl, file step.
----------------------------- ENGLISH --------------------------
The guide was translated using google, I apologize in advance for any errors.
The kit has the purpose of making the installation of the BMG TRIANGLELAB / BONDTECH or similar (they have the same connections) more versatile and at the same time adaptable to different components such as fan 4020 - 4010 - 5015, block V6 and Volcano, in addition it includes attachment system for BL-touch. This allows different configurations to be adopted with simple adjustments and minimal adapter change.
Why NANO 2? The “NANO 1” model follows (support for matrix / hemera already published). in addition to the name and logo (grant it to me) they share the same "SUPPORT BASE" component as a fixed base, and with the quick release (only 2 screws) to adapt in the future the "MOTOR AND EXTRUDER SUPPORT" component with kits for other extruders (time and money if available), minimizing the disassembly and reassembly of the group, I also wanted to insert for "FAN HOTEND" and "FAN DUCT", a system of N52 magnets as release and coupling, and adjustment, in order to adapt to the various hotends (in case of need the thin thickness allows to shape the support with a cutter), I tried to align the nozzle mouth with the same measurements as the Artillery stock group, leaving the fan-duct height difference and the nozzle mouth 1.5mm, whether using V6 or Volcano.
The air escapes from 3 holes up to the nozzle and creates a downward column of air during the collision (I did some simulations with solidworks).
The tolerances of the holes in the kit are minimum for my choice, they are between 0.1 - 0.15mm, compensating for any calibration on the print of the pieces, so if necessary, countersink the edges in some holes, while in others it is convenient because they are not used the dice.
I created a hook to avoid stress on the flat cable, and finally a cover just for aesthetics, but on the top side of the cover there is a cover that can be opened and closed again with the N52 magnet system, to hide (in part) any excess cables .
Some indications for assembly. When it arrives at the recipient, the BMG kit includes several components including heating cartridge, thermistor, and an envelope with screws (made for BMG) and washers. It is not possible to use stock cartridge and thermistor for the distances from the pcb, even the hotend fan2 needs to readjust the cable; the fan is the artillery 4020 stock one. If you use heating cartridge and thermistor included in the package or from third parties, remember to make the changes to the firmware, and redo the PID calibration, (in this guide I have mounted almost everything with stock components included the fan duct fan so as to facilitate those who follow). The screws to carry out most of the mounting all have “M3” dimensions between 6 and 12mm). To mount the BMG on the NANO2 support according to the configuration, carry out an initial check of the nuts and bolts, keep M3 nuts, button head screws or countersunk head always M3, with measurements between 6 and 14mm, very important 2 of these screws must be always M3 25mm that will serve for the main attachment of the slide to the main support of the artillery on the X axis.
After this introduction I will try to report in detail with photos the assembly phase of the BMG without dwelling on the size of the screws to use (you can see very clearly which ones are used) taking into account that I physically carried out the tolerance tests and everything (apart from the BL-Touch support) was used for almost 1 month as a check in case deformations or other would occur. If you encounter any problems, please let me know to make the changes. Thanks good reading.
The publication includes: assembly guide with photos and list of materials, solidworks files, stl files, step files.
:format(webp)/https://fbi.cults3d.com/uploaders/26105973/illustration-file/09d64681-f0bd-4d0f-8732-3f607151deb3/1.JPG)


/https://preview3d-images.cults3d.com/jwe9flyklmknh5j40xtc3a0ct7li)
/https://preview3d-images.cults3d.com/5vfi92y23vx7jv2qtsdligv6l2yr)
/https://preview3d-images.cults3d.com/3sx5h48mur64ldnxri9y7jjvvgcb)
/https://preview3d-images.cults3d.com/17wlr9f2jgzrjbpyceopvdexg3od)
/https://preview3d-images.cults3d.com/katek8aid4pb7gu8ozgdhl4g6gyg)
/https://preview3d-images.cults3d.com/qan68zykmbm7oleqc80llqq94unf)
/https://preview3d-images.cults3d.com/a4seufqkzvh085avgj47nl57xk3z)
/https://preview3d-images.cults3d.com/cmm7kj3mxhpjdcioqezh3cfe7hul)
/https://preview3d-images.cults3d.com/44kr8wwm3z6gl65rrl6pey0bfusp)
/https://preview3d-images.cults3d.com/0p72inu4uac9jzuz8qecqohihci4)
/https://preview3d-images.cults3d.com/1duyc8zojpw3os1bj214uc3q8ii2)
/https://preview3d-images.cults3d.com/ci9zzevczifdysltmdjannhnrjoo)
/https://preview3d-images.cults3d.com/ckqnyrvli4xu1sbnc3cy2um9nkiw)
/https://preview3d-images.cults3d.com/z8n68ylwo0satnkc2bsdx7qdvxcg)


