Skip to content

B3 Innovations Pico Hot End Mount for Rostock Max

Advertising
Advertising
?
Creation quality: 0.0/5 (0 votes)
Evaluation of members on the printability, utility, level of detail, etc.

  • 294 views

License
3D design format
Folder details Close
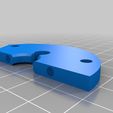
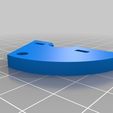
  • Core_Ring_Left.stl
  • Core_Ring_Right.stl
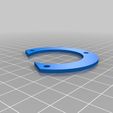
  • Top_Bottom_Ring.stl

Learn more about the formats

Publication date 2022-12-19 at 23:58
?
Published to Thingiverse on: 2014-05-20 at 18:57
Design number 970088

3D printer file info

3D model description

I needed a mount for my new B3 Innovations Pico Hot End, sooooo... Here it is.

This is designed for the Rostock Max from SeeMeCNC (gen 1.) I went with a split design that would fit into the Pico's hot end groove mount slot. The 2 halves are mechanically held together with 2 bolts and nuts. The Top Bottom part is now used as a spacer.

3D printing settings

Printed on a Replicator with ABS

.3 layer height

50% fill

6 shells

The core is the part that fits the groove mount on the Pico hot end. I have split this for easy assembly.

For a tight fit I also decided to hold the 2 halves together with a M3 x 40mm, and M3 35mm bolt. With the nuts placed in the other half as a screw boss.

You will also notice a hole in the Core plate that allows the heater and thermistor wires to pass from the Pico through the core and on to your printer.

I originally had the ring on top and bottom to hold the 2 halves together but found that there was too much slop to get a good tight fit. So now the ring can be used as a spacer, or not used at all.

I used the existing metal spacers from the original hot end mount.

I also made a flat area to mount the fan. Be careful to mount the plate in a way so that the flat area is between 2 arms, this way there will be enough space for clearance between the arms and the fan.

DO NOT try to run the Rostock without moving the head around to test clearances -- you may be sorry.

DO make sure you re-adjust the max height of XYZ or you may just plow your new pico into your build plate.

There are a few pictures to help you assemble the mount.

Advertising


Issue with this design? Report a problem.

Would you like to support Cults?

You like Cults and you want to help us continue the adventure independently? Please note that we are a small team of 3 people, therefore it is very simple to support us to maintain the activity and create future developments. Here are 4 solutions accessible to all:

  • ADVERTISING: Disable your banner blocker (AdBlock, …) and click on our banner ads.

  • AFFILIATION: Make your purchases online by clicking on our affiliate links here Amazon.

  • DONATE: If you want, you can make a donation via Ko-Fi πŸ’œ.

  • WORD OF MOUTH: Invite your friends to come, discover the platform and the magnificent 3D files shared by the community!


Sharing and downloading on Cults3D guarantees that designs remain in makers community hands! And not in the hands of the 3D printing or software giants who own the competing platforms and exploit the designs for their own commercial interests.

Cults3D is an independent, self-financed site that is not accountable to any investor or brand. Almost all of the site's revenues are paid back to the platform's makers. The content published on the site serves only the interests of its authors and not those of 3D printer brands who also wish to control the 3D modeling market.

100% secure payment by credit card, PayPal, Apple Pay, Google Pay, etc.
View all payment options.