Skip to content

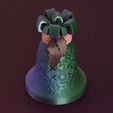
Radiant Chime (Christmas ornament)

Advertising
Advertising
?
Creation quality: 5.0/5 (1 vote)
Evaluation of members on the printability, utility, level of detail, etc.

  • 574 views
  • 1 like
  • 20 downloads

License
3D design format
Folder details Close
  • bell.stl
  • connector.stl
  • holly.stl
  • ribbon.stl
  • rope.stl

Learn more about the formats

Publication date 2022-12-25 at 00:01
?
Published to Thingiverse on: 2022-12-24 at 15:42
Design number 977052

3D printer file info

3D model description

Hark! how the prints
Sweet 3D prints
All seem to say
“Bells print away”
Christmas is here!
Very, very, very, very radiant

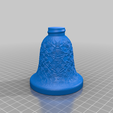
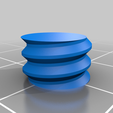
The bell is covered in a glitchy geometric pattern with a Christmas-y feel, resulting from a noise function. It is designed for vase mode printing, ensuring a perfect surface finish. In order to print this clearly-defined pattern in vase mode, we must use a low layer height and a wider than usual line (but easily printable with a 0.4 mm nozzle). Combined with a low printing speed, these settings will really bring out the details.

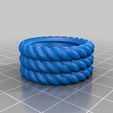
All components print without supports in their default orientations. There is a little bridging in the rope and ribbon units, which is easily handled by your printer. No infill is required for the rope, holly, and ribbon units.

The parts are designed to hold together without glue. To assemble the ornament:

  1. Screw the connector on the ribbon unit
  2. Place the holly leaves in the corresponding socket of the rope unit
  3. Screw the above assemblies together
  4. Screw the assembled top and the bell together

A bell printed in a white filament, will make a great festive diffuser for your LED tealights.

Instructions

Bell:
Prints in vase mode with the following settings:
- Layer height: 0.1 mm
- Line width: at least 0.55 mm (this is doable with a 0.4 mm nozzle without any further adjustments to your print settings)
- Bottom layers: 0
- Brim

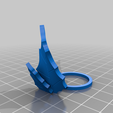
Rope and Holly Leaf units:
- Layer height: 0.2 mm
- Infill: 0%
- Perimeters/walls: 2
If using PrusaSlicer, disable “Ensure vertical shell thickness” under Print Settings > Quality. This setting is visible in Advanced and Expert modes.

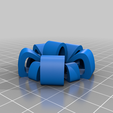
Ribbon unit:
- Layer height: 0.15 mm or lower
- Infill: 0%
- Perimeters/walls: 2

The connector prints at 0.2 mm layer height. Use enough perimeters/infill to make it sturdy if you intend to disassemble the ornament.

3D printing settings

-

Advertising


Issue with this design? Report a problem.

Would you like to support Cults?

You like Cults and you want to help us continue the adventure independently? Please note that we are a small team of 3 people, therefore it is very simple to support us to maintain the activity and create future developments. Here are 4 solutions accessible to all:

  • ADVERTISING: Disable your banner blocker (AdBlock, …) and click on our banner ads.

  • AFFILIATION: Make your purchases online by clicking on our affiliate links here Amazon.

  • DONATE: If you want, you can make a donation via Ko-Fi 💜.

  • WORD OF MOUTH: Invite your friends to come, discover the platform and the magnificent 3D files shared by the community!


Sharing and downloading on Cults3D guarantees that designs remain in makers community hands! And not in the hands of the 3D printing or software giants who own the competing platforms and exploit the designs for their own commercial interests.

Cults3D is an independent, self-financed site that is not accountable to any investor or brand. Almost all of the site's revenues are paid back to the platform's makers. The content published on the site serves only the interests of its authors and not those of 3D printer brands who also wish to control the 3D modeling market.

100% secure payment by credit card, PayPal, Apple Pay, Google Pay, etc.
View all payment options.