Bass guitar muter - 3D print

Bass guitar muter - 3D print 3D print model

Description

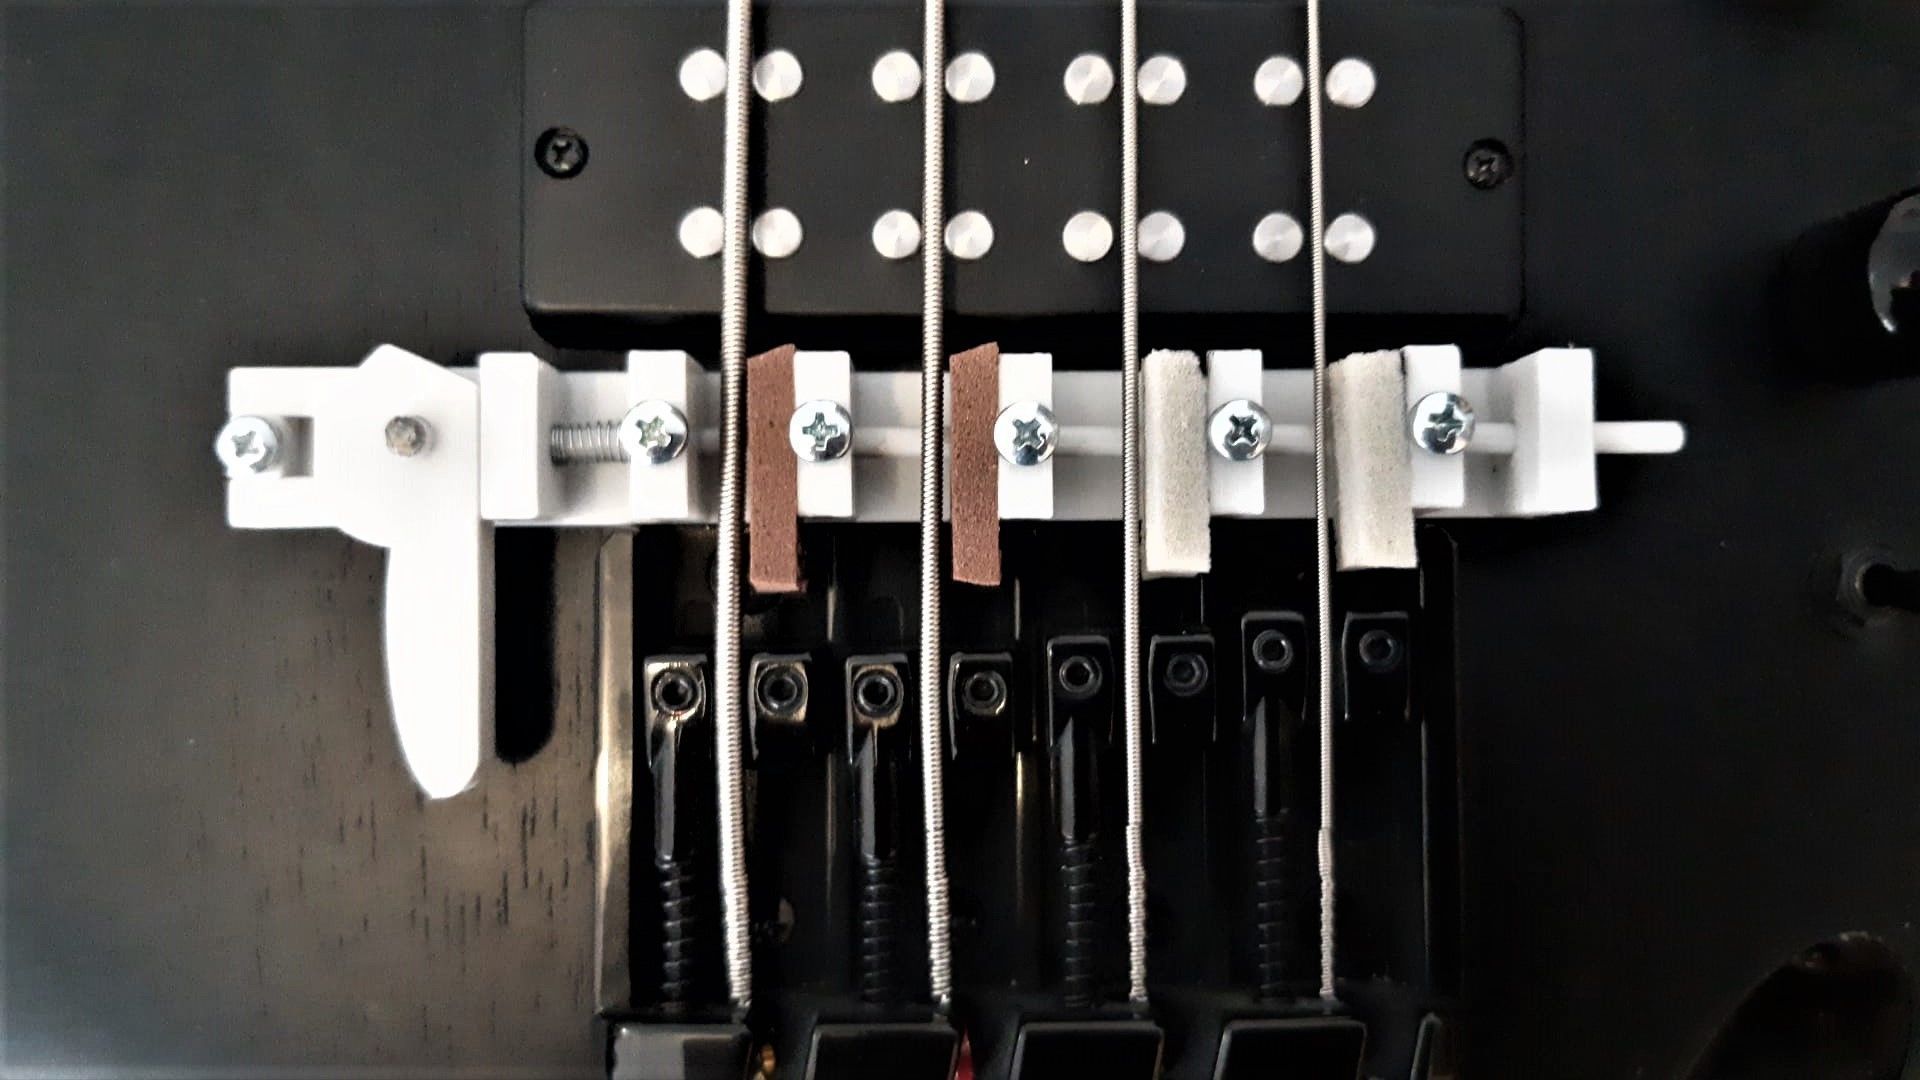
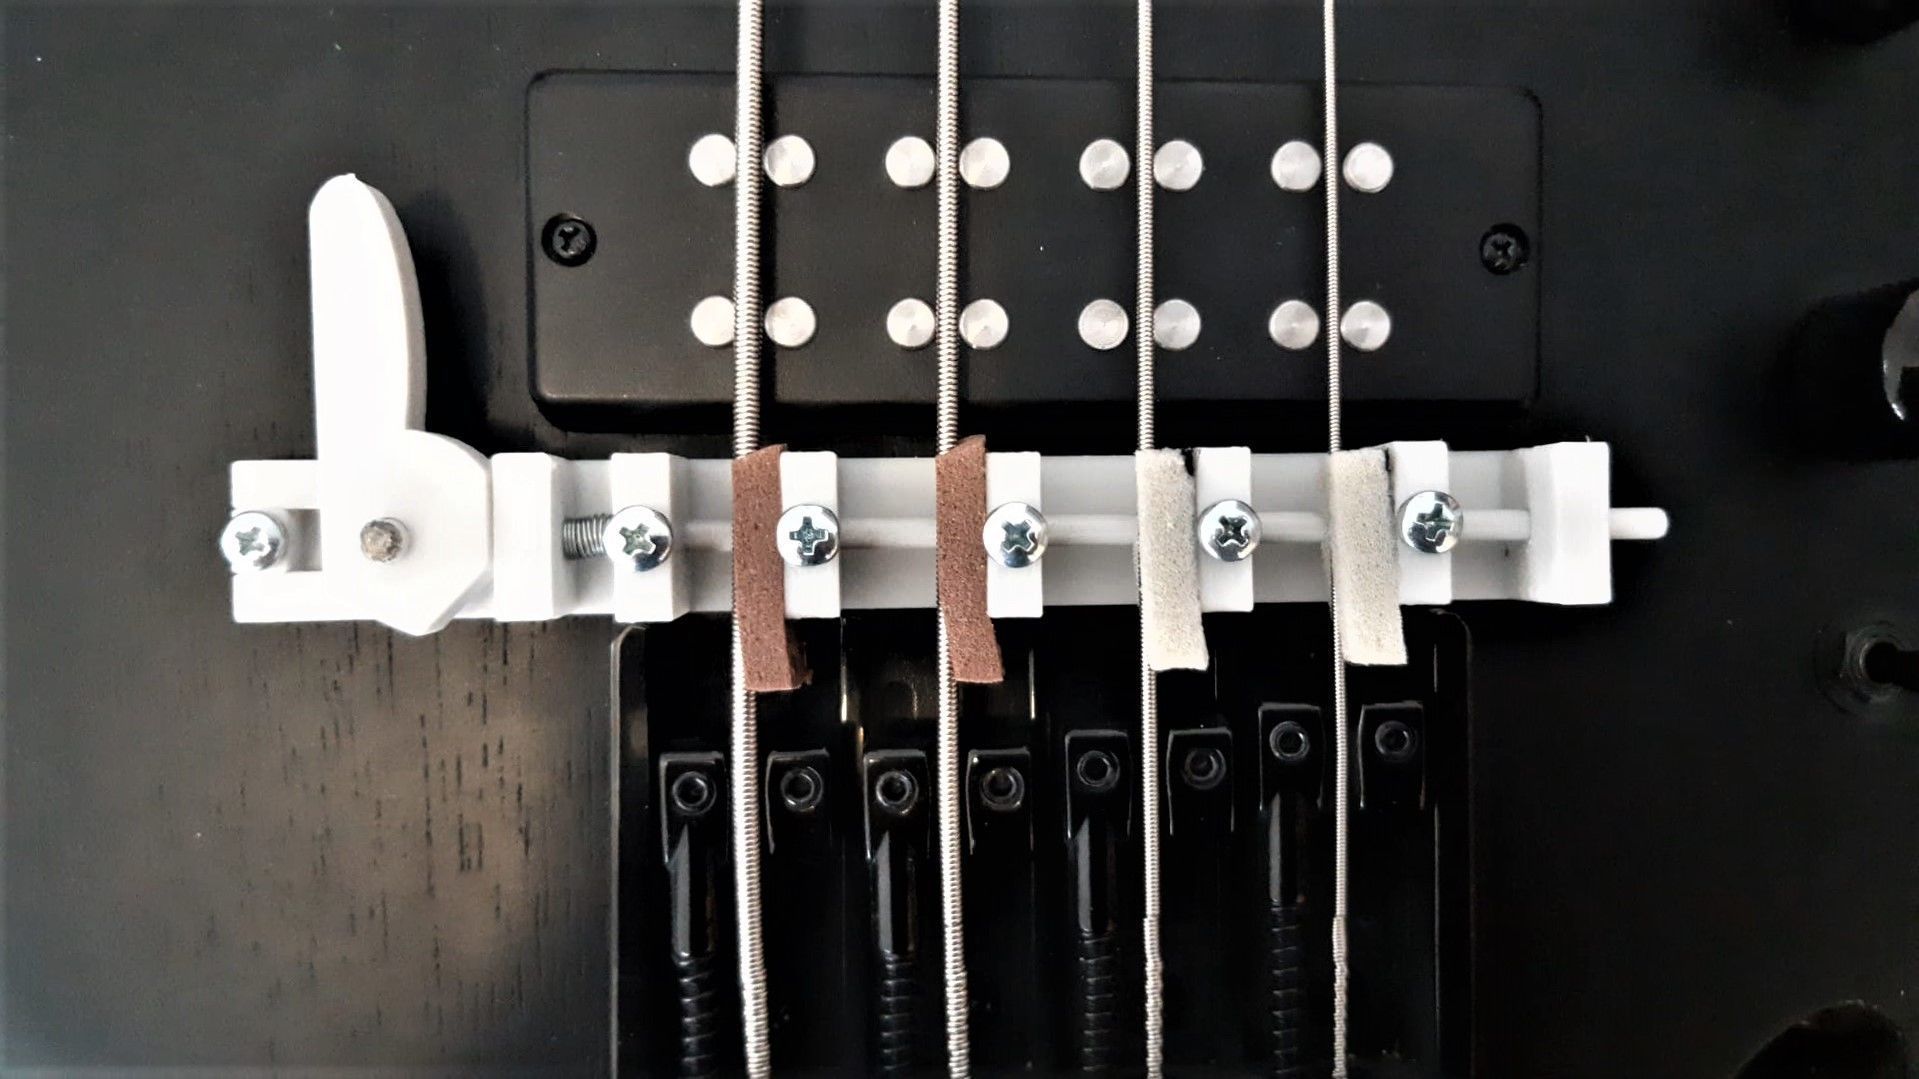
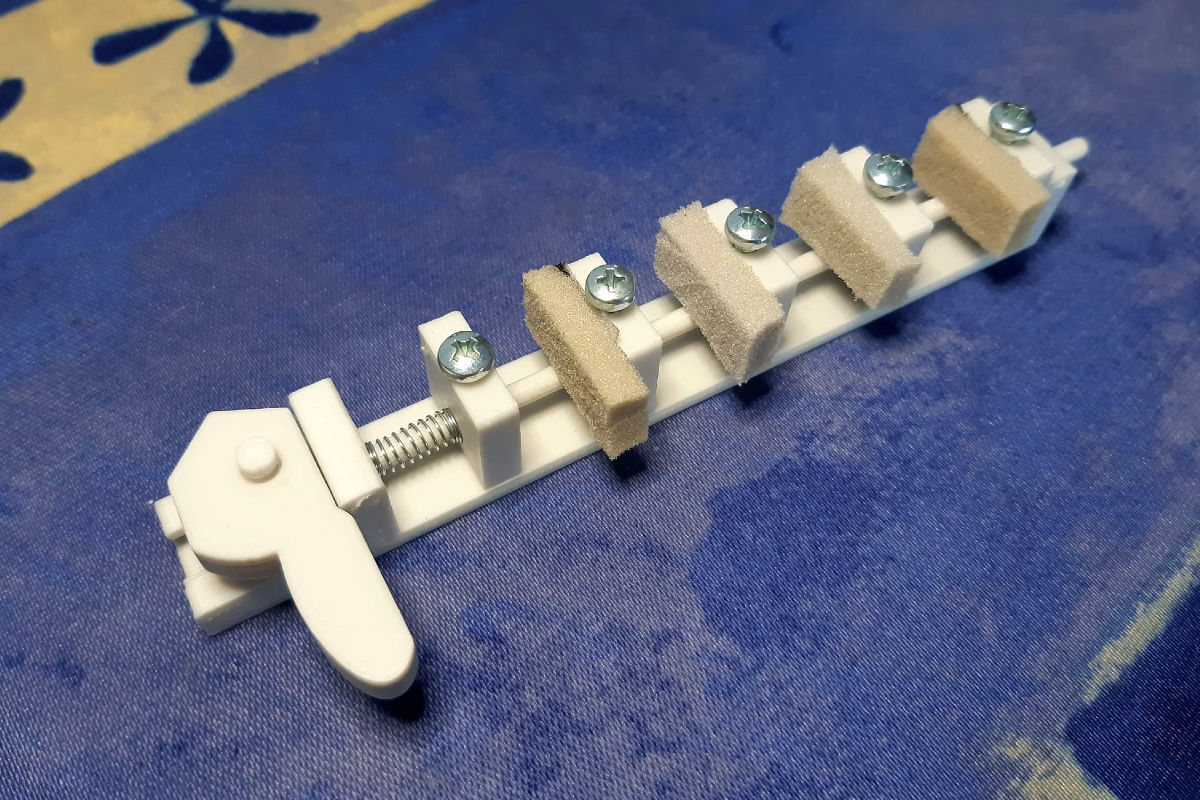
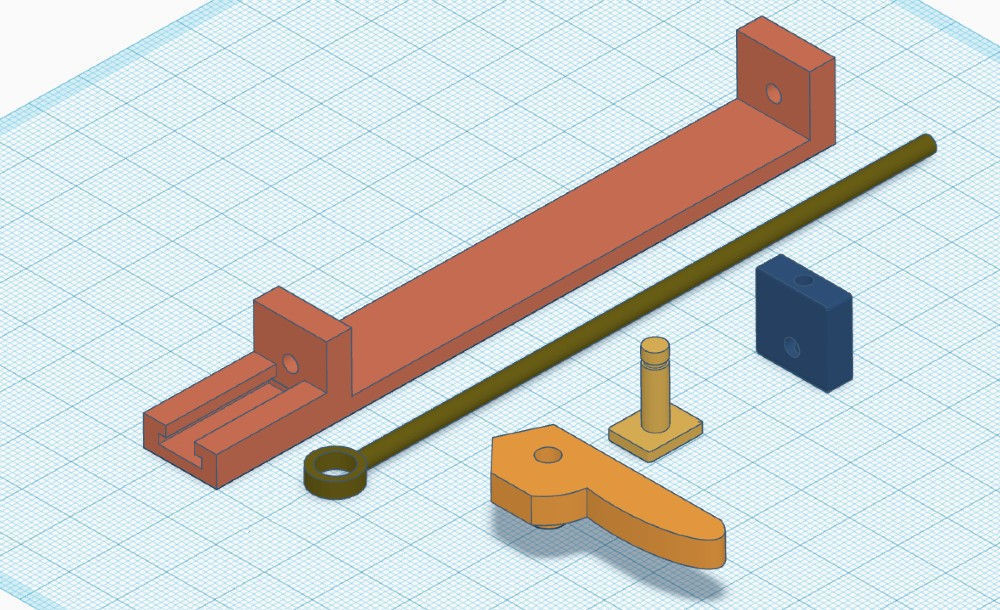
This is a model of bass guitar mute device for 3D print.

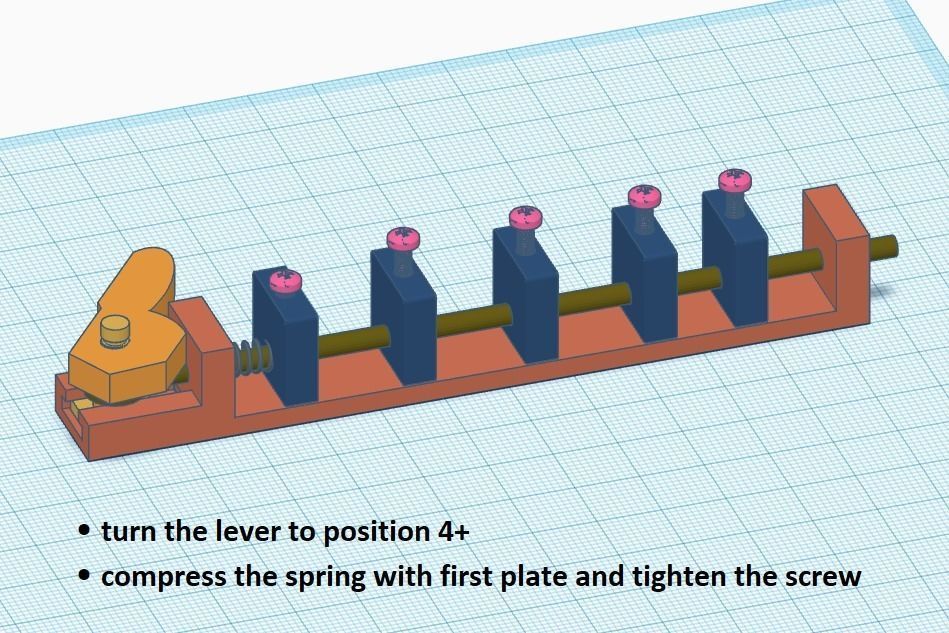
It is designed to be installed next to the bridge and enables you to easily turn muting on your bass guitar off/on (3 steps of muting + off step) This specific model is for 4 string bass (5 string bass if the first plate can also be used for muting of the string and not just as the spring control plate or if the string spacing is extremely small) but it is easy to make adjustments in the length of the base plate and shaft for specific bass guitar. I can help or make those adjustments in the model if needed.

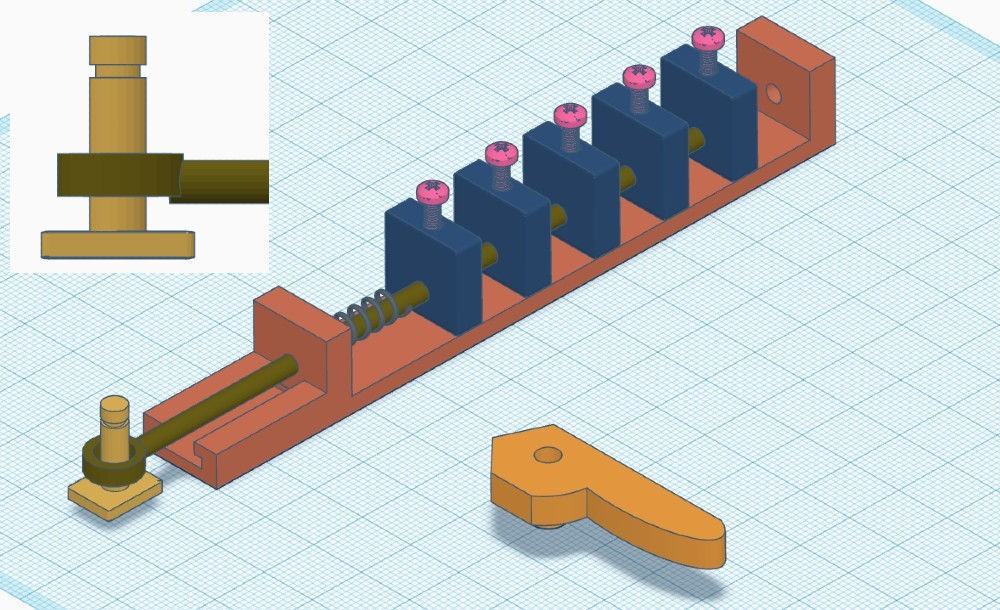
There is a separate file for each part...

  1. base plate 4-5 string
  2. shaft 4-5 string
  3. lever
  4. slider pin - 2 versions; one with a hole if you need to make it sturdier by inserting metal pin and glue it in
  5. muter plate

Print all pieces with very hard filament. I used Facilan C8 filament and it proved to be an excellent option.

  • 1 base plate
  • 1 shaft
  • 1 lever
  • 1 slider pin
  • 5 muter plates

Printed parts must be treated with send paper to remove printing imperfections and allow all pieces to slide easily. Bottom of each muter plate should be sanded to allow movement over the main plate without deforming the shaft (1mm) if needed. I suggest using fine sandpaper for flat surfaces and shaft and using small Philips bit (3mm) for widening and cleaning of the screw holes and shaft holes on the muter plates. Needle or tiny screwdriver can be used to clean hard to reach parts on the base plate (where the slider goes).

Additional pieces are needed:

  1. spring - I found that ordinary pen spring was the cheapest and ease to find solution but it has to be somewhat tougher spring. Then I used one additional muter plate (without muting material) to keep the spring compressed (spring control plate).
  2. screws to tighten muter plates to the shaft
    • for tightening of muter plates to the shaft, metric screws M3 x 10mm (DIN 7500C or DIN 967 with Phillips head) are the best options - easily found in computer stores as it is used for PC parts mounting (approx. $1 for 10 screws). I used these https://www.pcboard.ca/metric-stainless-pan-head-screw in above measures NOTE: Self-Drilling screws can easily break 3D print so avoid those and use metric screws. Go slowly and without too much force.
  3. muting material to be glued to the muter plate, that will do the muting of the strings
    • personal preference (sponge, rubber sponge, speaker sponge, very thick cloth...). I used medium hard sponge.
    • it is easy to experiment once everything is set up, by changing the muting material, to get desired result
    • muting material should be 4-5mm thick (from string side to muter plate side), 9-10mm high (from the shaft to the top of the muter plate) and start with 20mm long (along the string) piece and trim the length to get desired muting
  4. double sided sticky tape - start with less strong (3M Scotch Double Sided Tape Rolls - preferred) up to extremely strong (Bison doublefix, only if necessary as it is hard to remove)

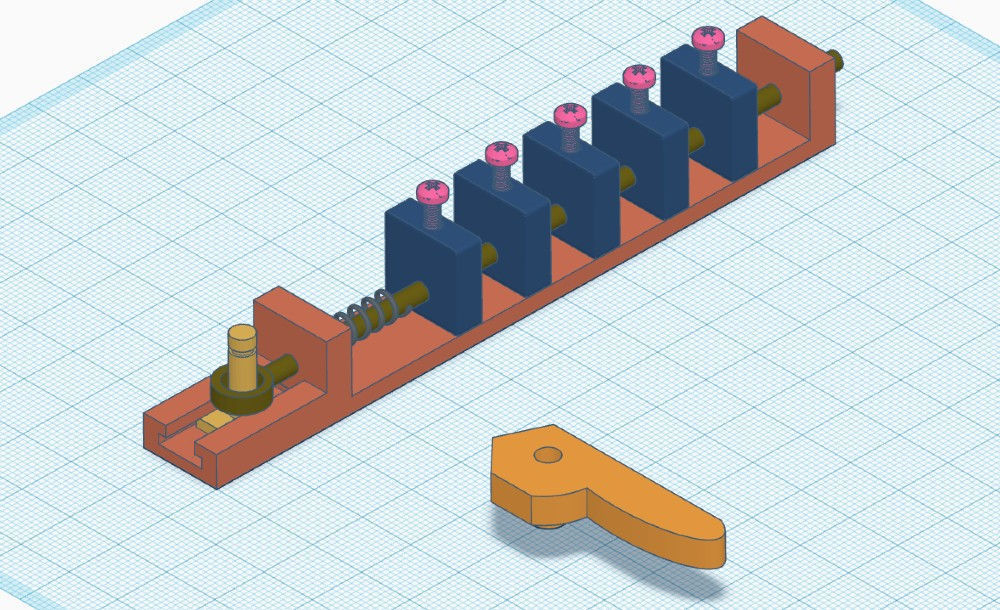
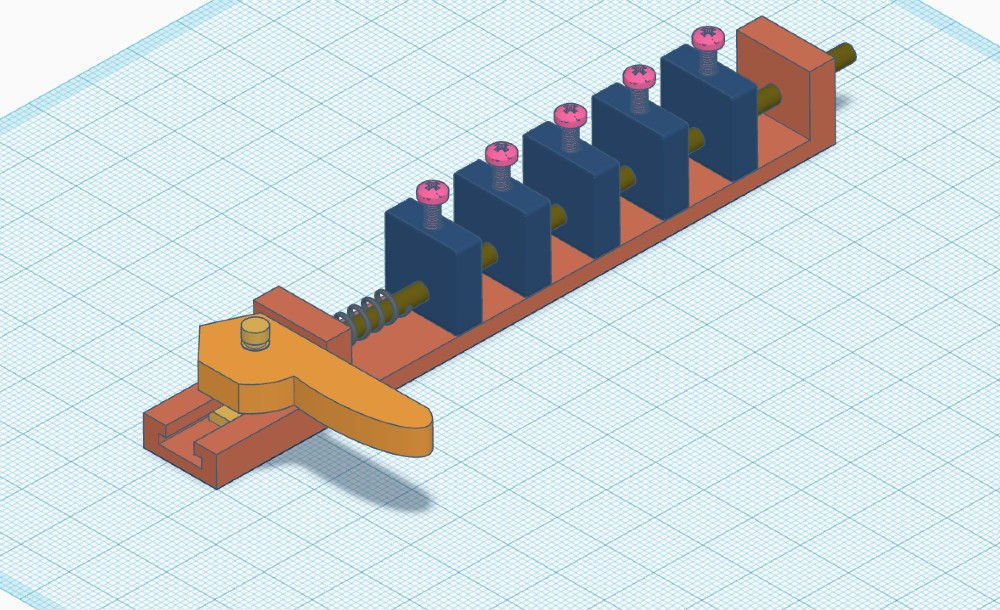
Installation is simple and straightforward, but I'll also answer any additional question.

  1. assemble all parts and leave all the screws on the muter plates untightened. Check that the lever, the slide pin and the shaft, move easily. NOTE. The shaft is not symmetrical (UP/DONW) so during installation you must take notice that the ring on the shaft is placed upwards. NOTE. if the spring is strong enough and long enough, you can use the first string muter plate as a spring control plate (first muter plate that is not used for muting of the strings but to keep the spring compressed).
  2. set the lever to the most muted position (position 4+) and using the spring control plate compress the spring almost to the end (leave 1-2mm) and tighten the spring control plate with a screw so the spring doesn't move anymore without using the lever.
  3. check that you can use the lever to move the muter plates/shaft and that the spring is strong enough to move the shaft and muter plates backwards. If the muter plates are rubbing too hard on the base plate, sand down the bottom of the muter plates a little bit.
  4. glue your muting material to the upper portion of the muter plates, above the shaft hole (except the first one if it is used only as the spring control plate - check the note above). Use double-sided tape to stick the material to the muter plates if needed (if the material does not have a sticky side already).
  5. move the rest of the muter plates approx. 2cm apart
  6. remove the strings from the bass bridge and glue the muter in place using double-sided tape so each string is placed between 2 muter plates. I glued it right next to the bridge to avoid the string touching the muter while bending the string during playing.
  7. reinstall the strings
  8. put the lever in position 2
  9. move each muter plate so it just touches the string. So when you put the lever in position 1, there is a gap of around 2mm between the string and muting material.
  10. tighten the muter plates with the screws
  11. cut out the excess mute material to even out muting level for all strings. You can also use softer material for higher strings.

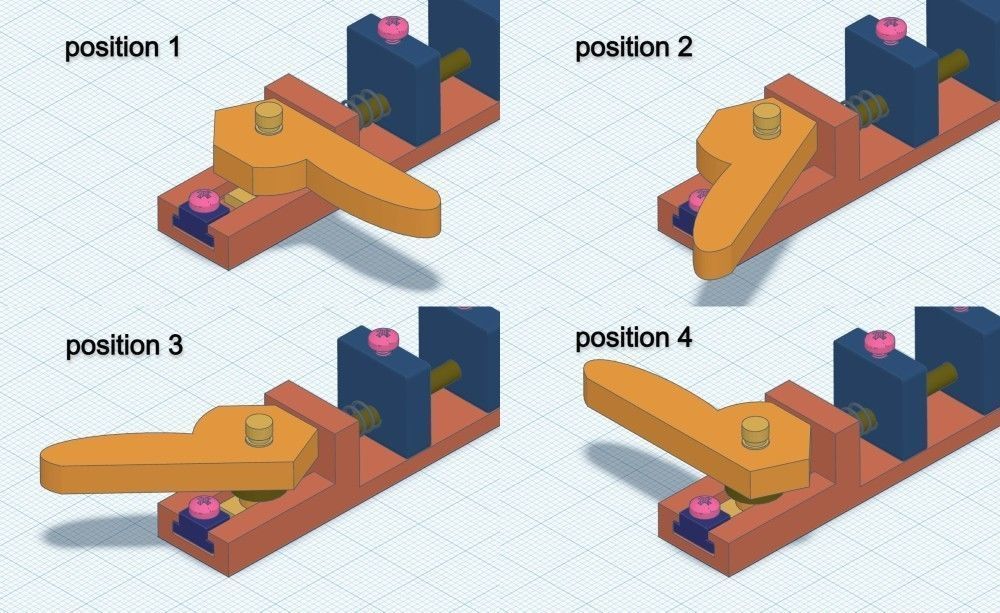
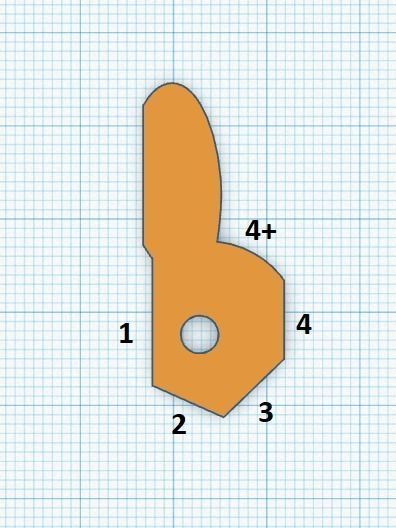
version 2. The lever is smaller and has bigger gap between positions 1 and 2. Small block plate is no longer used and needed. Slider pin is sturdier. Assembly images are still applicable with minimal changes.

Item rating
1 0
H
heyjmw 2023-02-22 18:37:42 UTC
Recommended
This is a pretty cool device. It prints easily and works. It’s a well designed file. I made some adjustments for my project but some DIY is expected when 3d printing. Thanks for the cool bass mute!
Bass guitar muter - 3D print
$20.00
 
Editorial No Ai License 
Bass guitar muter - 3D print
$20.00
 
Editorial No Ai License 
Response - % in - h

3D Model formats

Format limitations
  • Stereolithography (.stl) (7 files)198 KBVersion: 1Version: 2Version: 2Version: 2Version: 2Version: 3Version: 4

3D Model details

  • Publish date2021-09-22
  • Model ID#3275033
  • Ready for 3D Printing
Help
Chat