Skip to content

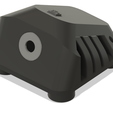
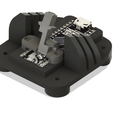
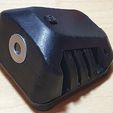
Arduino Micro IR Case

Advertising
Advertising
?
Creation quality: 0.0/5 (0 votes)
Evaluation of members on the printability, utility, level of detail, etc.

  • 547 views
  • 2 downloads

License
3D design format
STL Folder details Close
  • bottom.stl
  • button.stl
  • foot.stl
  • footb1.stl
  • footb2.stl
  • lock.stl
  • top.stl

Learn more about the formats

Publication date 2022-07-21 at 23:43
?
Published to Thingiverse on: 2022-07-21 at 15:07
Design number 789738

3D printer file info

3D model description

3d Print:
1x Bottom.stl
1x Button.stl
2x Foot (Preferably soft material)
1x Footb1.stl (Preferably soft material)
1x Footb2.stl (Preferably soft material)
1x Lock
1x Top

Other Materials:
1x Arduino Micro
1x TSOP4838 IR-module 38 kHz
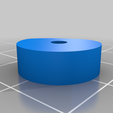
1x Shim Washer
1x Floppy Disk
6x Small Screws

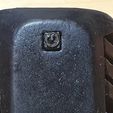
  1. Put ir-module through front of case(might have to cut some of the inner stop off depending on size)

  2. Solder Ir-module to Arduino Micro with short thin wires. Please check your ir-modules schematic for pins.

  3. Put the Arduino Micro in the bottom part with usb pointing towards the back.

  4. Screw the lock piece with the indent facing forward to the bottom part with the Arduino in between.

  5. Place the button in the top part square hole. Then place the top part on the bottom part. Button should slot into the lock piece dent and clicking the button should click the button on the Arduino.

  6. Screw the circular foot pieces on the front bottom of the case so that it screws the top and bottom together. Then attack the two irregular feet at the back so that they match the bottom case.

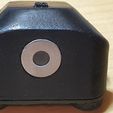
  7. Take the disk out of the floppy disk and glue it on the bottom of the shim washer. Make sure to not get any glue in the center of the washer. Then cut around the washer so there is no floppy drive disk visible on the outside.

  8. Put a small amount of glue where the washer should be, then glue the washer to the case. Make sure to check so that the ir works through the floppy disk.

Done.

I spent some time sanding mine and then painting it.

3D printing settings

-

Advertising


Issue with this design? Report a problem.

Would you like to support Cults?

You like Cults and you want to help us continue the adventure independently? Please note that we are a small team of 3 people, therefore it is very simple to support us to maintain the activity and create future developments. Here are 4 solutions accessible to all:

  • ADVERTISING: Disable your banner blocker (AdBlock, …) and click on our banner ads.

  • AFFILIATION: Make your purchases online by clicking on our affiliate links here Amazon.

  • DONATE: If you want, you can make a donation via Ko-Fi πŸ’œ.

  • WORD OF MOUTH: Invite your friends to come, discover the platform and the magnificent 3D files shared by the community!


Sharing and downloading on Cults3D guarantees that designs remain in makers community hands! And not in the hands of the 3D printing or software giants who own the competing platforms and exploit the designs for their own commercial interests.

Cults3D is an independent, self-financed site that is not accountable to any investor or brand. Almost all of the site's revenues are paid back to the platform's makers. The content published on the site serves only the interests of its authors and not those of 3D printer brands who also wish to control the 3D modeling market.

100% secure payment by credit card, PayPal, Apple Pay, Google Pay, etc.
View all payment options.