Skip to content

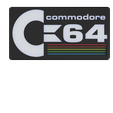
Vintage Computer sign/plaque - COMMODOR 64 LOGO

Advertising
Advertising
?
Creation quality: 5.0/5 (1 vote)
Evaluation of members on the printability, utility, level of detail, etc.

  • 780 views
  • 4 likes
  • 12 downloads
  • 2 collections

License
3D design format
STL Folder details Close
  • Commodore 64 plaque sign vintage.stl

Learn more about the formats

Publication date 2022-08-17 at 14:45
Design number 815739

3D printer file info

3D model description

This was my brother's first home "computer".

When I started liking vintage signs I came across this logo and couldn't pass. Here's some interesting info:

The Commodore 64, also known as the C64 or the CBM 64, is an 8-bit home computer introduced in January 1982 by Commodore
Date introduced: August 1982
Developer: Commodore International
Original author: Commodore International
Memory: 64 KB (65,536 bytes) (IEC: KiB) RAM + 20 KB ROM
Operating system: Commodore KERNAL/BASIC 2.0; GEOS (optionally)
CPU: MOS Technology 6510/8500: @ 1.023 MHz (NTSC version); @ 0.985 MHz (PAL version)
Sound: SID 6581/8580 (3Γ— osc, 4Γ— wave, filter, ADSR, ring)

I hope there are some of you that remember and appreciate.

If you like it enough to download it - pls leave a like.

3D printing settings

I had to make this rather thick to deboss the colours. The writing is embossed.

Count your layers carefully for the filament changes. There are 4 0.2 Layers for each colour.

0.2 Layer height

Speed: 40mm/s

4 top layers
3 bottom layers

12% infill - lines

0.8 wall width

Layer/ filament changes:

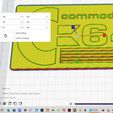
If you don’t know how to do layer changes in Cura here follows:
In the left top corner choose:
1. Extensions
2. Post processing
3. Modify g-code
4. Add script
5. Filament change

Insert the filament change layer as x
Repeat for layer y and so for every colour

You would have to slice it first and carefully select the layer changes according to the layer heights you would like the colours to change.

(Remember to deactivate these settings after your print)

TIP TO AVOID THE UGLY BLOB WITH FILAMENT CHANGES:

After post processing G-code and adding filament changes at the correct layers, add a tiny square on your bed. All the blobs will be on the tiny square and not on your model.

Advertising


Issue with this design? Report a problem.

Would you like to support Cults?

You like Cults and you want to help us continue the adventure independently? Please note that we are a small team of 3 people, therefore it is very simple to support us to maintain the activity and create future developments. Here are 4 solutions accessible to all:

  • ADVERTISING: Disable your banner blocker (AdBlock, …) and click on our banner ads.

  • AFFILIATION: Make your purchases online by clicking on our affiliate links here Amazon.

  • DONATE: If you want, you can make a donation via Ko-Fi πŸ’œ.

  • WORD OF MOUTH: Invite your friends to come, discover the platform and the magnificent 3D files shared by the community!


Sharing and downloading on Cults3D guarantees that designs remain in makers community hands! And not in the hands of the 3D printing or software giants who own the competing platforms and exploit the designs for their own commercial interests.

Cults3D is an independent, self-financed site that is not accountable to any investor or brand. Almost all of the site's revenues are paid back to the platform's makers. The content published on the site serves only the interests of its authors and not those of 3D printer brands who also wish to control the 3D modeling market.

100% secure payment by credit card, PayPal, Apple Pay, Google Pay, etc.
View all payment options.