Skip to content

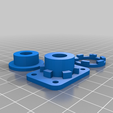
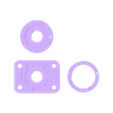
Solidoodle Torsional Anti-Backlash Nut for Z-Axis

Advertising
Advertising
?
Creation quality: 0.0/5 (0 votes)
Evaluation of members on the printability, utility, level of detail, etc.

  • 506 views
  • 2 downloads

License
3D design format
Folder details Close
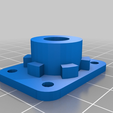
  • BacklashSolidoodleBase_2.1.stl
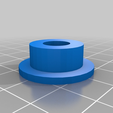
  • BacklashSolidoodleCollar_2.1.stl
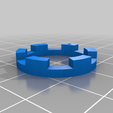
  • BacklashSolidoodleTop_2.1.stl
  • BacklashSolidoodle_2.1.scad
  • BacklashSolidoodle_2.1.stl

Learn more about the formats

Publication date 2023-01-16 at 18:12
?
Published to Thingiverse on: 2014-01-23 at 09:57
Design number 1013308

3D printer file info

3D model description

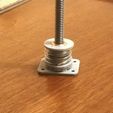
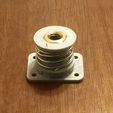
Specifically designed for the Solidoodle 2 with the aluminum platform and original lead-screw. It can be used with or without the nut attached to the platform. This design has not been tested yet. It will definitely help with backlash from changing direction in Z, but I don't know how much it will help with wobble or Z banding caused by an eccentric lead screw. In order to make it work you will need to make a spring of the correct size.

This design was inspired from a Kerk anti-backlash nut I saw the other day. I was trying to replicate the idea, but had to redesign it because of constraints on the size. So this is the best I could do.

Not sure how useful the customizable version will be at this point, but here's the link: http://www.thingiverse.com/apps/customizer/run?thing_id=232253

##History

rev 2.0 - I removed the printed threads because I decided they are redundant and cause too much friction. Instead, the spring will act on the upper nut counterclockwise, "clamping" the two nuts together.

rev 2.1 - I removed an unnecessary feature which allowed me to reduce the diameter a bit. This should make it a little bit easier to install.

3D printing settings

##Parts Needed:

  • spring
  • two 5/16-18 nuts (or one if you have the original threaded insert)
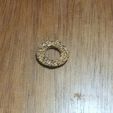
  • small sheet of rubber gasket material (not critical, but it will help ensure consistent pressure between the two nuts)

##Instructions

1) Print out the parts with 2 perimeters and 25% infill (not critical)

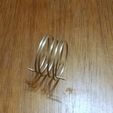
2) Create a torsion spring out of some wire, bending up both ends. I made one using wire from a large spiral binder notebook and it seems to give enough torsion.

3) Cut your gasket material into a ring shape that will fit in between the Base and the Top

4) Assemble

##How to Install the Anti-Backlash Nut:

* Piece together the anti-backlash assembly, including lead screw nuts, but do not put torsion on the spring yet.

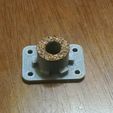
* If you have the original threaded insert on the platform, make sure to only insert a nut in the Top and not in the Base.

* If you have it, insert the rubber gasket ring in between the Top and the Base. This will make for more consistent pressure between the two nuts.

* Put onto the lead screw by turning the lead screw while holding the assembly together.

* Screw the anti-backlash assembly onto the platform.

* Add torsion to the spring, tightening the upper lead screw nut.

Advertising


Issue with this design? Report a problem.

Would you like to support Cults?

You like Cults and you want to help us continue the adventure independently? Please note that we are a small team of 3 people, therefore it is very simple to support us to maintain the activity and create future developments. Here are 4 solutions accessible to all:

  • ADVERTISING: Disable your banner blocker (AdBlock, …) and click on our banner ads.

  • AFFILIATION: Make your purchases online by clicking on our affiliate links here Amazon.

  • DONATE: If you want, you can make a donation via Ko-Fi πŸ’œ.

  • WORD OF MOUTH: Invite your friends to come, discover the platform and the magnificent 3D files shared by the community!


Sharing and downloading on Cults3D guarantees that designs remain in makers community hands! And not in the hands of the 3D printing or software giants who own the competing platforms and exploit the designs for their own commercial interests.

Cults3D is an independent, self-financed site that is not accountable to any investor or brand. Almost all of the site's revenues are paid back to the platform's makers. The content published on the site serves only the interests of its authors and not those of 3D printer brands who also wish to control the 3D modeling market.

100% secure payment by credit card, PayPal, Apple Pay, Google Pay, etc.
View all payment options.