Skip to content

Ozito Battery to Ryobi Tools Adapter

Advertising
Advertising
?
Creation quality: 5.0/5 (1 vote)
Evaluation of members on the printability, utility, level of detail, etc.

  • 2.6k views
  • 3 downloads

License
3D design format
STL Folder details Close
  • Ozito Battery Mount M.stl
  • Ryobi Battery insert M.stl
  • Ryobi Battery top ext M.stl
  • Ryobi Button H.stl

Learn more about the formats

Publication date 2023-01-21 at 08:53
Design number 1020682

Blacksmithoz

3D printer file info

3D model description

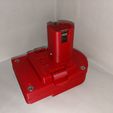
This adapter will allow an 18V Ozito / Einhell Power eXchange battery, to operate most Ryobi One+ cordless hand tools.

Some of the higher powered tools like the angle grinder, and impact wrench may cause lower powered batteries to cut out (overload) or sometimes there can be feedback from the grinder that may destroy the battery.

I stick with using it for drills, lights, grease gun, etc.

I had some Ryobi tools lying around and the batteries were getting a bit tired. I had some fairly new Ozito tools, so I went hunting for an adapter, but there wasn't one for what I wanted. After some prototyping and handing out some demo's to friends to test out and get feedback, I finalised (ish) the design and now sell the fully assembled and tested adapter (and other models) on Ebay.

https://www.ebay.com.au/itm/283240837343 Ryobi
https://www.ebay.com.au/itm/283894044834 Dewalt

3D printing settings

0.4 or 0.5 nozzle
0.3 layer height
3mm wall thickness, top and bottom
15% infill
supports on

I print the top separate to the bottom and insert and buttons, mainly to lower the risk of waste if there is a failure.

Parts List
1x top
1x bottom
1x insert
2x buttons
2 springs (0.7x9x15) over stretched to double the length
4 wood screws m4 x 16
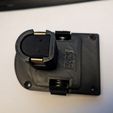
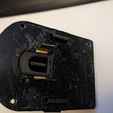
Brass contact x 2 of 0.5 x 10 x 95 bent to specs

print time is about 22 hours
object size 120x90x80
I use PLA+ or PETG depending on requirements

there are extensions to increase the surface contact with the heat bed. They are only 1mm thick so can be trimmed off easily with scissors or metal snips. be careful with the screws as they can strip out easily if over tightened.

Advertising


Issue with this design? Report a problem.

Would you like to support Cults?

You like Cults and you want to help us continue the adventure independently? Please note that we are a small team of 3 people, therefore it is very simple to support us to maintain the activity and create future developments. Here are 4 solutions accessible to all:

  • ADVERTISING: Disable your banner blocker (AdBlock, …) and click on our banner ads.

  • AFFILIATION: Make your purchases online by clicking on our affiliate links here Amazon.

  • DONATE: If you want, you can make a donation via Ko-Fi πŸ’œ.

  • WORD OF MOUTH: Invite your friends to come, discover the platform and the magnificent 3D files shared by the community!


Sharing and downloading on Cults3D guarantees that designs remain in makers community hands! And not in the hands of the 3D printing or software giants who own the competing platforms and exploit the designs for their own commercial interests.

Cults3D is an independent, self-financed site that is not accountable to any investor or brand. Almost all of the site's revenues are paid back to the platform's makers. The content published on the site serves only the interests of its authors and not those of 3D printer brands who also wish to control the 3D modeling market.

100% secure payment by credit card, PayPal, Apple Pay, Google Pay, etc.
View all payment options.