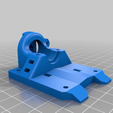
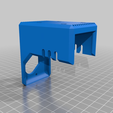
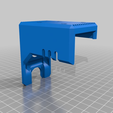
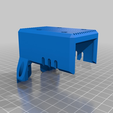
Important notice: The Projects has moved to https://www.blvprojects.com
Thank you :)
official site: https://www.blvprojects.com
Facebook page: https://www.facebook.com/groups/BenLevi
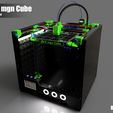
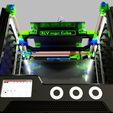
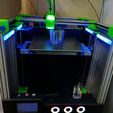
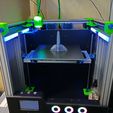
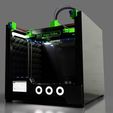
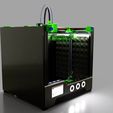
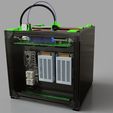
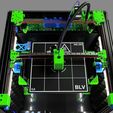
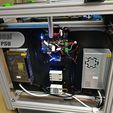
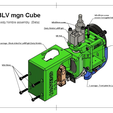
Hi, my name is Ben Levi and This is: "BLV mgn Cube" open-source 3D printer project.
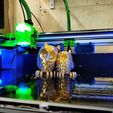
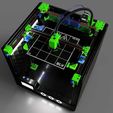
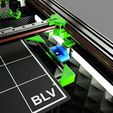
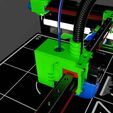
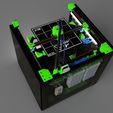
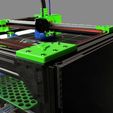
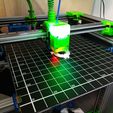
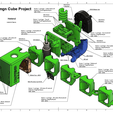
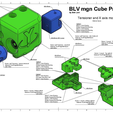
building your own good and reliable 3D printer is the main purpose of this project. Basically, it's an open front structure CoreXY 3D printer, based on mgn linear rails for maximum accuracy, efficiency, and high print quality.
Notice: I promise to update this Project page on a weekly basis until it will be completed.
Fast, reliable, accurate
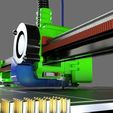
The linear bearing and Delrin Wheel Gantry commonly used at most of the low-mid 3d printers as a cheaper solution for linear motion. well, ye.. it's cheaper but at the expense of accuracy and reliability. linear guided rails (mgn rails) are a way more rigid, extremely precise, and smoother then linear bearing or Delrin. shorting print time without compromising on print quality. There seems to be a good reason why they are mostly used with high-end 3D printers. So, i found cheap Chinese mgn rails at Aliexpress and thought to myself why not?
Rigid open structure
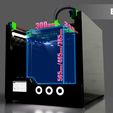
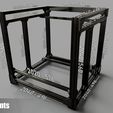
I focused my efforts on designing an open front structure that will be rigid as a cubic structure but yet giving you easy access to your build plate and prints. the design includes a front belt tensioner to make it even more convenient. It came after spending tons of hours of software simulating and physical stress test.
Accessible
All the parts are easy to find, print or make. You will not find in the BOM an expensive CNC special machined parts or parts that are hard to get. most of the parts are printed or you can buy them online / locally. Notice that you can use your own electronics - as long as you have the knowledge to make your FW suitable to the build.
Open Source
You don't need to ask for the original CAD files since i already included it inside the project folder. I admire this community and believe that sharing is the main key in order to make this project even better. Feel free to download the CAD files (Step file) and modify, add, remix or improve it as you like. I would appreciate if you could please share it with this awesome community and mark the remixed parts as a "remixed" linked to this project page.
Build and print
I spent many hours adjusting the Firmware for this 3D printer and fine-tuning the best slicing profile (Simplify3D) for it. After building this printer you will only need to upload the config files, load your slicing profile and you are good to go.
More modular
The design is more flexible then you think. the printed parts and structure designed to be modular. Not only you can choose your Z height - But you can use a much bigger build plate. all you need to purchase a bigger aluminum profile and mgn rails. The provided CAD file will assist you in calculating the right measurements for your customized "BLV mgn Cube" 3D printer.
Easy to build?
To be honest, the installation of the rail will take 70% of the build time. you will have to be accurate and spend a few hours aligning the rails, but boy.. the joy you will feel when it prints will worth every minute you spent installing them. To make it easy on you, I made a 3D animation videos as instructions, Information PDF, sketches, and measurements.
balanced budget
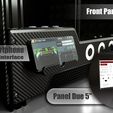
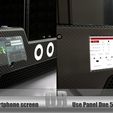
The cost was important, therefore the BOM is balanced to give you the best money-value ratio, without compromising on quality. you will find The best 32bit board a 3D printer can have. Excellent stepper motors, sensors and so. you get to choose if you want to have a 5" panel due touch screen or save 80$ and use your smatphone/Tablet screen without losing features.
To your convenience, i added below an Online 3D viewer links.
you will be able to explore the printer and the isolated frame:
Facebook group
You are more than welcome to share your thoughts, build videos/photos and more at the BLV mgn Cube facebook group: www.facebook.com/groups/BenLevi
Latest updates:
03/02/19: added Jigs
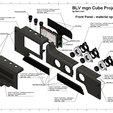
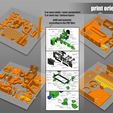
06/02/19: Printing orientation description added + image
07/02/19: added Printer size calculator (Excel file) and info
09/02/19: now BOM calculator file supports Threaded rods length
09/02/19: added block shield for Bltouch, 8mm,and 12mm sensors.
09/02/19: front panel for smartphone.stl - fixed
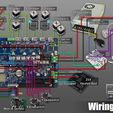
15/02/19: electronics schematics updated (dual extruder + buttons)
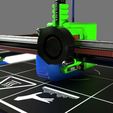
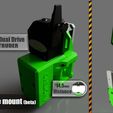
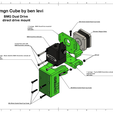
16/02/19: added BMG direct drive extruder (3 STL files + instructions)
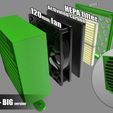
16/02/19: added Big Air Scrubber - HEPA+Carbon (working on instructions)
17/02/19: renamed back the 8mm/12mm mounts
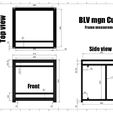
17/02/19: added walls dimensions pdf
18/02/19: added Calibration Z height guide
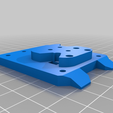
25/02/19: added Zesty Nimble front plate and block shield
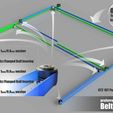
26/02/19: Belt system V2 updated - Please use only flanged 623zz ball bearing+flip belt.
28/02/19: fixed Z-height calibration guide
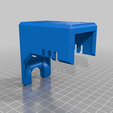
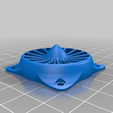
08/03/19: added spitfire fan cover
08/03/19: added Front plate for Chimera (not suitable for layer fan/sensor)
18/03/19: Wiring diagram fixed.
19/03/19: added Step file (CAD) for the DirectDrive setup.
20/03/19: added DWG for the (bottom, Rear, sides) Panels
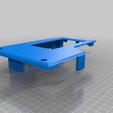
25/03/19: small fix: Front Panel - Left plate for PanelDue 5 STL file
31/03/19: Fw updated - added M80 PS_ON command on startup.
04/04/19: added DXF (vector file) for the enclosure panels.
16/04/19: Wiring diagram updated v3.2
16/04/19: added steppers setup guide for others steppers brand/batches
17/04/19: updated Simplify3D profile v1.2 (added: M81 S1 end script)
17/04/19: added Neopixel wiring diagram (Beta) and Mimasx Code.
01/05/19: added STL panels for PanelDue 4.3 and MKS TFT32 V4 (not supported by duet)
10/05/19: fixed V6 locker by decreasing the fan screws holes to 2.7mm.
11/05/19: added E3D high temp 314x314 bed size
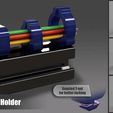
12/05/19: added quick frame wire holders (based on samella design and thing:2576237)
19/05/19: fixed typo - purge message box
24/05/19: added support for Ender-3 bed size
11/06/19: added Hotend and Heated bed PID tuning Quick guide
25/06/19: added picture that demonstrates how to flip the belts on the rear
01/07/19: added a link for all the screws kit
05/07/19: added wiring diagram for using 12v fans on a 24v system
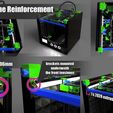
21/07/19: added optional frame reinforcement for higher Z-axis builds
03/08/19: added New updated Neopixel code by Claus Noack - works!
03/08/19: added updated neopixel wiring version 2.2b
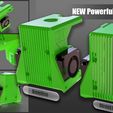
09/08/19: added Powerful twin 4010 blower fan option (layers fan) for Bowden and direct!
13/09/19: added step files for the new twin fans
04/09/20: added a new website for the project!!
Where to start?
- 1. Read, understand and prepare yourself
Start with reading the Thing description and "more info links" section, watch the 3d animations, explore the printer 3D model with the 3d viewer, read the pages I linked in the "more info" sections and make sure you understand the printer structure.
- 2. Get the parts
The waiting - is the most frustrating part. make sure you got all the needed parts. prepare spares of T-nuts, screws and so on. If you have decided to use your own electronics, make sure you know how to correctly configure the firmware of your board.
- 3. build
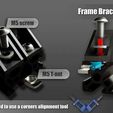
now the building process begins.. Know that it isn't going to be easy as building a pre-made kit. Prepare all the tools you need and please use a good corner alignment tool, it is crucial to have a precise structure for excellent printing results. it is advised to use also the provided JIGS, the assembly will be much easier. Don't forget to tap holes on the corners and check if its an M5/M6 screw (depends on your extrusions manufacture). Take your time when fixing the rails to the extrusions. I found a good quick video tutorial made by 3D distributed: (youtube.com/watch?v=iX0U1ADH0MY) showing an easy way to align parallel rails. Don't forget to reward yourself after the rails installations - you deserve it :)
- 4. Electronics installation
Install your Electronics carefully. Check your connections and wiring diagram closely and make sure everything hooked up correctly. don't make any shortcuts and use the right tools and parts. the Power cable should be the last thing to connect.
- 5. Software, Tests and Calibrations
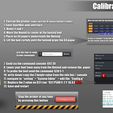
Update you DuetWifi board to the latest version and upload all the provided config to the sd-micro card, then insert it to your board and power up the system. make sure that the Mini IR sensor blinks 4 times right after powering the printer. please don't move the axis before checking endstop response. Try to home the printer - the printer should move to the left and then to the rear for the printer. if it isn't - check ou motors wiring and config. calibrate your Z height and check your sensors reading (temp). Please make sure to do a PID calibration for both the bed and the hotend sensors - This is very important. otherwise, your prints will fail. if everything looks good load filament and print a calibration cube and so on.
- 6. print
Enjoy your printer and give her love when needed :)
maintain your printer by greasing the rails with a Synthetic grease with PTFE or sewing machine oil. Keep the rails clean and the belts tight.
Also, Clean your PEI build plate with alcohol after every print. If you are using the Air scrubber - please replace the HEPA filter when needed.
- 7. Post an "I made one" pictures
Show the world your new 3D printer and be proud of your creation:)
I would appreciate if you could please upload your new built 3D printers pics. Knowing that it helped you create your own 3D printer - for me, it's worth all the hard work and many hours that I spent in this project.
- 8. Remix & Share
I am 100% sure that there are many ways to make this printer even better. this is why I gave you the source file of the Printer. Make it better by sharing your remixed and ideas with this awesome community:)
Those are the main resources you will need have:
- a passion for 3D printing (most important)
- Tools
- Technical ability
- spare time
- budget (mid)
BOM - Bill Of Material
Notes:
- Please Be precise and use the correct extrusions without shortcuts. using 2020 profile instead of 2040, may reduce the frame rigidity.
- The BOM below is for 365mm Z height, If you wish to build a different size, then use the Calculator (excel file named: "BLV_mgn_Cube-Frame_calculator.xlsx" can be found at the project Zip file)
- It is recommended to use normal extrusions with mgn rails and NOT V-slot.
- Please let me know if you found any typo/mistake and I promise to fix it ASAP.
- The Blurolls store from Aliexpress has started to offer a Kit for the project. It contains most of the needed electronics, frame, screws, pre-crimped wiring, panels, tube, brackets and more. I think its a pretty convenient solution, especially when part of the deal is genuine Hiwin rails!
- New cheaper BLV mgn Cube (lite) kit based on SKR + tmc2209 spotted on Aliexpress.
Frame
- 9 x 2040 aluminum extrusion 496mm (Wide Beams)
- 3 x 2020 aluminum extrusion 576mm (Aux wide Beams)
- 1 x 2020 aluminum extrusion 460mm (X axis)
- 4 x 2040 aluminum extrusion 560mm (4 corners height beams)
- 2 x 2040 aluminum extrusion 442mm (Z axis)
- 2 x 2020 aluminum extrusion 405mm (bed frame)
- 2 x 2020 aluminum extrusion size: for CR-10 bed: 173mm OR for Anet bed: 142mm OR for E3D High temp size 314x314 bed: 240mm OR for Ender 3 bed: 106mm
Optional: recommended Frame Reinforcement for higher Z axis builds (465mm+):
- 1 x 2020 aluminum extrusion 496mm
- 4 x aluminum 2020 Brackets 20x20 \ 20x17
Other
- 2 x T Shape Bracket 60x60
- 14 x Corner 90 degrees Angle Bracket for 2020/2040
- 100 x aluminum 2020 Brackets 20x20 \ 20x17
Getting the frame Kit:
notice that you may be able to get a much cheaper price for the extrusions locally.
- Alumnium frame kit in 4 colors: Black/Blue/Red/Purple - anodized after cut+Brackets
- Fysetc - frame aluminum profiles Set / Full frame Kit
- Funssor - frame Kit containing all the needed extrusions
- Reprap - Frame Kit with free DHL shipping - not tested yet
- Geckosys.ch - Frame kit (Switzerland, Germany, and Austria)
Screws and bracket kits:
- Fysetc Brackets, corners, T-nut and M5 screw kit
Motion System
Rails
- 5 x [Mgn12H Carriage + 400mm Rails](http://s.click

/https://fbi.cults3d.com/uploaders/27198161/illustration-file/3cc08a5e-89f5-413f-8976-d5fe412e1f85/BLV_Cube_mgn_Project_Ben_Levi.jpg)
