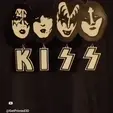
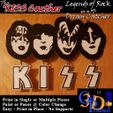
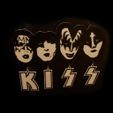
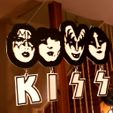
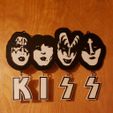
What inspired such a creation? It was a Crazy Crazy Night, that's all I remember! Next thing I knew, these legends of rock n roll, Gene Simmons, Paul Stanley, Ace Frehley, and Peter Criss - collectively, KISS, were layering their way into existence on our Anycubic Kobra Max. 8 hours later, the Kiss Catcher was born!
Who knew KISS would ever become a dream catcher, of all things? Oh well, it happened, and how could I not share such a unique - and let's be honest, entirely unexpected (even by me) - creation with the Cults3D community?!
ASSEMBLY INSTRUCTIONS
There are a total of 5 pieces in the ZIP file. They include:
Kiss Catcher - WHOLE
Kiss Catcher - Faces
Kiss Catcher - K
Kiss Catcher - I
Kiss Catcher - S
Using the WHOLE STL file, you can print the entire KISS band dream catcher in one go. The problem is that, without excellent adhesion, you may experience warping on the edges before it's over. For this reason, I've provided each file separately, as well. Separately, you'll need to print:
Faces (x1)
K (x1)
I (x1)
S (x2)
Once they're all printed out, assembly is simple. You can use string, yarn, fishing line, or my favorite, a small keyring, to attach each letter to the above faces. Then connect a string or chain to the two holes at the top of the faces to hang it.
Enjoy!
HOW TO COLOR
There are two ways to go about coloring the print. You can paint it or change filament colors during the print (I recommend the latter).
PAINT: All of the edges that need to be black are raised up, making it as easy as possible to paint. Just print it in white, then paint the raised edges black.
MULTI-COLOR PRINT: If your printer can be set to 'Pause at Layer Height', I highly recommend this option. When slicing (with Cura), insert a "Filament Change" or "Pause At Height" at the appropriate layer. Use the Preview option to view layers by layer. Watch for the layer that changes to the raised egdes, and set it to pause at that layer. Change the filament to black, then resume the print.
Using the recommended settings below (Quality: Layer Height 0.2, Initial Layer 0.3), there should be 12 layers total. Color change should occur at Layer 8.
Here's a quick Cura Color Change Tutorial if you need it.
Dimensions:
At 100% scale and fully assembled (the dream catcher measures:
X = 20cm / 7.87in
Y = 14cm / 5.5in (variable)
Z = 0.25cm / 0.1in
The actual Y distance will depend on what you use to connect the letters to the faces.
If you like the Kiss Catcher, please check out our ever-growing portfolio of STL models.
IMPORTANT: Unless otherwise noted, ALL GetPrinted3D designs are Copyright protected. When you purchase a file, you do NOT have the right to sell the file or printed model. Files may not be redistributed under any circumstances. The models are for personal and private use, and may not be sold commercially without the explicit written consent of GetPrinted3D.
You can obtain a Commercial License to legally sell our designs here:
- https://www.patreon.com/GetPrinted3D

/https://fbi.cults3d.com/uploaders/26463760/illustration-file/502ca42b-9d6d-4876-9c64-2c86cc7cf7fa/Kiss-Catcher-GifVideo.gif)
