Parametric Stackable Boxes - SBox Redone

Description
PDFUpdate: This model is now parametric! I re-designed it to have better snapping force and in such a way that I was comfortable sharing the f3d file so now you can make your own sizes or edit the model if you want.
I recommend only changing these parameters. Other parameters will almost certainly break the design. Unfortunately this means you won't be able to change the height of the top, only the bottom. 
I also added a front handle if you want to use that. I personally don't really use the handles but I included them for anyone who would want it!
I removed all the old files and just included the f3d file. Use fusion to open it, set the size you want, export as 3mf, and orient the pieces. Anything over 90x90 will need to print the top and bottom separately. Then you can print the clasps in whatever color you want.
----------------------------------------------------------------------------------------------------------------
First off - I wasn't sure if I should call this a remix or a new model. It is completely based on the SBox by Michal Fanta, but I designed this model from scratch. I set it as a remix since its so heavily based on his design.
I found his design and really liked the idea so I decided to print one for myself. Upon completing it I tried using a 3mm rod cut to the lengths I needed and I really didn't like that approach. I also noticed that you needed 24 pieces of 5 different lengths of rod. Some users also pointed out missing chamfers and bevels. So… I set out to challenge myself in Fusion360 and just design my own model.
First, I wanted to reduce the BOM so you didn't need so many different lengths of screws - and I wanted to use only screws. Second, I wanted to make the thing parameterized so I could make any size I wanted. Third, I just wanted to simplify the design and make something I could print for myself and use. Last, I wanted there to be options so you could use the box whichever way you wanted.
Note: All sizes listed are interior deminsions. Please add 25mm in XY and 5mm in Z for exterior.
---------------------------------------------------------------------------------------------------------
Let me cover print settings first:
15% infill works well for a strong enough box that is quick to print - you can use more if you want!
The pictures use grid, but I recommend gyroid
2 walls is strong enough, but use more if you want a strong box
I personally used a brim of 5mm with 0.25mm separation, but there is still a bit of manual removal that is tedious. You definitely don't need to do this if your bed adhesion is good.
No supports are required
All my pictures are PLA, but I am positive any material would work great. Use PETG or ASA/ABS if you need these go outside!
If you print at layer heights bigger than 0.2 the holes will obviously become less circular. This might not be the worst because the less circular the holes the more the screws will grab. I have not tested printing at taller layer heights (or with a 0.6mm nozzle) but I plan to and I will report back.
----------------------------------------------------------------------------------------------------------------
BOM:
To get a box that is hinged and clasps shut you need:
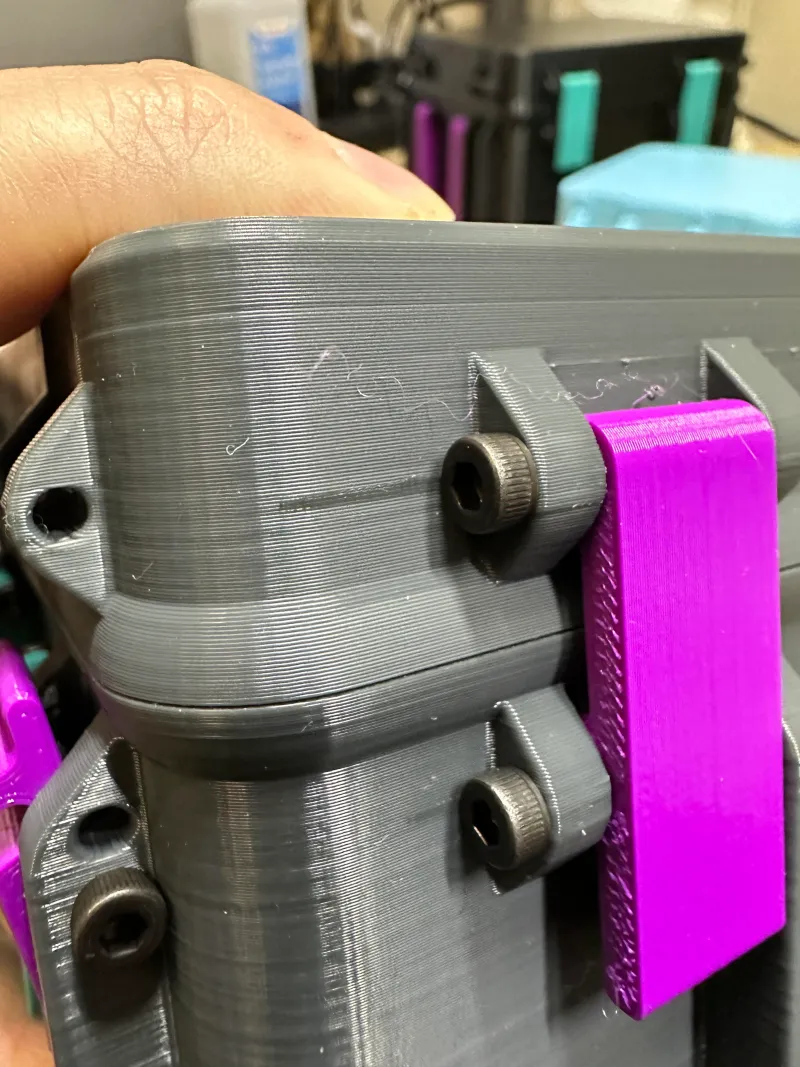
6xM3x25
To run the side claps you need an additional:
8xM3x25
For the side handles you can use either:
4xM3x15
or
4xM3x35
Note: If you attach the side claps on the top of the box you will need to use the M3x35 approach
For front handles:
Replaces 2x of the 6xM3x25 screws from the front with 2xM3x35
Confirguations:
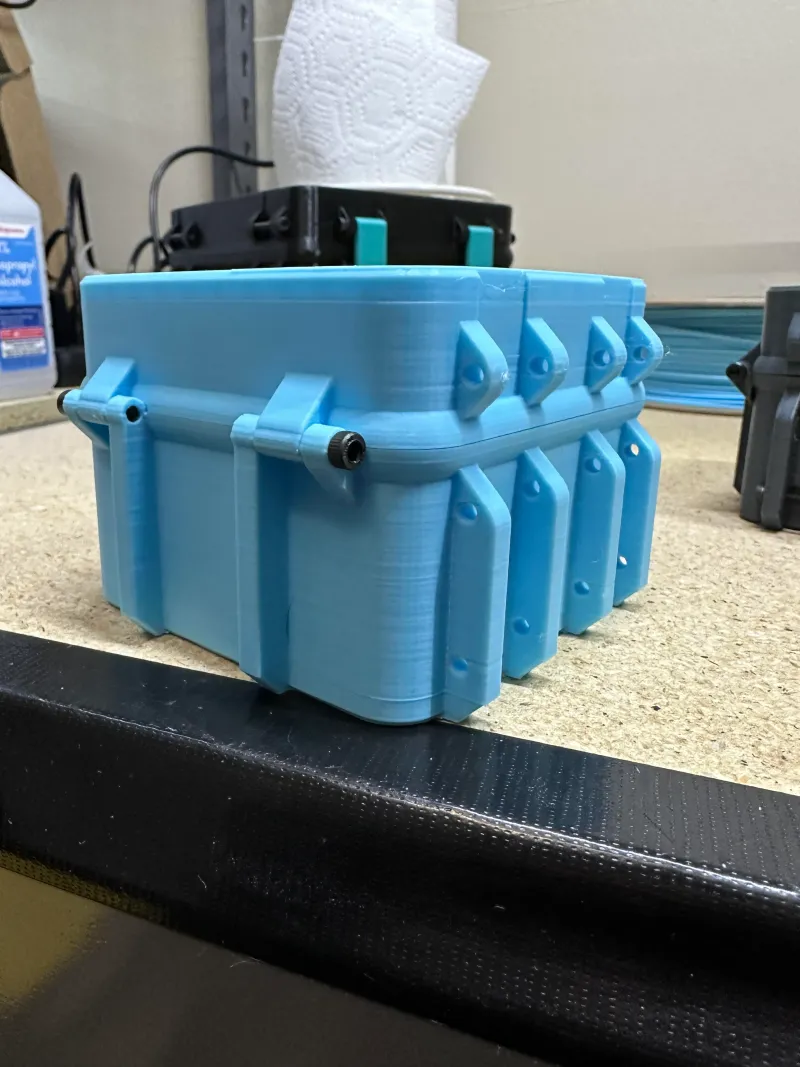
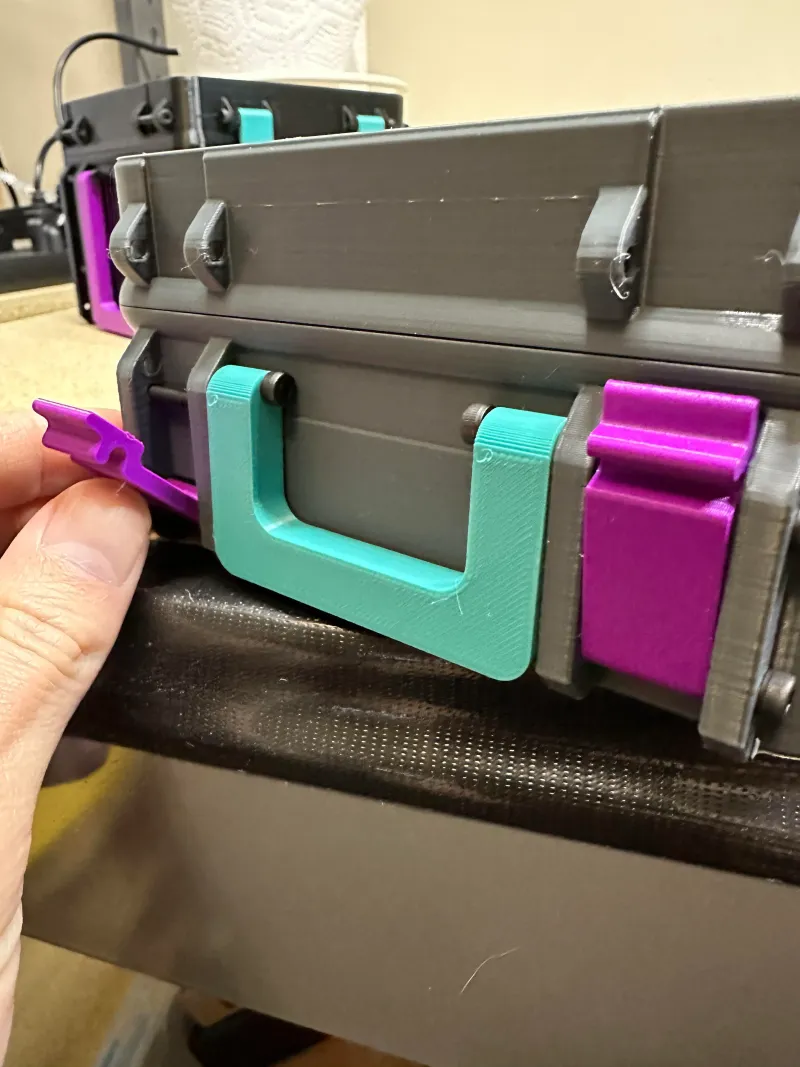
You can run the boxes with just hinges and front clasps, this is personally how I will run them as I don't find a need to have the handles or side claps. (Please note the one in these pictures is not the final design, but still shows what I mean).
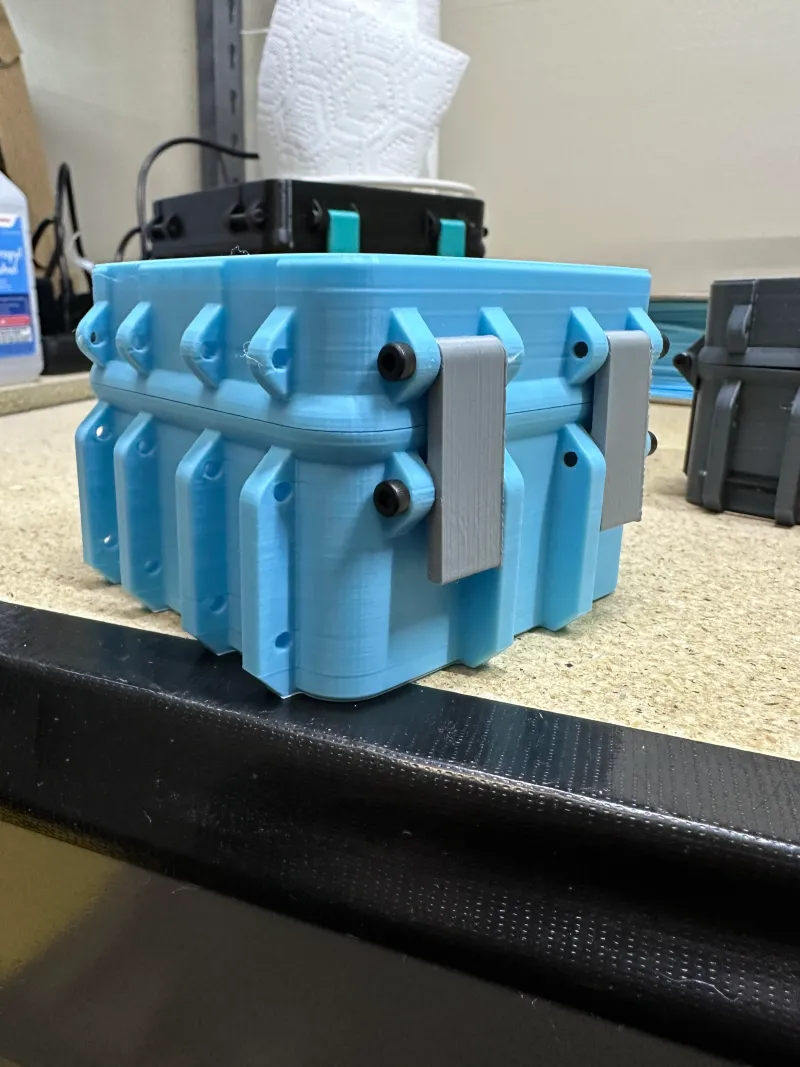
You could also choose the use the side claps. You can either attach them to the bottom of the box, which would clip onto the top of the box below it OR to the top of the box, which would clip to the bottom of the box above it. The stack on the left shows the first option and the stack on the right shows the second.
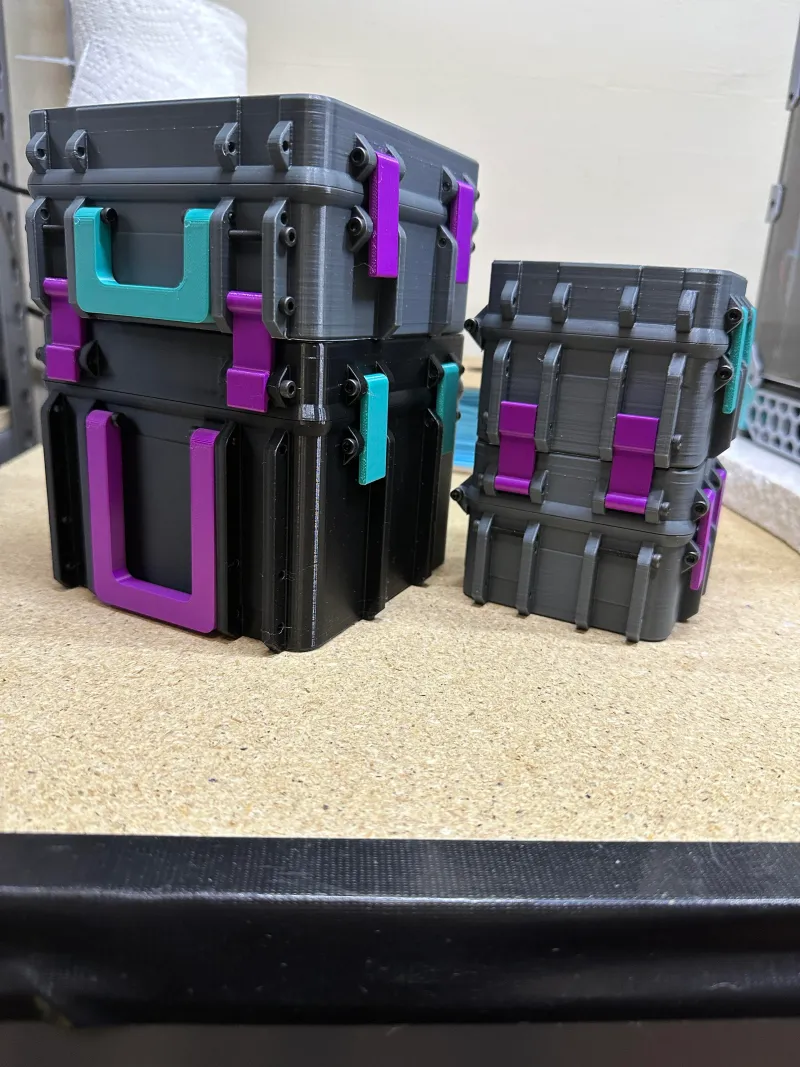
If you are going to stack them the prefered way is probably the first option, because when the clasps are on the top you have to flip them out of the way to open the box which can be annoying. The reason I left this as an option though is that in either configuration there is a screw that the clasp can attach to when not attached to a second box. If you run the clasps on the top, they will secure down and provide a bit more closing force for the box:
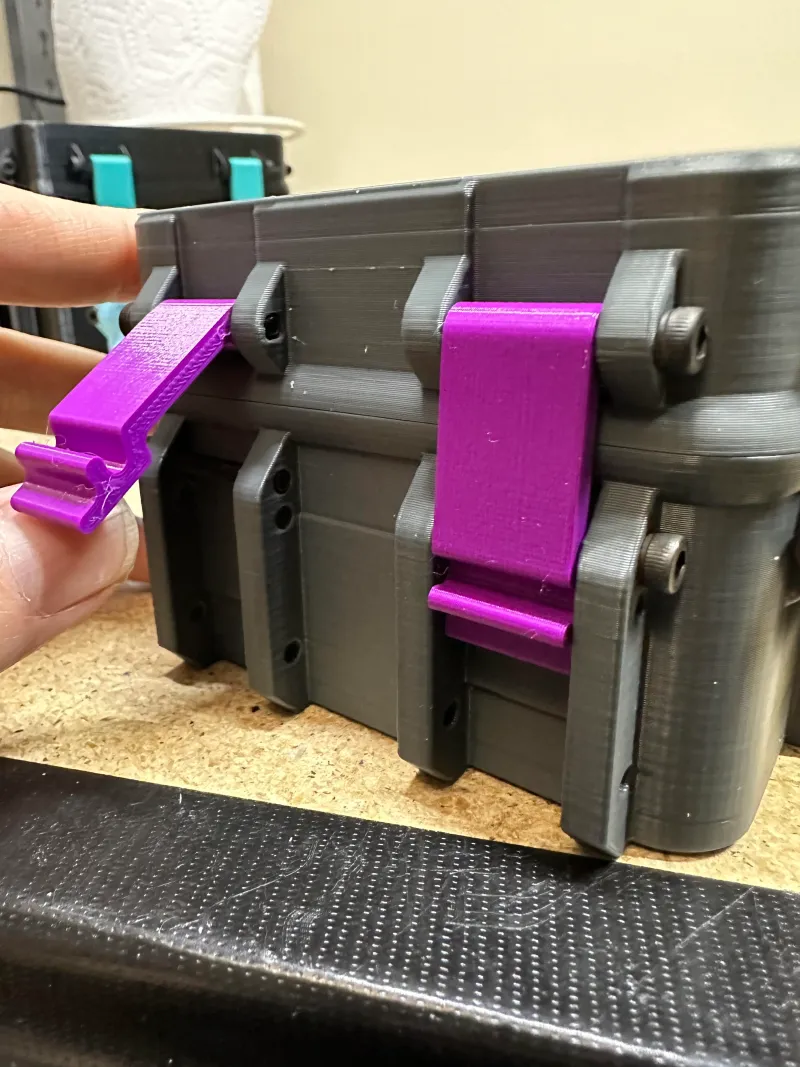
This shows when they are on the bottom and they can clip out of the way:
That is pretty much all I have to say. I mostly wanted to design something for myself, but hopefully others can get some use out of it as well. I wanted a box like the SBox but with a smaller BOM and I hope 1 (or potentially only 2) sizes of screw does that! Please let me know if there is a size you want to see that I didn't upload or a change youd like to see! Actually, one final note, if you use cap screws like I did it may actually scratch the box as you screw it in. I can add a bevel for this, but I found it unecessary for my personal use. A different type of screw head may also solve this problem:
Tags
Model origin
The author remixed this model.


