Skip to content

08-16 CHEVY CRUZE DEFROST GAUGE POD RHD

Advertising
Advertising
?
Creation quality: 0.0/5 (0 votes)
Evaluation of members on the printability, utility, level of detail, etc.

  • 1.7k views

License
3D design format
STL Folder details Close
  • cruze defrost gauge pod Rhd.stl
  • cruze defrost gauge pod jig2 Rhd.stl
  • cruze drill jig Rhd.stl

Learn more about the formats

Publication date 2023-03-01 at 02:35
Design number 1091516

littlebluescort

3D printer file info

3D model description

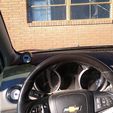
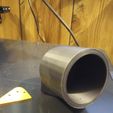
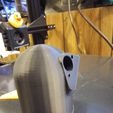
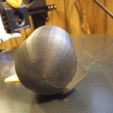
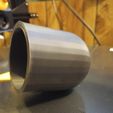
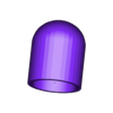
Turn your cruze into an information center with this gauge pod design. Allows you to retain the functionality of the defrost vent and gives it a new look.

Model is for RHD
Pictures represent LHD

Start with removing your existing defrost vent. Using your newly printed drilling jig. Place drill jig on top of defrost vent align on top Left of vent and your set to drill. Drill three 1/8 in holes the jig provides. Using #25 drill bit by hand drill the 2 outside holes of the defrost vent. The outside holes fit 4mm x16mm screws. Next using a dermal or (cutting device) carve out the center hole to desired size for the gauge wiring harness. Next using the #25 Drill bit on the newly printed defrost vent gauge pod by hand clean up the 2 mounting holes. Using the 4mm x 16mm screws slowly thread them into the holes using a back-and-forth movement to create threads for the screws. As the screw is doubling as a thread tap. Now you are able to mount your newly 3d printed defrost vent gauge pod.
The small hole on the bottom face of the defrost vent gauge pod is for a 3mm set screw. Using the 1/8 drill bit, drill the small Pilet hole. Using the 3mm set screw place in hole using the back-and-forth motion to thread the set screw into place enough to hold the gauge in place. You are now ready to show off your newly 3d printed defrost vent gauge pod.

Tools needed.
Dermal or (cutting device) for center wiring harness hole.
1/8 drill bit
#25 drill bit

Hardware needed to mount gauge pod to defrost vent.
4mm x 16mm button head socket screw
3mm x 3 set screw (3d printer set screw)
Gauge pod has a small hole on the bottom designed to use a 3mm set screw to secure your gauge into the gauge pod.

Depending on the gauge you use and the filament you use for the pod you may have to sand the inside of the gauge pod for the exact fitment for your gauge.
PLEASE DO NOT FORCE YOUR GUAGE INTO THE POD
This may lead to damage to your newly printed gauge pod.

3D printing settings

Printed in ASA
Temp was at 240-260 nozzle.
Bed 100
Enclosure recommended.
Print speed depends on your machine/slicer setting.
Infill at 30-40
Print time 4-6 hrs

Advertising


Issue with this design? Report a problem.

Would you like to support Cults?

You like Cults and you want to help us continue the adventure independently? Please note that we are a small team of 3 people, therefore it is very simple to support us to maintain the activity and create future developments. Here are 4 solutions accessible to all:

  • ADVERTISING: Disable your banner blocker (AdBlock, …) and click on our banner ads.

  • AFFILIATION: Make your purchases online by clicking on our affiliate links here Amazon.

  • DONATE: If you want, you can make a donation via Ko-Fi πŸ’œ.

  • WORD OF MOUTH: Invite your friends to come, discover the platform and the magnificent 3D files shared by the community!


Sharing and downloading on Cults3D guarantees that designs remain in makers community hands! And not in the hands of the 3D printing or software giants who own the competing platforms and exploit the designs for their own commercial interests.

Cults3D is an independent, self-financed site that is not accountable to any investor or brand. Almost all of the site's revenues are paid back to the platform's makers. The content published on the site serves only the interests of its authors and not those of 3D printer brands who also wish to control the 3D modeling market.

100% secure payment by credit card, PayPal, Apple Pay, Google Pay, etc.
View all payment options.