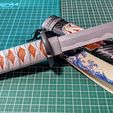
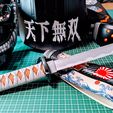
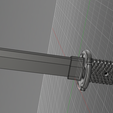
This prop knife is modeled to be as much accurate as possible in two different ways:
- The game model
- A real tantô knife
I pictured it like a high quality but mass produced knife from Kendachi (a main blade arms corporation in the game) so I had to adjust some things to make it work for the real world. So if you want to, you can assemble and disassemble all parts with just one screw like in a real japanese sword.
The files are the following:
- CP2077 Tanto Blade Split Point: Blade front part
- CP2077 Tanto Blade Split Tang: Blade back part
- CP2077 Tanto Habaki: Blade mounting
- CP2077 Tanto shim: Print this x2
- CP2077 Tanto Tsuba: Hand guard
- CP2077 Tanto Tsuka: Hilt
- CP2077 Tanto Kashira: Hilt pommel
I recommend to print it in ABS-like resin, but FDM is also possible. If you print it in resin, be careful with the blade, it's pointy and kind of sharp.
I printed it in ABS-like resin, painted all parts and then mounted them using one screw/pin in the hilt (and one in the pommel). Last step was to make the handle wrapping.
You'll need the following hardware if you don't want just to glue the parts:
- 3M threaded rod to reinforce and align the blade.
- (1) 5Mx15mm plug screw for the hilt (Tsuka)
- (1) 4M plug screw or M4 hex socket screw for the pommel (Kashira)
- 8mm cotton/non-streching flat lace for the handle wrapping (Tsukamaki)
ASSEMBLY:
First decide if you want to glue all together or you are going to use screws.You can dry assembly it to check fittings first.
Insert a M3 rod in the blade front part and glue the back part (trim the rod if needed). Insert the habaki from the tang. Put a shim and insert the hand guard (Tsuba). Put another shim and insert the hilt (Tsuka). Attach the pommel (Kashira).
Although parts are kind of threaded where needed, you'll have to carefully put the screws in. Like making a new thread, don't use too much force and go back and forth several times.
Habaki (blade mounting) covers the gap where you glue blade parts. It has a small notch inside to make sure it is correctly inserted.
Shims are for adjusting all the parts. You have to put one in both sides of the hand guard (Tsuba) and you can print them thicker or thinner (or just sand) to eliminate play between parts.
The handle wrapping lace ends under the pommel, using the cut at the end of the handle, just use a drop of glue to secure it and then put the pommel in place. I had to made up this system, as the wrapping in the game, unlike a real tantô, has no knots and it's the same in both faces.
UPDATE (18/07/2023):
By popular request I've uploaded the files needed for the scabbard/saya that you can see in the pictures. I tried to copy the size and shape of an actual tanto sheath, but with some cyberpunk details. Kendachi is one of the main blade makers of the cyberpunk universe, so i put their brand in the top ring.
Warning! This part is NON CANON stuff, it's JUST MY CREATION to keep the blade safe when cosplaying or carrying the knife (and it looks cool too in a showcase). It's inspired by CP20077 but is not part of the actual game.
File list:
- Saya x_4: Main part in 4 pieces for smaller printers.
- CP2077 Tanto Saya2: Scabbard pommel.
- CP2077 Tanto Saya3: Top ring with Kendachi brand logo and lanyard loop hole
Just align and glue everything together.
Don't hesitate to ask any question. And if you print it, leave me a Make.
This prop is intended for cosplay or decoration, not as a toy. also NOT INTENDED FOR COMMERCIAL USE. Reselling this model is not authorized in any way.

/https://fbi.cults3d.com/uploaders/24701639/illustration-file/bb9a578b-a3cf-4b14-91a6-ba9572178798/PXL_20230225_185649767~2.jpg)
