Pumpkin Walking


Pumpkin Walking
Published 2017-03-28T11:18:52+00:00
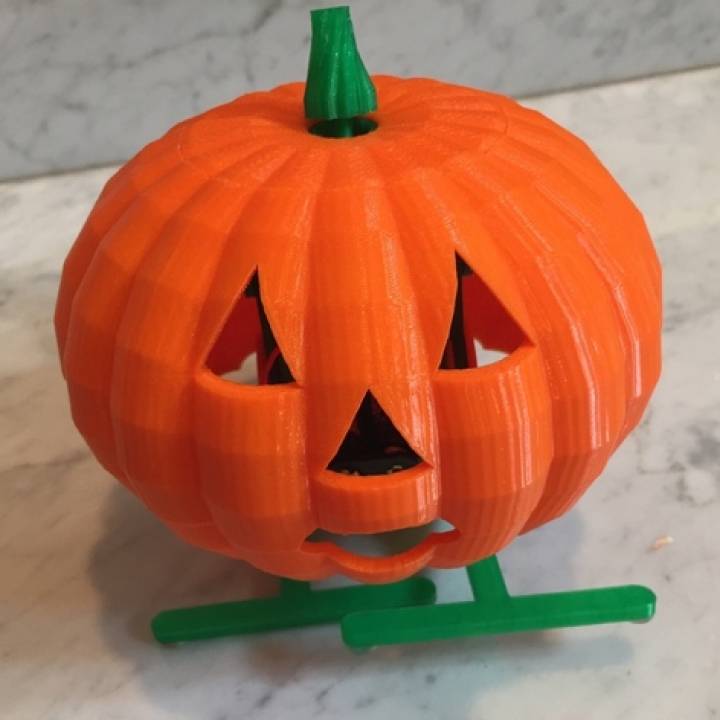
Just in time for Halloween, my wife desired a Walking Pumpkin for an office Halloween Party, so this thing was my first attempt.
With a simple flip of the stem, this pumpkin will walk until the stem is switched off, the batteries run out, an obstacle is encountered, or any gravity induced fall is encountered (sigh, I've encountered them all).
So what does my wife and her office colleagues think? They love it! Life is good! Thus if you too find yourself, significant other, office colleagues, etc., in dire need of a walking Halloween Pumpkin for your own Halloween Party (and by gosh who wouldn't?) , then this thing is for you!
Video here: https://www.youtube.com/watch?v=U_h4p3p5EaQ&index=1&list=UUv_zm49u-RjnCJVwhUO-ecA.
UPDATE 1:
Thingiverse user Alzibiff used a different motor with a longer shaft, so I've uploaded a new left side entitled "Side Left New.stl" that includes a hole that allows for the longer shaft. Thanks Alzibiff!
Designed using Sketchup 8, and printed in PLA on a Makerbot Replicator 2 using Makerware 2.3.3.42 "Standard" settings.
Hope you like it, and Happy Halloween!


Parts I purchased:
1) 6VDC 45 RPM Pinky Finger Sized Gear Motor 1" Long x 15/32" x 3/8" (amazon).
2) Battery Holder (Radio Shack 2700398).
3) Switch (Radio Shack 275-0624).
4) 2 "AAA" batteries.
Print the PLA parts using Makerware "Standard" settings or equivalent.
Test fit and trim, file, sand, etc. all PLA parts as necessary for smooth movement of moving surfaces, and tight fit for non moving surfaces. Depending on the colors you chose and your printer settings, more or less trimming, filing and/or sanding will be required.
Install the battery case on the top side of "Bottom.stl"using double sided tape or small dots of thick cyanoacrylate.
Use two small dots of thick cyanoacrylate to glue the pumpkin top to the pumpkin in the orientation shown on "Assembly.skp".
Wiring is pretty straight forward, however you'll need soldering skills and equipment. If you have questions don't hesitate to comment or message and I'll respond as soon as possible. Basically, the battery holder black wire is soldered to the motor "-" terminal. Next, solder a wire between the motor "+" terminal and either terminal of the switch. Finally, solder the battery "+" terminal to the remaining terminal of the switch. I found that there is enough wire in the battery holder to complete the wiring without the need for any additional wire. After assembly, if your pumpkin walks backwards, turn the shell around.
There's still time for questions before Halloween, so if you have any, comment or message me and I'll do my utmost to respond.
Hope you like it, and Happy Halloween!
| Date published | 28/03/2017 |
| Technology | FDM |