3D model description
UPDATE 8/29/2019 - added untested 35mm top plate
UPDATE 3/29/2019 - added missing base plate files
Another "resolution" I have this year is to finally digitize all my old medium format film negatives. Commercially available film scanners that support 120mm film are either expensive or low resolution. I designed this film scanner as a way to use a regular digital camera to capture the negatives so that they could be inverted in Photoshop.
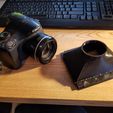
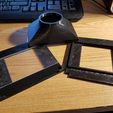
This is a series of plates and a camera hood for scanning 120mm medium format negatives using a digital camera and a light table.
The bottom plate requires the use of a sheet of 0.093" thick acrylic, I got mine from Home Depot for less than $5.
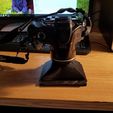
This should in theory work for any camera, only the lens hood would need adjusted for your model. The included lens hood is for a Canon SX40HS point-and-shoot digital camera. It sits just inside the lens, against the plastic that surrounds the lens element.
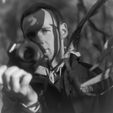
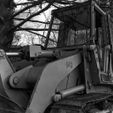
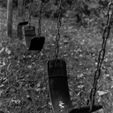
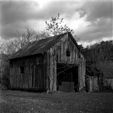
Using the SX40 in manual shooting mode, the focus is set to about 1.5 inches, ISO 100, aperture at 2.8. I adjust exposure by changing shutter speed. I also use the self timer at 2 seconds to be sure I do not shake the camera when capturing the image. The attached photos were scanned in this manner. The original scans are much better quality than seen here, you can easily make out the film grain.
Also included is a parametric model of the lens hood that you can customize in SCAD for using a different camera. This is now a universal film scanner for medium format film! You can download the latest build of SCAD and enable the customizer, or just edit the first few variables yourself - it's easy!
The lens hood has been updated so that it no longer sits inside the lens touching the glass. Now the rim of the lens should sit on the small ring with the cylinder surrounding the lens housing by 15-20mm. this will stabilize the camera and help block light.
3D printing settings
Make sure to use a filament that is as opaque as possible, and ideally has a matte finish. I printed my hood in black PLA and it works fine, just make sure you use an opaque filament. You can also paint the pieces with a matte black spray paint to help.
(I printed the infill on my top plate too low in the photo, so make sure you print with enough that the top layers survive.)
WHAT TO PRINT:
-6x9 Bottom Plate
-Top plate with dimensions that match your negative
-Lens Hood (suitable for your camera)
YOU WILL NEED:
-Light Table
-Sheet of 0.093" thick acrylic (I got mine from Home Depot for less than $5.)
-Digital camera with manual mode (focus and exposure)
BUILD INSTRUCTIONS:
Print the 6x9 bottom plate and cut a piece of acrylic 61.5mm wide and 110mm long. The acrylic is glued into the recess on the top of the bottom plate. You may need to sand the sides of the acrylic to fit depending on your tolerances. I glued mine in with Goop brand adhesive.
You can also glue a thin piece of black felt on the bottom of the top plates to prevent scratching the negatives, just leave enough room in the center for the light so shine through the negative.
HOW TO USE:
-Place the bottom plate directly on your light table.
-Place the negative to be scanned on the bottom plate
-Place the top that matches the negative dimensions on top of the negative and bottom plate. The corners on the bottom plate will meet up with the notches on the top plate to ensure the correct position
-Place the lens hood on the top plate. The lens hood will fit around the rectangle on the top plate to ensure the correct position.
place your camera onto the lens hood
-Adjust focus, exposure, and shoot!
-Use your favorite image editing software to invert colors and make corrections.
-Enjoy your high-res digital scan!
Notes:
While the bottom plates are standard, you will probably need to create a lens hood that matches the lens diameter and depth requirements for your camera.

/https://fbi.cults3d.com/uploaders/13329179/illustration-file/a700f5dd-c25d-443e-8eb1-98026f205529/620c28d9da30a282641b9e82783c7e22_display_large.jpg)

