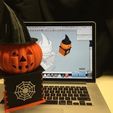
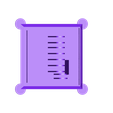
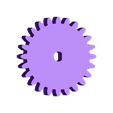
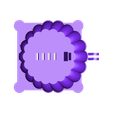
Carefully study "Assembly.skp". For clarity, the icons (skull, cat, ghost and moon) are not included in this diagram.
Parts I purchased:
1) 6VDC 45 RPM Pinky Finger Sized Gear Motor 1" Long x 15/32" x 3/8" (amazon).
2) Coaxial Power Jack (Radio Shack part number 274-1583).
3) 3.0 Vdc Power Supply (Radio Shack part number 273-315 with the "N" style plug 273-345, you get one free with the power supply).
Print the PLA parts using Makerware "Standard" settings (.2 mm layer height, 10% infill, 2 shells) in the color(s) of your choosing. When printing "Top.stl", I started printing in black, then paused the printer at 4.2 mm, and changed to orange so that the base of "Top.stl" was black, and the bottom of the pumpkin was orange. If you cannot pause your printer, I can separate these two components if necessary, but you will be required to glue them together for final assembly, just comment and I'll provide these pieces separately.
Test fit and trim, file, sand, etc. all PLA parts as necessary for smooth movement of moving surfaces, and tight fit for non moving surfaces. Depending on the colors you chose and your printer settings, more or less trimming, filing and/or sanding will be required. I strongly recommend completely assembling the crank shaft assembly (shown in the center of "Assembly.skp") to make sure the crank shaft arms fit tight and the connecting rods move freely on the crank pins prior to final assembly in "Base.stl" as shown in "Assembly.skp".
Use two small dots of thick cyanoacrylate to glue "Hat.stl" to "Pumpkin Body.stl" in the orientation of your choosing.
The four icons (skull, cat, ghost and moon) have insets ("Skull Insets.stl", "Cat Insets.stl", "Ghost Insets.stl" and "Moon Insets.st" respectively) for the eyes, nose, etc. The insets are optional, but I used a rubber mallet to press the insets into the appropriate icons.
The four icons (skull, cat, ghost, moon) press fit onto the ends of each of the four "Connecting Rod.stl" pieces. Again, prior to final assembly, make sure each icon press fits onto its respective connecting rod. For final assembly, I gripped the connecting rod with needle nose pliers and press fit the assembled icons onto its respective connecting rod. If necessary, place a very, very small dot of thick cyanoacrylate to hold the icons in place. Do not apply too much cyanoacrylate so that you can remove the icons if necessary.
Lubricate all moving surfaces with light machine oil.
Wiring is pretty straight forward, however you'll need soldering skills and equipment. Basically, solder a 6" red wire between the gear motor "plus" terminal and the coaxial power jack "Center" terminal, then solder a 6" black wire between the gear motor "minus" terminal and the coaxial power jack "Shield" terminal. Make sure the wires do not interfere with the crank shaft components during operation.
If you have questions don't hesitate to comment or message and I'll respond as soon as possible.
Hope you like it, and Happy Halloween!

/https://fbi.cults3d.com/uploaders/13550170/illustration-file/f18deb29-2624-460f-ac02-a22527cfdad6/Visions_preview_featured.jpg)


