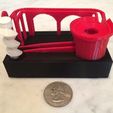
Study "Assembly.skp". If you don't have Sketchup 8 (it's free), you can view "Assembly.stl" in Makerware, just don't print anything from it.
Obtain the following parts;
1) Gear Motor - "Amico 300RPM 6V 0.45A High Torque Mini Electric DC Geared Motor for Robot DIY" at Amazon.com. WARNING!!! Don't buy this motor, see update 2) below.
2) Coaxial Power Jack - Radio Shack part number 274-1583.
3) 1.5 Vdc Power Supply - Radio Shack part number 273-315 with the "N" style plug (273-345, you get one free with the power supply).
4) Single "AA" batter holder - Radio Shack part number 270-0401.
5) SPST micro switch - Radio Shack part number 275-0624.
6) "AA" battery.
7) 9.5mm (3/8") ball bearings - I found mine at Ace Hardware.
Print "Gear Motor.stl" and "Gear Crown.stl" in Makerware "Fine" resolution. I also printed "Base.stl", "Track Bowl.stl" and "Gear Worm.stl" in "Fine", but it is not a necessity. "Track Bowl.stl" printed in Makerware "Standard" has larger track steps and thus is a little noisier, and can cause a marble to jump off the track more frequently. After printing, carefully trim away the hold down pads (the disks at the four corners of "Base.stl" and "Track Bowl.stl) and any stray filament strands with a modeling knife.
Test fit the motor, coaxial power jack, micro switch, battery holder and "Gear Crown.stl" in their respective compartments in "Base.stl" and sand, file and/or trim with a modeling knife for a smooth fit if necessary. Test fit "Gear Worm.stl" and "Gear Crown.stl", and sand, file and/or trim with a modeling knife for a tight but removable fit necessary.
Place a small amount of white lithium grease on "Gear Crown.stl" then install in its compartment in "Base.stl". Petroleum jelly may work as a substitute for the white lithium grease buy I did not test it.
Next, solder a wire between the motor minus terminal to the coaxial power jack "center" terminal. Solder the red wire from the battery holder also to the coaxial power jack "center" terminal. Solder the black wire from the battery holder to to the coaxial power jack "switch" terminal. Solder a wire from the "shell" terminal of the coaxial power jack to either of the terminals on the micro switch. Solder a wire from the remaining terminal of the micro switch to the motor plus terminal. This wiring will allow the Marbelvator "Mini" to be turned on and off, and will disconnect the battery with the 1.5 VDC power supply connector is plugged in.
Press "Gear Motor.stl" on the motor then insert it into its compartment in "Base.stl".
Install a AA battery into the battery holder then insert it into its compartment in "Base.stl".
Snap "Track Bowl.stl" onto "Base.stl" aligning the hole in "Track Bowl.stl" with "Gear Crown.stl". This is a very snug fit as the motor is held in position by the base of "Track Bowl.stl".
Test run the motor to make sure "Gear Crown.stl" is turning with ease.
Press "Gear Worm.stl" into "Gear Crown.stl" and turn on the motor to make sure "Gear Worm.stl" is turning with ease.
If you use the 1.5 VDC power supply, set the "N" size connector for positive tip.
Notice at this point that every part can be pressed apart as opposed to being pulled apart via access holes in the gears and base. Pulling apart can break the parts (e.g. pulling "Gear Worm.stl" out of "Gear Crown.stl").
Place a marble or two (three, four, etc.) into the bowl, and Marblevate.
UPDATES:
1) I received a comment about a "non-modal" issue with "Track Bowl.stl". I searched via wire frame view and found a few stray line segments and corrected them. The result is "Track Bowl 1.stl". You may try this if your slicer has trouble with "Track Bowl.stl". Both print fine with Makerware 2.3.3.42.
2) I have ordered many of the "Amico 300RPM 6V 0.45A High Torque Mini Electric DC Geared Motor for Robot DIY" from Amazon.com and have discovered they deliver a 45RPM motor in a 300RPM package. I currently recommend you do not order this motor from Amazon.com as their only recourse is a refund after return, not a correct part. In searching for a suitable replacement, I've found a Pololu motor that I have ordered and will test before announcing the replacement. Sorry, I thought Amazon.com was more reliable than what I experienced with this motor.
3) The Pololu motor works. Part number 2366.

/https://fbi.cults3d.com/uploaders/13550170/illustration-file/4daa3e6e-a217-431f-b10b-1845fabce6a3/photo_preview_featured-3.jpg)


