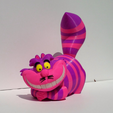
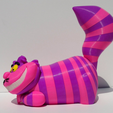
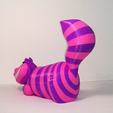
Printer: FlashForge Creator X
Rafts: No
Supports: No
Resolution: .2mm
Infill: 10%
Notes:
See important notes in the 'extra notes for printing' section for the black eyes and whisker pieces. I printed all the parts except for the head with one shell. I printed the head with two shells due to the 'extreme' overhangs (60 degrees max) which I am always cautious with.
Colors
pink:
face
ear_r
ear_l
arml_1
arml_3
arml_5
arml_7
armr_1
armr_3
armr_5
armr_7
arm_bump (two copies)
tail_2
tail_4
tail_6
tail_8
body_1
body_3
body_5
body_7
body_9
body_11
body_13
body_bump (four copies)
purple:
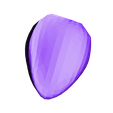
head
arml_2
arml_4
arml_6
armr_2
armr_4
armr_6
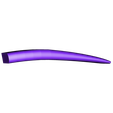
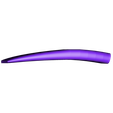
tail_1
tail_3
tail_5
tail_7
tail_9
body_2
body_4
body_6
body_8
body_10
body_12
body_14
white (or glow in the dark):
teeth_1
teeth_2
teeth_3
black:
eyebrow_r
eyebrow_l
eye_r
eye_l
whisker_l (three copies)
whisker_r (three copies)
yellow:
eyeball_r
eyeball_l
Extra notes for printing
Rafts are not required, except for the eye_r and eye_l parts due to the small sizes.
I use a Geckteck plate for adhesion and printed all other pieces with no brim or rafts.
Due to the narrow size of the whiskers, I printed them with 0% infill and 0 bottom layers. This allows them to be squeezed into the narrow whisker slots on the face. Alternatively you can simply sand them down to fit.
Extra copies of parts:
Three copies of whisker_r
Three copies of whisker_l
Four copies of body_bump
Two copies of arm_bump
Assembly
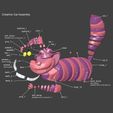
The assembly diagram below shows all connections. To keep the diagram somewhat readable, for the tail, body and arms I simply labeled the first and last piece for each of those sections. All numbered pieces are to be assembled in order.
Special notes to be aware of:
1-Take care to note left and right pieces. They look quite similar but are actually different.
2-The whiskers could be problematic if the model is resized. At the standard size, the whiskers actually fit quite well if you follow the whisker instructions above.
3-There is a fair amount of gluing to be done. I wound up gluing pieces in pairs, letting the glue settle a bit then gluing pairs together. Also, masking tape worked great in holding pieces together while waiting for the glue to dry.
4-Glue the tail together.
5-Glue the body together. See the diagram for the body_bump position.
6-Glue the body and tail together.
7-When gluing the arms, create each arm (including the arm_bump) without the hands. Glue the arms to the body. Interlock the hands together and then glue them between the arms. It's simpler than it sounds, but if you glue the hands first, you may not be able to fit the arms into the body.
8-Be sure that the bottom of the hands rest on the table surface, even with the body. When placing the head, the head will rest on the hands and fit into the body.
9-Push the eyes into the eyeballs, then glue the eyeballs, ears and eyebrows into the head.
10-insert the whiskers and teeth into the face. When inserting the teeth into the face, put in teeth_1 and teeth_3 first. Be sure they are all the way in and then insert teeth_2 between them.
11-Glue the face and head together
12-The last step should be to glue the full head/face to the body (the head is rotated), while the chin rests on the hands.
Note-The body and tail are hollow (I wanted to cut down on print time). If you are handy, you might consider putting a light inside the model!

/https://fbi.cults3d.com/uploaders/12888752/illustration-file/1466757796-6047-6005/Capture_d_e_cran_2016-06-24_a__10.39.40.png)


