Skip to content

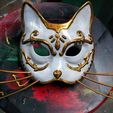
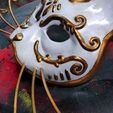
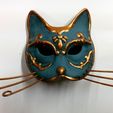
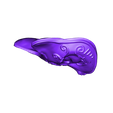
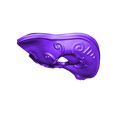
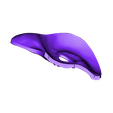
Splicer Cat Mask (Bioshock)

Advertising
Advertising
?
Creation quality: 5.0/5 (5 votes)
Evaluation of members on the printability, utility, level of detail, etc.

  • 27.9k views
  • 211 likes
  • 1.8k downloads
  • 3 collections
  • 4 makes

License
3D design format
STL Folder details Close
  • catmask.stl
  • catmaskleft.stl
  • catmaskright.stl
  • peg.stl
  • whisker1.stl
  • whisker2.stl
  • whisker3.stl

Learn more about the formats

Publication date 2018-02-06 at 18:16
Design number 20876

3D printer file info

3D model description

Love the power of vigors but afraid your fellow citizens of Rapture may not appreciate your thrilling new look? Well then have I got the mask for you. This half mask will cover your face and enthrall your friends, and keep those dinner invitations coming. Be the cat's meow. The talk of any ball or gala. Wear a mask today!

-=Design=- This mask was designed in Blender. I was inspired by Audrey2's amazing Bunny Mask, but was disappointed no one had modeled the cat mask yet. After tinkering for a long while with Blender and some paper mache copies, I think I've managed to come up with a fair replica.

-=Printing Instructions=- I've included the full mask, and a cut version in the files. Both versions should be printed with supports. If you print the full version you won't need the pins, otherwise you'll need to print three pins. Print 2 of each of the whiskers, one for each side. You should have a total of six whiskers. If you print with less then 20% fill make sure to increase the wall thickness. I have a rather large head so the mask was designed with that in mind. You may find you want to decrease the size slightly.

-=Construction=- For the cut version of the mask insert three of the pins in the provided holes. This will help you line up both halves accurately and ensure a good fit. It'll also help add some stability. The whiskers should slide right into the provided slots. Whisker1 is the lowest, Whisker2 is in the middle, and Whisker3 is the top. Normal super glue works just fine to hold the whiskers and mask halves together.

-=Finishing=- I printed my version in ABS, and used the hot acetone method to smooth out the design after a thorough sanding. Once all the pieces were glued together I used Squadron's putty thinned with liquid cement to fill in the cracks in the seams, applied another light sanding, and primed the mask gray. I then painted with acrylic hobby paint.

-=Enjoy=-

3D printing settings

If you're planning on sanding print at least 1.2mm wall thickness, and 10% fill.

Advertising


Issue with this design? Report a problem.

Would you like to support Cults?

You like Cults and you want to help us continue the adventure independently? Please note that we are a small team of 3 people, therefore it is very simple to support us to maintain the activity and create future developments. Here are 4 solutions accessible to all:

  • ADVERTISING: Disable your banner blocker (AdBlock, …) and click on our banner ads.

  • AFFILIATION: Make your purchases online by clicking on our affiliate links here Amazon.

  • DONATE: If you want, you can make a donation via Ko-Fi πŸ’œ.

  • WORD OF MOUTH: Invite your friends to come, discover the platform and the magnificent 3D files shared by the community!


Sharing and downloading on Cults3D guarantees that designs remain in makers community hands! And not in the hands of the 3D printing or software giants who own the competing platforms and exploit the designs for their own commercial interests.

Cults3D is an independent, self-financed site that is not accountable to any investor or brand. Almost all of the site's revenues are paid back to the platform's makers. The content published on the site serves only the interests of its authors and not those of 3D printer brands who also wish to control the 3D modeling market.

100% secure payment by credit card, PayPal, Apple Pay, Google Pay, etc.
View all payment options.