3D model description
UPDATE 2010-03-19
I\'ve added new pictures and completed the build and usage instructions. I spent my time on those so am still cleaning up the OpenSCAD files.
UPDATE 2010-03-05
I\'ve uploaded two new STL files. These supersede all previous versions:
- MouseMotel_0.3.stl
- MouseMotelLid_0.3.stl
These are for a 70 mm ID bottle. I used a 20 oz/591 mL one.
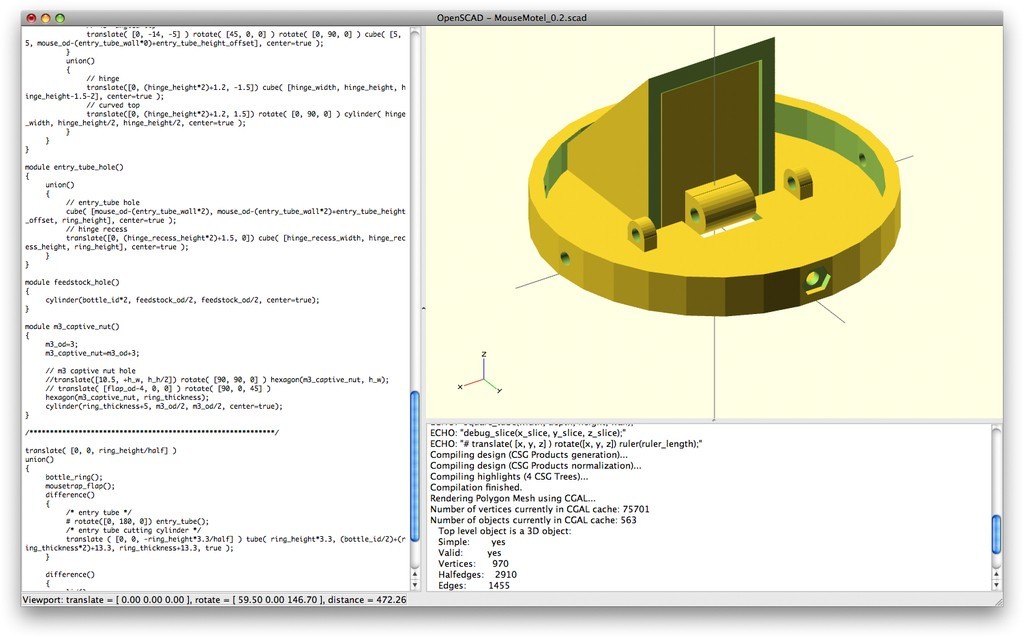
I\'ve uploaded an OpenSCAD screen grab of the parts assembled to show how they go together.
Once I clean up the MouseMotel.scad file I will upload it too.
UPDATE 2010-03-04
I\'ve uploaded an STL file of the main part. I still need to tweak the flap that contains the mouse.
UPDATE 2010-03-02
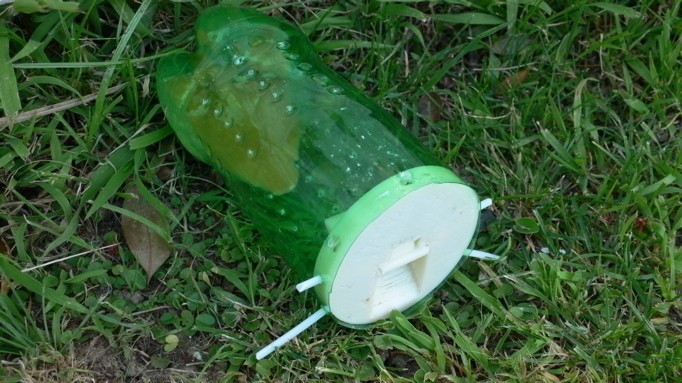
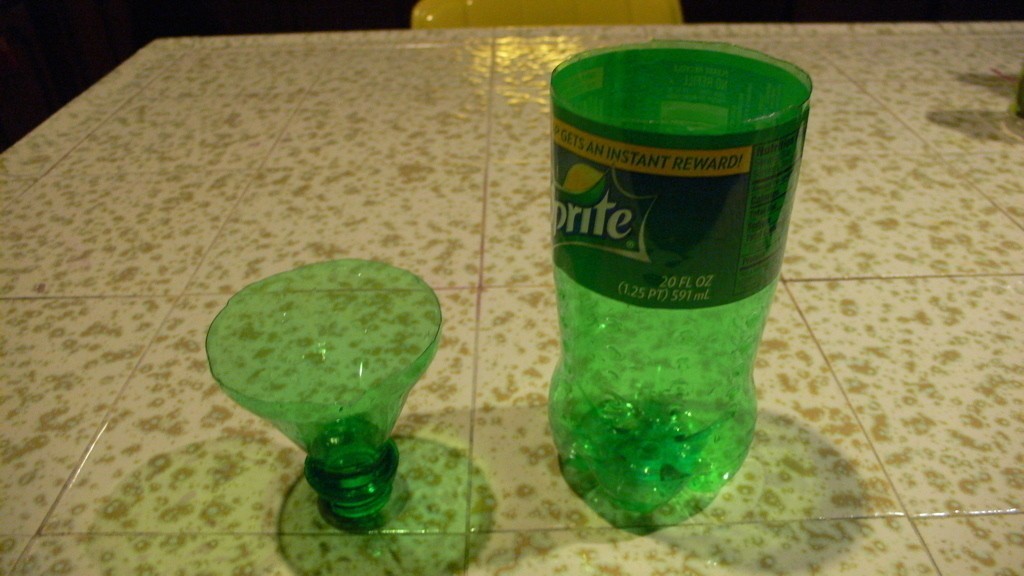
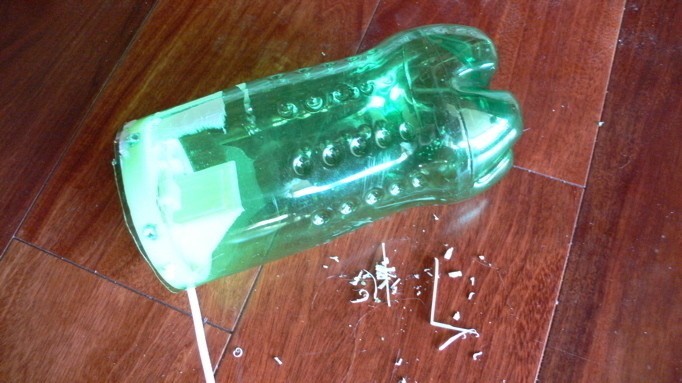
Look at the photo; mine works!
And it\'s still alive!
;)
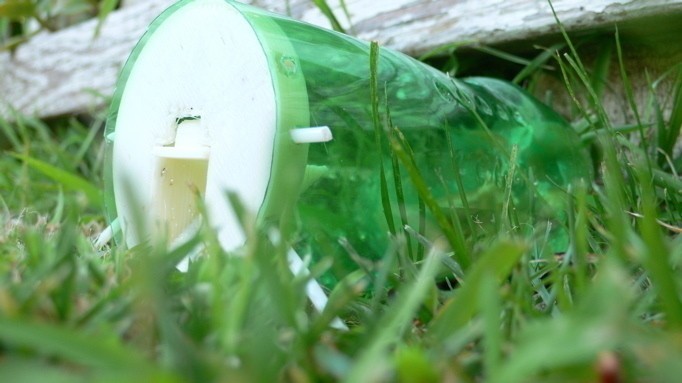
Seriously, since any garbage can contains a suitable enclosure for the trap, i.e., a soda or water bottle, I decide to focus on creating a printable one-way flap that can be fitted to a cut-down bottle. This reduces the size and number of parts necessary for the trap and because I used my favorite modeling tool, OpenSCAD, I parameterized the design so it can be used for bottles of various diameters.
Here\'s the basic concept:
- Cut off the top of your selected bottle
- Size and print a ring that fits inside bottle
- Print flap that sits inside the ring
- Insert 2 3 mm captive nuts into holes on outside of ring
- Insert ring into bottle
- Punch/cut holes for stabilizers
- Insert stabilizers into captive nuts
- Insert a length of 3 mm plastic feedstock to function as the flap hinge pin
- Place motel at desired location
- Bait motel with peanut butter
- Wait
The mouse will smell the bait, enter the one-way flap in the bottle to get it, and be trapped!
The stabilizers on either side of the bottle will keep it from rolling around as the mouse explores its new home.
I\'m still working on a few details, and will update this thing as I finalize them.
3D printing settings
Tools
* Scissors
* Utility knife
* M3 nut-driver
* Vise or locking pliers
* Drill bits
Materials Prep
1. Obtain a plastic soda bottle that is sized for your prey. I used a 20 oz/591 mL Sprite bottle with a 70 mm inside diameter (ID), for a theoretical mouse girth of 30 mm.
Squarely cut off the bottle top; do this right above the label top using scissors or a utility knife. You want to maintain as much of the flat bottle walls as possible, and following the label top makes it easy to cut the edge square.
Cut and thread two 100 mm lengths of ABS feedstock for use as stabilizers. If you'd rather use M3 bolts, you can skip this; I didn't have the correct length bolts, so I used feedstock instead. See below for feedstock threading instructions.
Cut one length of feedstock for use as the flap hinge pin. It should be about 20 mm longer than the ID of the bottle.
You want all feedstock as straight as possible, so if necessary, slightly bend it to remove any coiling curves.
Printing
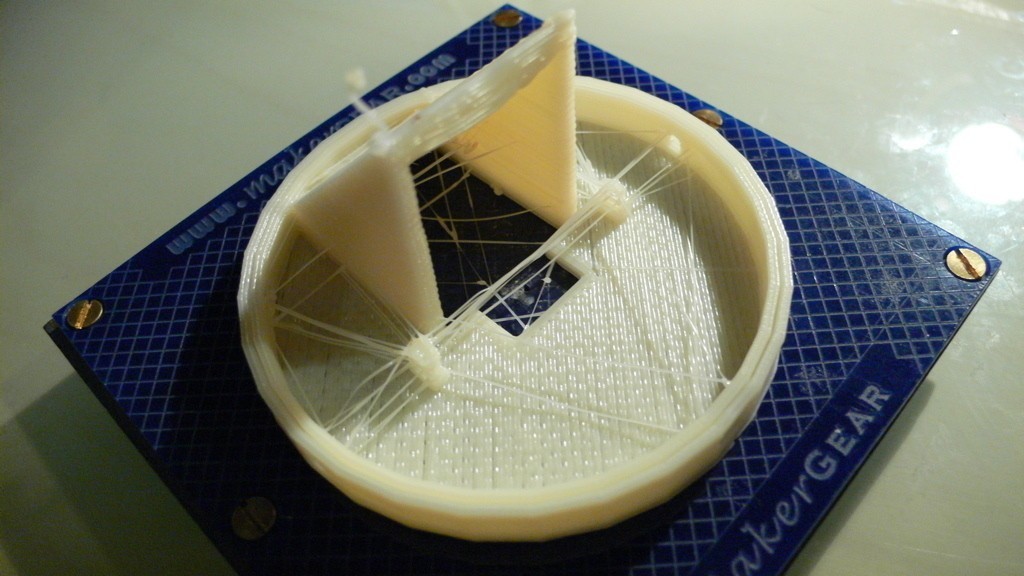
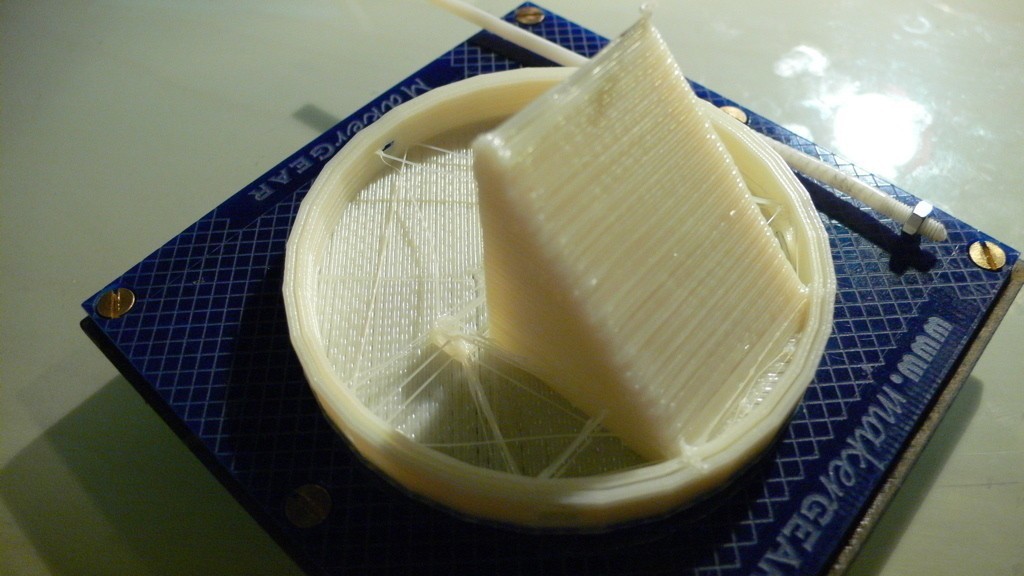
1. Skeinforge both MouseMotelLid_0.3.stl and MouseMotel_0.3.stl. I used an infill of 0.5.
Print MouseMotelFlap_0.3.stl.
Print MouseMotel_0.3.stl; it needs to be warp-free, so a heated build platform is recommended.
Assembly
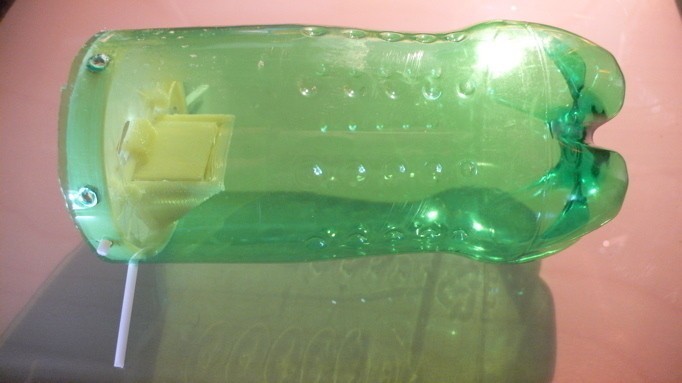
1. Clean up the holes in both prints with a drill bit and trim the flap and entry tube with a utility knife as needed. A few threads of plastic in the entry tube are OK, but this is the entrance to the motel and you want it to be as inviting as possible for your guest. The M3 nuts and hinge pin should fit snugly in the ring, but the hinge pin should fit loosely in the flap hinge. The flap hinge should fit loosely in the front cutout, and when closed it must lay flush on the top of the entry tube. This last fitting is important because if it doesn't lay flat the mouse could lift the flap and check out early.
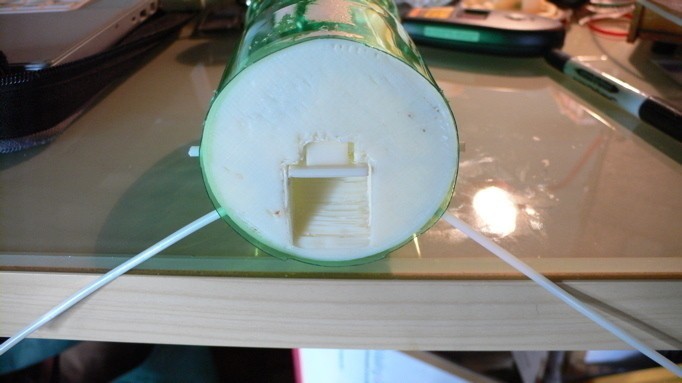
Place flat side of MouseMotel on horizontal surface and lower bottle over it.
Mark the bottle for the four holes: one for each side of the flap hinge pin, and two for the stabilizers.
Remove the ring and drill or punch the holes in the bottle at the marked locations. The holes should be slightly larger than the feedstock diameter.
Insert the flap hinge pin into one hole of the ring and guide it through a pillow block, into the flap hinge, through another pillow block, and finally into the opposite ring hole. The hinge pin should be flush with the outside of the opposite ring hole, such that one side protrudes out of the ring and the other doesn't.
Press M3 nuts into ring. If they are loose, use a drop of hot glue to secure them.
Place bait in bottle. I used a small dollop of creamy peanut butter.
With flat side of MouseMotel facing out, insert long side of feedstock hinge pin into correct hole in bottle. Tilt ring into bottle and align opposite ring and bottle holes. Push hinge pin into bottle hole. The ring should now be attached to the bottle with the hinge pin.
Rotate ring, and screw stabilizers entirely into captive M3 nuts. They will likely be long, so place MouseMotel on the edge of a table with the stabilizers facing downward. With the entry hole level, mark then cut stabilizers to the correct length. If bottle rocks, unscrew stabilizers as needed.
That's it! You are now a MouseMotelier!
Usage
As in the human hospitality business, "location, location, location" is very important to attract a guest. Look for mouse droppings or chewed paper goods and place it nearby.
As a good MouseMotelier, you should check the occupancy status at least once a day. Once you have a guest, place a piece of duct tape over the entry and take the MouseMotel to a release location. Once there, remove the duct tape and place the MouseMotel on the ground upside down. This will cause the flap to fall open and permit your guest to check out.
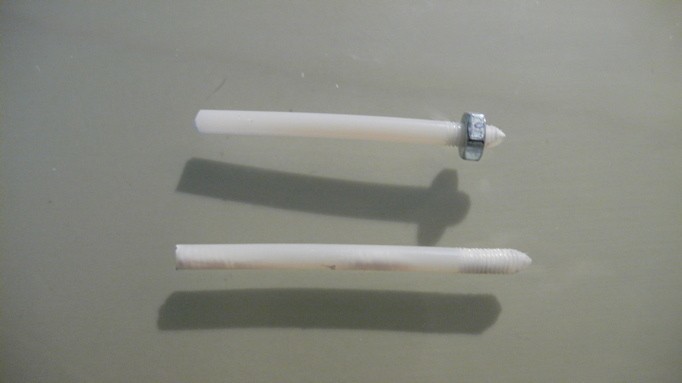
Threading 3 mm ABS Feedstock FTW!
This is a little tricky, but if you take your time and don't force things, you can do it. If you don't get it the first time just cut off the FAIL and try again. See the photo for finished examples.
Taper one end of feedstock using 320 grit sandpaper or a nail file; it should be slightly conical.
Secure the non-tapered end in a vise or locking wrench. Don't squeeze too hard otherwise the ABS will deform.
Place an M3 nut in a nut-driver and insert nut into tapered end of feedstock. A nut-driver works better than a wrench because the nut remains flat against the bottom. This makes keeping the nut perpendicular to the feedstock easier so you are less likely to strip or angle the threads.
Slowly and firmly turn the nut-driver clockwise to start threading the feedstock. Ensure the nut is perpendicular to the feedstock.
After completing two revolutions, turn the nut-driver counter-clockwise one revolution and blow on the feedstock to clear the feedstock threads of ABS shavings.
Continue this until you have threaded enough feedstock. Ten turns results in about 7 mm of threads.
Kustomizing
Koming soon...
:format(webp)/https://fbi.cults3d.com/uploaders/13708965/illustration-file/13c452ac-4d20-41ad-bc3a-1ae02e215a25/mouse-motel-with-treats_display_large_display_large.jpg)