Skip to content

Whirligig Flying Spinner - Flies 30 ft (10 m)

Advertising
Advertising
?
Creation quality: 5.0/5 (1 vote)
Evaluation of members on the printability, utility, level of detail, etc.

  • 4.2k views
  • 4 likes
  • 128 downloads

License
3D design format
STL Folder details Close
  • whirligig_hex_stick.stl
  • whirligig_nail_adapter.stl
  • whirligig_nail_clip.stl
  • whirligig_quick_release.stl
  • whirligig_string_handle.stl
  • whirligig_thin_quick.stl

Learn more about the formats

Publication date 2018-10-30 at 11:21
?
Published to Thingiverse on: 2012-05-24 at 02:35
Design number 36156

3D printer file info

3D model description

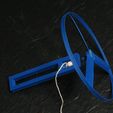
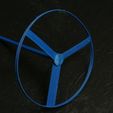
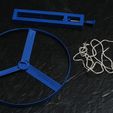
Pull the string and watch your Whirligig fly across the room. Print 2 handles and pass back and forth with a friend. Tilt at 45 degrees in the direction you want it to fly.

To launch, place the whirligig on the handle and wind the string. Be sure to wind clockwise when viewed from the top of the whirligig/handle.

Also comes with a stick so you can launch with your hands, if you prefer that method. Place the whirligig on the end of the stick and hold the stick between your hands with your hands flat. Quickly push your right hand forward. The whirligig will detatch from the stick and fly (you don't want the stick to stay in; the extra weight will cause it to not fly as far).

Stick launched version flies 20 ft (6 m).

3D printing settings

When I first designed this, I did not think it would print, but it did and it flies well. Printers have trouble with 2 in bridges and 15 degree inclines in general, but the two together seem to work.

String launched version:

Requires 2 vitamins:
1. String about 3 ft (1 m) long. Tie a bowline knot with 1/4 inch (6 mm) diameter loop at one end. http://en.wikipedia.org/wiki/Bowline
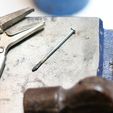
2. Nail roughly 2 inches (5 cm) long with 0.093 inch (2.4 mm) diameter shaft. For best results, flatten 1/4 inch (6 mm) from point with hammer (refer to the attached image). I used a blow torch to heat the tip to red hot to ease flattening (Be careful. Use pliers to hold the nail. Don't burn yourself). Flat portion should be 0.050-0.060 thick (1.3-1.5 mm). Nail shaft diameter is not critical. You may need to scale the nail clip to match your nail diamter. The scale option on your host software will work fine for this since no other dimention on the clip really matters.

Assemble as follows:
Print whirligig, string handle, quick release, nail adapter, and nail clip (1 each). I used a 0.18 mm layer height.
1. Push the nail, flattened tip first, through the handle. The flattened tip should stick out the top of the handle.
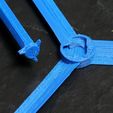
2. Push the nail adapter on the flattened end of the nail. It should be a tight fit. If it is too loose or you opted to not flatten the end of the nail, use some glue. At this point the nail is trapped, the coupling prevents it from sliding out one way and the head keeps it from sliding out the other way.
3. Glue the quick release to the end of the nail adapter.
4. For ease of winding, snap the nail clip onto the nail between the two handle beams. This will probably need glue.

Start wrapping the string by putting the bowline loop over the nail clip and spin the nail.

Stick Launched Version

No vitamins required.

Assemble as follows:
1. Print whirligig, stick, and quick release.
2. Glue coupling to stick.

Parts print fine with ABS or PLA. I have found ABS to work better for the whirligig because the PLA is brittle and breaks more easily when it impacts a wall. It does not matter what material you use for the non-flying portion.

Advertising


Issue with this design? Report a problem.

Would you like to support Cults?

You like Cults and you want to help us continue the adventure independently? Please note that we are a small team of 3 people, therefore it is very simple to support us to maintain the activity and create future developments. Here are 4 solutions accessible to all:

  • ADVERTISING: Disable your banner blocker (AdBlock, …) and click on our banner ads.

  • AFFILIATION: Make your purchases online by clicking on our affiliate links here Amazon.

  • DONATE: If you want, you can make a donation via Ko-Fi πŸ’œ.

  • WORD OF MOUTH: Invite your friends to come, discover the platform and the magnificent 3D files shared by the community!


Sharing and downloading on Cults3D guarantees that designs remain in makers community hands! And not in the hands of the 3D printing or software giants who own the competing platforms and exploit the designs for their own commercial interests.

Cults3D is an independent, self-financed site that is not accountable to any investor or brand. Almost all of the site's revenues are paid back to the platform's makers. The content published on the site serves only the interests of its authors and not those of 3D printer brands who also wish to control the 3D modeling market.

100% secure payment by credit card, PayPal, Apple Pay, Google Pay, etc.
View all payment options.