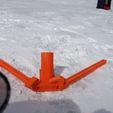
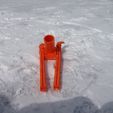
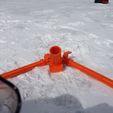
3D model description
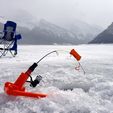
An automatic hook setter for a standard ice fishing rod.
This device dramatically increases your hookup rate, by setting the hook automatically when the fish takes the bait.
It's also safer for fish than conventional means if you're practicing catch and release as it doesn't give the fish the chance to swallow the hook, you'll get more hookups in the mouth.
Once triggered, you lift the rod out of the holder and you have a conventional rod and reel to bring in your fish.
The hook setting process is, the fish tugs on the bait, pulling the line
which releases the zigzag catch at the end of the rod. The rod which was spring loaded by being bent, now goes straight, pulling on the line at speed and setting the hook.
This thing makes use of the wonderful Plastic T-Slot by ProtoParadigm for the legs.
Some features:
Collapsable with quick release clamps, so easy to transport
Will work with the reel handle on either side of the rod.
Tested, it really does work.
The catch can also be used for shore fishing with a regular rod
and rod holder.
Very cheap to replicate !
I highly recommend combining this with "Fish-On Now!" http://www.thingiverse.com/thing:53840 so that you know when a fish has been caught and to avoid tiring the fish.
WARNING / DISCLAIMER: Do not place your face over this device, if it goes off accidently or a fish comes along whilst setting up you could injure your face or eyes. Also you can break your rod if apply too much tension. Use at your own risk.
Also, check your local regulations to see if automatic hook setters are allowed. To my knowledge most do, but Ontario and Minnesota do not.
Requirements:
2 x 6-32 Nut
2 x 6-32 x 2 inch countersunk machine screw
2ft fishing line >= 8lb test
3D printing settings
- Print 6 x 100mm pieces of 20mm Plastic T-Slots following the instructions
(I use ditto printing in Sailfish to print 2 at once)
Use customizer to:
Print 2 of the Pivot Joint Plate (50% fill, 1 shell)
Print 2 of the Pivot Joint Quick Release Clamp Plate (100% fill, 1 shell, full support)
Print the Rod Holder (15% fill, 2 shells)
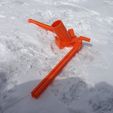
Print the Hook Setter Clip (100% fill, 2 shells). I normally print a few of these as spares in case of breakage, and at a few different angles and choose the best one for a rod.
Assembly:
I like to make an acetone glue and wipe it all over the surfaces for the T slots and rod holder to give it extra strength.
Acetone glue 3 T-Slots together to make a 300mm long T-Slot leg. Repeat with the remaining 3 T-Slots.
Examine and find the bearing block plate with a recess for a hex nut, keep this aside, we'll call it the "Nut bearing block plate".
Acetone glue 2 bearing block plates to the bearing block. When dry push fit the bearing block (optionally glue) to the T-Slot leg. Repeat for the other leg.
Acetone glue the "Nut bearing block plate" to rod holder using the notch as a guide, this is mounted so the nut recess is on the underside of the rod holder, repeat for the other side (making sure that's also on the underside).
Acetone glue the remain 2 bearing block plates. When finished the leg bearing block plate should fit inside the rod holder bearing block.
Assemble the quick release clamp by putting the quick release bearing inside the clamp and putting the 6-32 machine screw in so that the head is resting on the flat part of the bearing.
Put the leg into it's bearing, put the machine screw through and put the 6-32 nut on the other end of the bolt. Tighten up and this forms your quick release clamp.
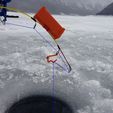
Attach some >=8lb test fishing line to the hook setter clip with a knot as shown in the pictures, so that the knot is located in it's retainer.
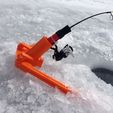
Put your rod in the rod holder, put the hook setter clip on the 2nd eyelet in from the end of the rod as shown in the pictures and put the other end of the fishing line through the hole at the front of the rod holder. Choose either the left or right hole depending on which side your reel handle is (choose the opposite) and pull until the rod is bent enough it has some tension, but doesn't break, tie a knot at the rod holder end.
Fishing With Catch More Fish:
Expand legs to form approximately a 90 degree angle and set the quick release clamps.
Put rod holder a little way back from the hole to make room for the rod. I use the ice left over from drilling the hole and push it down on top of the front of the arms of the rod holder, just in case you get that supersized pike that wants to steal your equipment.
Release your reel and get the bait to the correct depth, close the bail and put the rod in the rod holder. Make sure the tension on your reel isn't set too light, otherwise the sharp action of the hook setting motion will slip the clutch on your reel and not set the hook.
Bend the rod and put the small end of the hook setter clip over the 2nd eyelet, the tension should keep the clip in place, if it doesn't adjust the tension or use a clip with a different angle.
Now hook the line over the hook setter clip, so that when the fish takes the bait, it will pull the clip out. See the photo with the blue line indicating where the line goes.
Catch More Fish !
WARNING / DISCLAIMER: Do not place your face over this device, if it goes off accidently or a fish comes along whilst setting up you could injure your face or eyes. Also you can break your rod if apply too much tension. Use at your own risk.

