###Instructions:
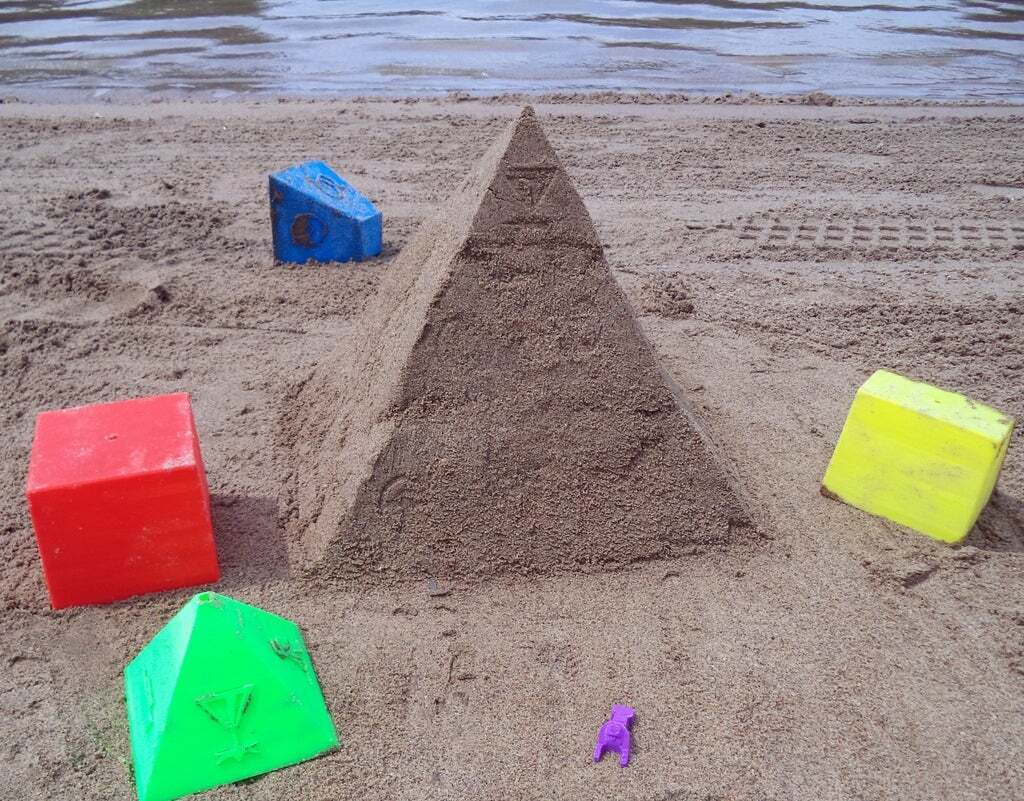
We built a 3 level pyramid totaling 14 blocks. Challenge yourself to see how high you're willing to build your pyramid.
It’s important to use wet sand as it holds its form better. Each mold has an air hole on the top to allow the sand to easy slide out.
Each mold is specially designed with angled walls to allow the sand to slide out.
##Print:
Each mold maximizes the bed size for your Makerbot Replicator 2 measuring 6" x 6".
You have the option to scale down the mold size. We found that smaller molds make the hieroglyphics less legible. A decent scale is up to 75%.
The molds do not use a lot of filament because they are hollow but they do take time to print.
100% infill, raft and supports. .3mm detail. All other settings can be set to standard.
##Assembly:
###Step 1
Find an area with wet sand and level out the surface with a straight edged object.
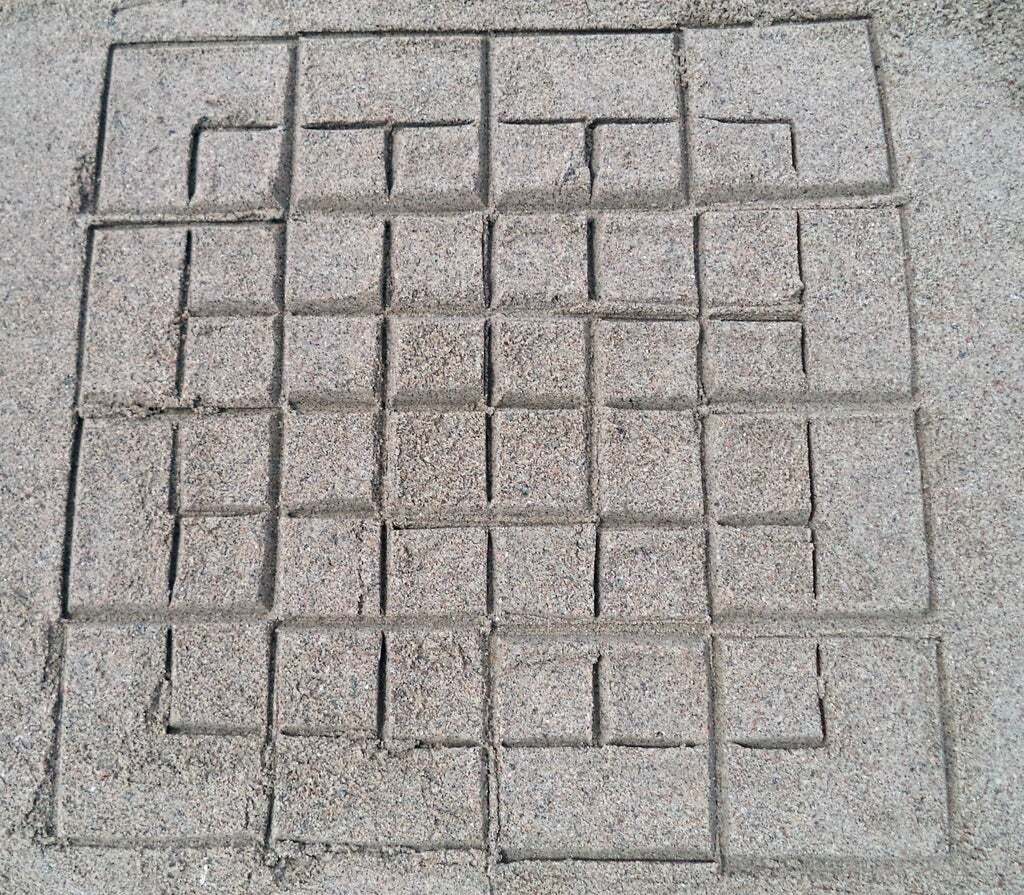
Determine your level height and calculate the amount of base blocks you will have to imprint in the sand. (Shown in image)
Levels/ Side blocks/ Imprinted guide squares (on first level)/ Total sand blocks
###L S I T
1 1 1 1
2 2 4 5
3 3 9 14
4 4 16 30
5 5 25 55
6 6 36 91
7 7 49 140
...
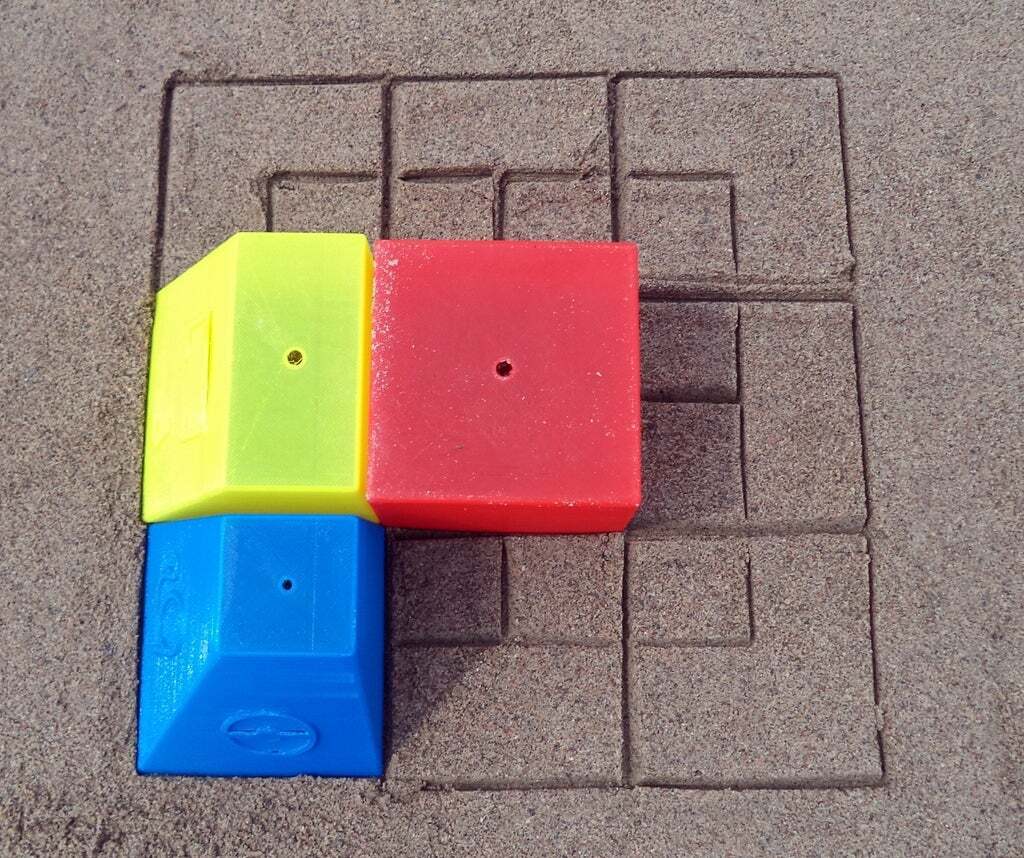
For example, to build a 4 layer pyramid you will need to make a 16 block imprint in the sand as illustrated in the images. When complete your base should look like a checkerboard with 3-inch squares (3" if mold is printed in full size). These lines in the sand are your blue prints that show you where to place your next sand block.
Each block mold has the same base width and length so you can use any mold to imprint the base block squares.
###Step 2
Build your pyramid starting from the center with the center mold (the red block in the images). Follow the guidelines imprinted in the sand to wedge each block against one another.
Pack in the sand tightly in the mold to remove any air pockets. Flip the mold quickly and remove the mold slowly while slightly shaking the mold.
###Step 3
Next complete the outer edges starting with the center edge (the yellow block in the images). Each edge block fits right up next to the adjacent block.
Next place the 4 corner block pieces (the blue blocks in the images).
Your base square imprints should be covered at this point.
You will see a gap in between every block. Fill the gaps with extra sand and smooth out the edges so that the blocks keep their shape.
Finally level out the top of the layer with additional sand in preparation for the next layer. A flat compact surface is ideal.
###Step 4+
Now build your next layer. Remember that each successive block is supported by several blocks from the previous layer. This support will insure stability.
You will have to be gentle when placing the successive blocks to insure that you do not compromise the form of the previous level. We found that you can use a fair amount of force as the base is substantially adequate in holding the weight.
Continue building each layer in the same fashion. Each layer will require fewer and fewer blocks.
###Step 5
Place the final crowning mold on top (green mold in the images)
Smooth out the edges to make the pyramid lines sharp.
Stand back and bask in the glory of your creation and listen to the oohs and aahs of the beach goers that pass by
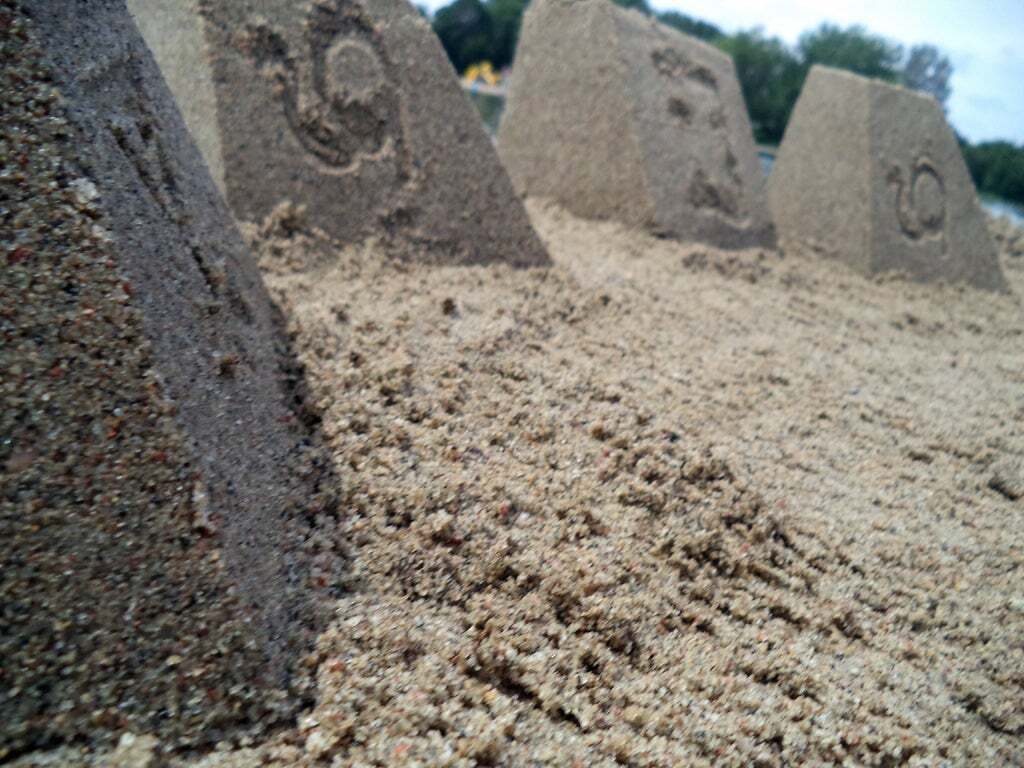
###Step 6
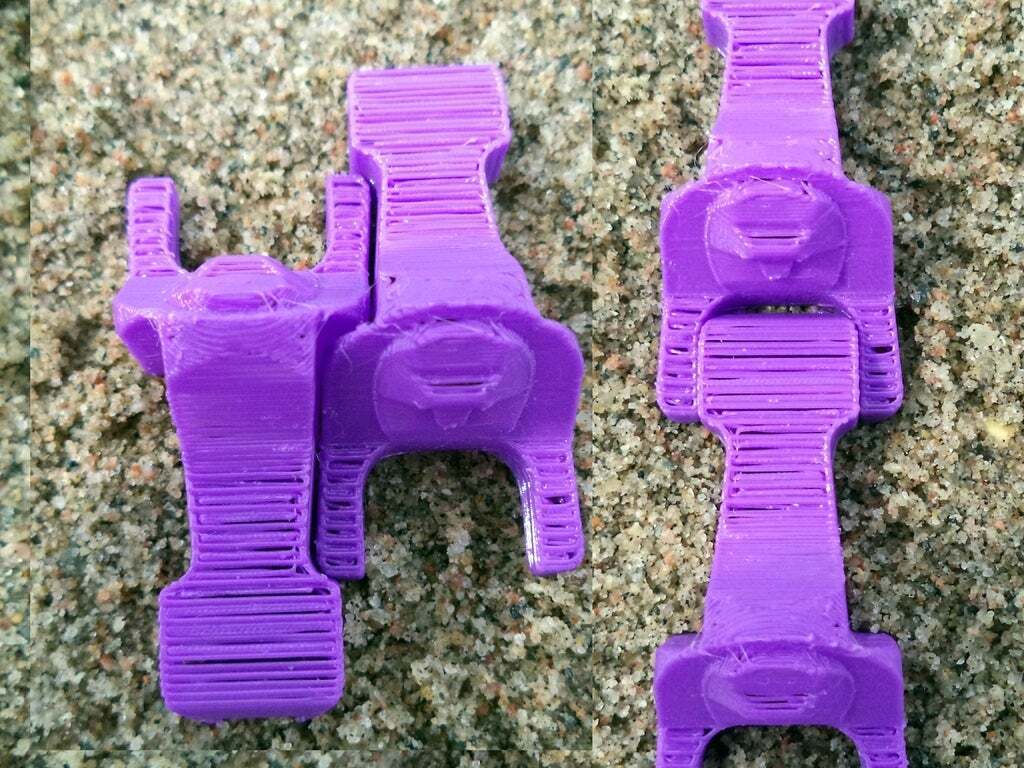
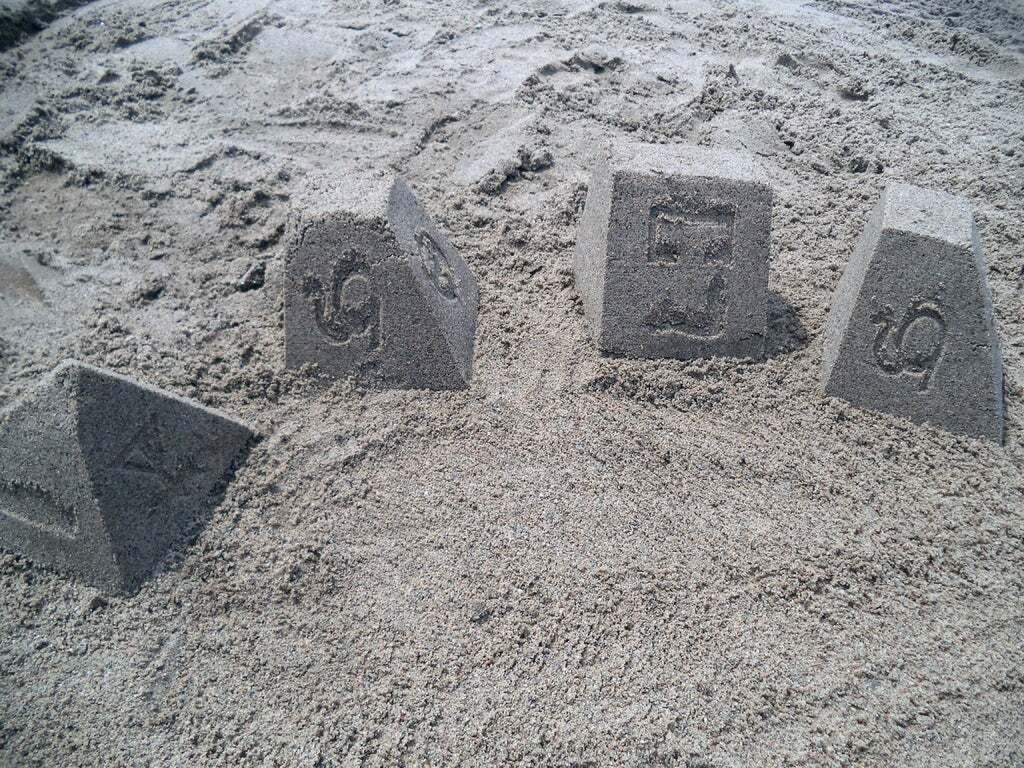
Its time for the piece de la resistance, the sphinx. Smooth out the area around the pyramid and create your tessellation sphinx pattern. You can encircle your pyramid like a moat or create an interesting geometric design (pattern shown in image). Try to wedge each sphinx close together as they perfectly align like illustrated in the images. Remember that the sphinx pattern changes direction for every other row.
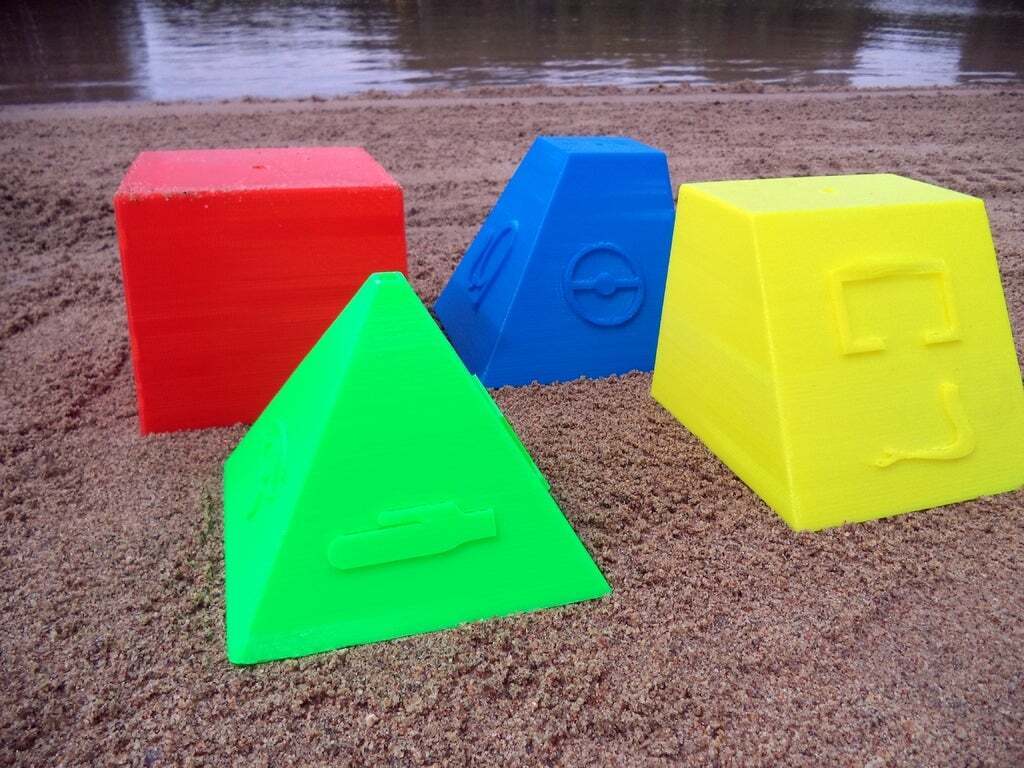
###The hieroglyphics:
The hieroglyphics on the molds represent 2 different classes of ancient Egyptian language including:
1. Phonograms which represent sounds.
2. Ideograms represent ideas and objects.
Top piece (green mold in images)
Bird = Sound of M or symbol for small
Hourglass shape object = our sigil is on the crowning mold which represents our 3D print club. You can use it for the sound of G or the symbol for group, gathering, together.
Eye = the symbol to see or the sound of IR
Hand = Sound of D of symbol for open
Side edge mold (yellow mold in images)
[-] = building or house
Arm = Sound of A or symbol to offer
Corner mold (blue mold in images)
(o) = Sound of RA or symbol of sun, light, time
Snake = Sound of J
Spell a sentence along the beach shore using individual blocks or create a sentence on your pyramid. There are several sources online that teach you the alphabet and other symbols. You can replace the symbols on the blocks or continue writing the sentence in the sand next to the blocks.
Hieroglyphs are read vertically, horizontally, from right-to-left or from left-to-right. Egyptians avoided leaving empty space. They stacked their signs and left no spaces between words or sentences.
:format(webp)/https://fbi.cults3d.com/uploaders/14187006/illustration-file/8a48fa6e-885b-44a8-a029-29984bccc572/complete1_display_large.jpg)