Skip to content

Tevo Little Monster Needle Bearing Idler Pulley

Advertising
Advertising
?
Creation quality: 0.0/5 (0 votes)
Evaluation of members on the printability, utility, level of detail, etc.

  • 1.1k views
  • 1 download

License
3D design format
STL Folder details Close
  • Idler-pulley-washer-V5-x2.stl
  • Idler-pulley-washer-part1-V3.stl
  • Idler-pulley-washer-part1.stl
  • Idler-pulley-washer-part2-V3.stl
  • Idler-pulley-washer-part2.stl

Learn more about the formats

Publication date 2020-04-07 at 08:51
?
Published to Thingiverse on: 2018-02-15 at 06:34
Design number 129031

3D printer file info

3D model description

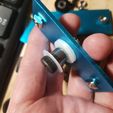
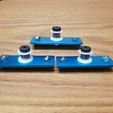
I was perusing a bearing website to locate some high-quality bearings to use for idler pulleys because I'm sick of crunchy bearings. Then I discovered these magical needle bearings tickling my creative mind. Little bit of tinker-cation and I determined the right combination of components to replace the current ball bearing setup with needle bearings! No more crunchiness!

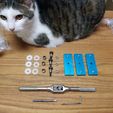
What is needed:
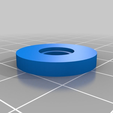
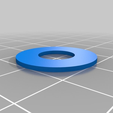
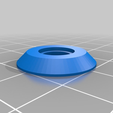
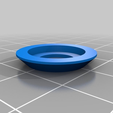
(3) Idler-pulley-washer-part1.stl
(3) Idler-pulley-washer-part2.stl
(3) Drawn cup needle roller bearing ID:8mm, OD:12mm, W:10mm
(3) M6 x 12mm Shoulder Bolt
(3) M6 Locking Nut
(1) Grease (Optional)

UPDATE - 2018-06-02
I've converted all my machines back to normal pulleys and here's why. I love the durability of needle bearings and never once encountered a failed bearing. Unfortunately, the bearings don't have sides and the belt will likely gravitate to one end which will wear the belt, make awful rubbing noises, and (the deal breaker) skew the accuracy of the print ever so slightly. I'm constantly fiddling and printing new washers or squirting some sewing machine oil to quiet the washers down (even though I printed graphite ones). It's just not worth the hassle.

UPDATE - 2018-04-26
V5 - I've been running this for several months now and I think I have them down to a science. Applying the KISS principle, you really only need 2 washers and I would recommend either buying nylon washers from the hardware store or printing with a self-lubricating material like IGUS or even Proto-pasta's conductive filament (it's a graphite composite and what I'm currently using). You can tap the plate, but I can tell you the metal is soft and will cause the post to bend (which is why the previous designs were failing me). I do recommend the greasing the bearing since the needles are exposed.

UPDATE - 2018-02-25
V3 - Tapered for guiding and form fitting around the head of the bolt. No supports are needed. I just printed and installed on latest TLM rebuild and am VERY happy with the results!

Advertising


Issue with this design? Report a problem.

Would you like to support Cults?

You like Cults and you want to help us continue the adventure independently? Please note that we are a small team of 3 people, therefore it is very simple to support us to maintain the activity and create future developments. Here are 4 solutions accessible to all:

  • ADVERTISING: Disable your banner blocker (AdBlock, …) and click on our banner ads.

  • AFFILIATION: Make your purchases online by clicking on our affiliate links here Amazon.

  • DONATE: If you want, you can make a donation via Ko-Fi πŸ’œ.

  • WORD OF MOUTH: Invite your friends to come, discover the platform and the magnificent 3D files shared by the community!


Sharing and downloading on Cults3D guarantees that designs remain in makers community hands! And not in the hands of the 3D printing or software giants who own the competing platforms and exploit the designs for their own commercial interests.

Cults3D is an independent, self-financed site that is not accountable to any investor or brand. Almost all of the site's revenues are paid back to the platform's makers. The content published on the site serves only the interests of its authors and not those of 3D printer brands who also wish to control the 3D modeling market.

100% secure payment by credit card, PayPal, Apple Pay, Google Pay, etc.
View all payment options.