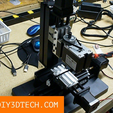
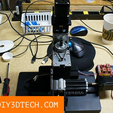
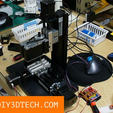
This post houses all of the related STL and product links I used to retrofit a small chinese micro-mill for CNC functionality. You can see more about the base Micro-Mill here: http://diy3dtech.com/micromill-resource-page/
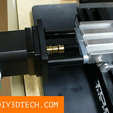
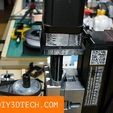
To attached the motor mounts to all three axis, we used 3 inch long #8-32 bolts and taped the mill to receive them. I am sure there is a metric substitution, however the length will needed to be maintained.
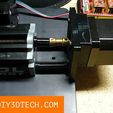
To attach the motors to the lead screws, we used 3mmx5mm Brass Shaft Coupling (https://amzn.to/2VLJvfZ) and drilled out and tapped the 3mm side to 4mm which screwed on to the shaft while the 5mm attaches to the motors. In full disclosure this works, however not the best because of the over rigidness, we likely rethink this so check back.
Also be sure to follow us on Instagram ( http://instagram.diy3dtech.com ) as we are posting some short video on the designs and operations ahead of the coming longer running YouTube build videos. You can also see more on this and other projects by check out YouTube Blog: http://youtubeblog.diy3dtech.com
Parts List:
uxcell 3mmx5mm Brass Shaft Coupling Coupler Motor Transmission Motor Connector for RC Boat Model: https://amzn.to/2VLJvfZ
SainSmart 3-Axis GRBL USB Driver Controller Board DIY Engraver Control Board for GRBL: https://amzn.to/2POWrfs
Stepper Motor Nema 17, 3 PCS Nema 17 Stepper Motor 4-Lead 1.8 Deg 40N.cm Holding Torque 1.7A 42 Motor : https://amzn.to/2H0Hx30
**280Pcs M3 Alloy Steel Grade 12.9 Hex Socket Cap Head Bolt Screw Nut Assortment Kit with Storage Box, 4/5/6/8/10/12/16/20/25mm Length: **https://amzn.to/2VOunyn
HVAZI 260pcs M3 Male Female Nylon Hex Spacer Standoff Screw Nut Assorted Kit (Black):https://amzn.to/2JF8Ku7
12v 30a Dc Universal Regulated Switching Power Supply 360w:https://amzn.to/2VbTJ4Y
STL Parts:
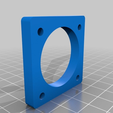
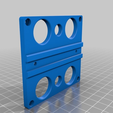
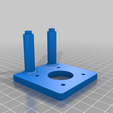
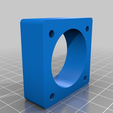
Mounting bracket for NEMA 17 stepper motor for Y and Z Axis:** DIY3DTech_MicroMill_YZ_v2.stl**
Mounting bracket for NEMA 17 stepper motor for X Axis:** DIY3Dtech_MicroMill_X_v2.stl**
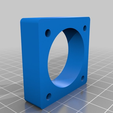
These stand-offs are only needed depending on your motor shaft length. Note, they are all the same just different thickness so if you modify the Z height in your slicer to fit your need if required:**
DIY3DTech_NEMA_17_StandOff_Y_Axis_6mm.stl
DIY3DTech_NEMA_17_StandOff_Z_Axis_15mm.stl
DIY3DTech_NEMA_17_StandOff_X_Axis_12mm.stl**
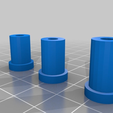
Since the dive for the table motions are both push and pull, the threaded rods must restrained and that is the purpose of the these bushings. Like the motor spacers, they are the same except for the length and if needed can be scaled in a slicer:
DIY3DTech_MicroMill_Push_Pull_Bushings_v1.stl
These two pieces mate via M3's (10 to 12mm) to mount the SainSmart (https://amzn.to/2POWrfs) control board to the back of the micromill. The board itself mounts the base via M3 Nylon standoffs (https://amzn.to/2JF8Ku7):**
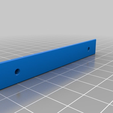
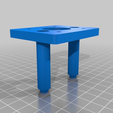
DIY3Dtech_MicroMill_Base_v1.stl
DIY3Dtech_MicroMill_Wedge_v1.stl**
Looking for the best deals on 3D Printers or maybe just want to see what new, this link is for you: http://diy3dtech.com/Current_GearBest_3D_Printer_Deals
Major Favor: if you make one of these please post the Make and share it with the community :-) .
Also, **please follow us on Thingiverse and give this a like if this came in handy **and for more information on this project, please visit us at http://www.DIY3DTech.com as well as subscribe to our YouTube Channel at http://YouTube.DIY3DTech.com along with a visit to our drone site and YouTube channel at http://video-drone.DIY3DTech.com
If you are looking for one of a kind swag shop for yourself or a Maker Geek friend, visit our swag shop at http://Swag.DIY3DTech.com for unique 3D Printing, Laser Cutting and CNC swag! Too, if you want a behind the scene look at what we are working on be sure to follow us on Instagram (https://www.instagram.com/diy3dtech/)!

/https://fbi.cults3d.com/uploaders/15225345/illustration-file/b25aa12a-7404-4660-8161-773de9028195/DIY3DTech_MicroMill_06.png)
