This is a repository of remixes of the best printable components to upgrade a standard Dagoma DiscoEasy 200 at low cost.
The most up to date version can be found on Thingiverse (https://www.thingiverse.com/thing:4299404)
There are no shortage of upgrade designs on Thingiverse (and other sites), but finding the best ones and ensuring that they are compatible with one another is not easy. So as I sort through the various designs and ideas that other people have had, combining them as appropriate for the best solution for my own printer, I thought I would share the same designs in a single place to help others achieve the same with far less work.
PLEASE NOTE: This is a design work-in-progress. You are welcome to try it out and I would welcome any feedback. But I have yet to get to the point of printing the parts and trying it.
The objectives of this design are:
a. Improve print quality substantially be removing as much slackness/wobble as possible. This means reprinting almost all the plastic parts of the standard printer.
b. Enable future upgrades to retain as many of these reprinted parts as possible. For example I hope to be able to undertake an XL upgrade simply by replacing the front and rear faces,
c. To retain the essence of the DiscoEasy style - it should remain recognisably a DE200 rather than starting to look like an Ender or Prusa etc.
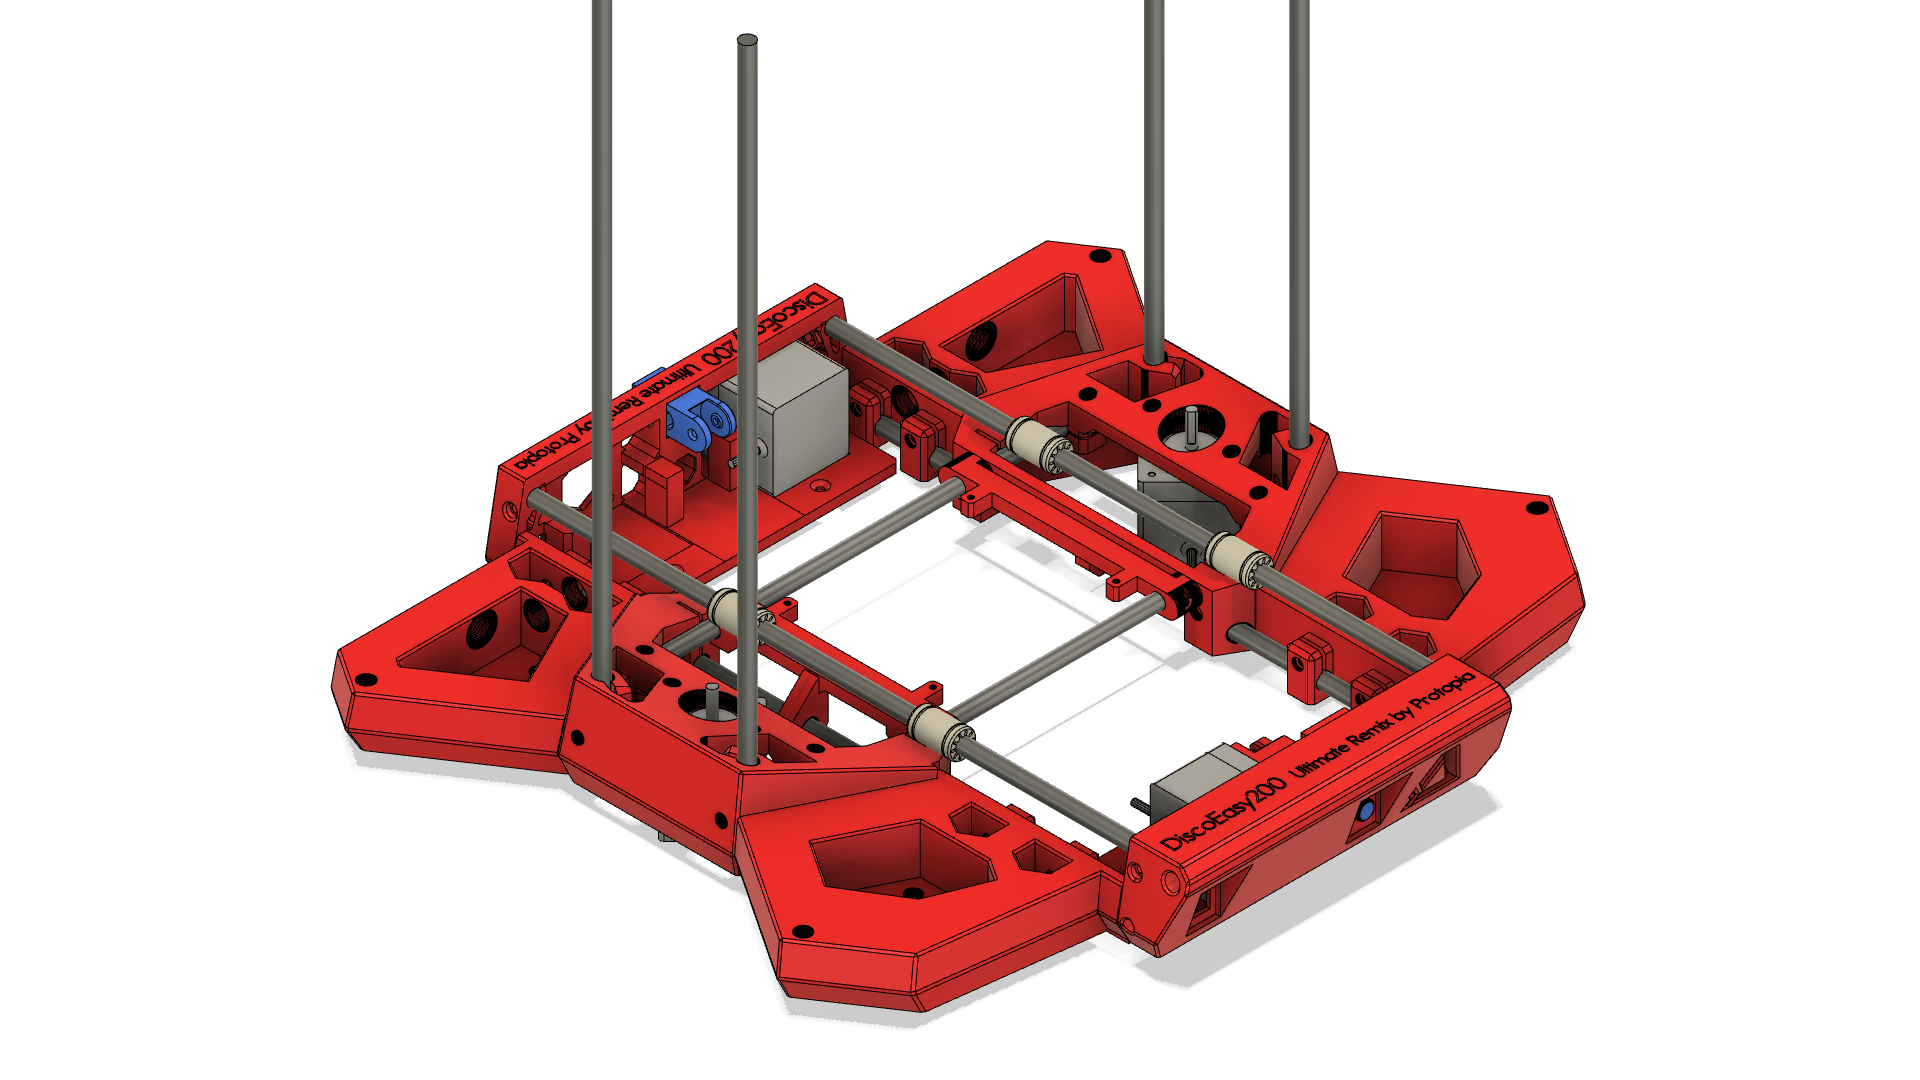
The repository currently has the following parts:
1a. A fresh remix of the Dagoma original front face drawing primary inspiration for rigidity from Front Face Reinforced by @filpompei (no longer on Thingiverse) and Face avant renforcé Discoeasy200 by ragnaroque (https://www.thingiverse.com/thing:2077102) together with my own addition of air gaps at the bottoms of the rod clamps and additional reinforcement fillets, and
1b. a Pause Button from Face avant et arrière renforcées by 3DLD (https://www.thingiverse.com/thing:3196138).
2a-c. A fresh remix of the Dagoma dual extruder back face drawing inspiration from Face avant renforcé Discoeasy200 by ragnaroque (https://www.thingiverse.com/thing:2077102) and a Y-belt tensioner from Faces AV&AR améliorées pour Dagoma DiscoEasy & DiscoVery by Z122 (https://www.thingiverse.com/thing:3309864). I have included designs for the back face both without (2a.) and with (2b. & 2c.) the tensioner.
3a. Reinforced Z-axis sides remixed from , modified to be the same profile as the standard Dagoma sides so that it fits with the Bezain Ultimod corners.
3b. PCB supports copied directly from the above.
3c. Anti-wobble bearings taken directly from . If possible, I would like to integrate these with the sides into a single part.
4a-d. A minor remix of Ultimod by Bezain to stiffen the Z-axis, with minor remixes to remove the internal wiring ducts, replace curved fillets with flat chamfering, standardising the screw points, integrating Z-axis top anti-wobble bearings. Currently, all four bottom parts are finished, with only the top parts still required to be remixed.
5a-b. (TBD) Z chariots.
6a-b. (TBD) Print head
7a-b. (TBD) X-dimension cable support chains to prevent cables dragging on the print.
Bill of Materials
- Front Face - 8mm stainless steel rod x 177mm - this is optional as the part is very stiff without it. Cut to length and bevel the edges. Drill out the hole with an 8mm drill before inserting as printing will never be accurate and you do not want to risk splitting the part.
Background
I recently acquired a Dagoma DiscoEasy 200, and wanted to make sure it printed objects to the highest possible quality. The first things I identified were to tighten the X and Y belts - which immediately made a big difference - and to get the temperature settings right. I then identified 2 stages for upgrades - firstly to take out as much play as possible, getting the best possible quality from the original DiscoEasy 200, and at some future point to add DIY versions of the Dagoma upgrades - essentially upgrading to an XL DiscoUltimate at a cost that makes economic sense.
Where to find me...
This thing can be found at Thingiverse (https://www.thingiverse.com/thing:4299404) and Cults3d. If you find it useful, then please gift me a cup of coffee through paypal.
License
This has been made available on a Creative Commons Attribution Non-Commercial Share-Alike license. This means you can:
* Download and print the design for personal / non-commercial use.
* Modify the design if you wish.
* Share the original design or your own modifications on the same license terms.
What you cannot do:
* Sell copies of this design or derivatives;
* Sell manufactured copies of the parts or derivatives either separately or as part of something else. This design represents a LOT of effort, and if you want to use the design commercially then please contact me to discuss licensing terms.
:format(webp)/https://fbi.cults3d.com/uploaders/14942657/illustration-file/dcb11f3b-75e0-4885-a229-f48f7e200f05/Dagoma%20DiscoEasy%20200%20DE200%20Ultimate%20Remix%20-%20Parts%20so%20far.png.png)

/https://preview3d-images.cults3d.com/variants/c5xb5ia5dqvlxkxhug4ne9diguy1/2c25dfac9c0c4b3fee1a07527bd1c6bb2fb599b319b4e1ae3ef1d256f7781447)
/https://preview3d-images.cults3d.com/variants/lirsi3zvbh67jky47hr0yw6zapkv/9ce1a1278a90847fe525f7bdea66ae6081035e320afa813bf6efbbbe4c5d9f85)
/https://preview3d-images.cults3d.com/variants/sytay5z5nx7046xz8nu0fxoukta7/848ec152657411c3fb217bef17c5a518f412feacc875ce6f22e14239149a46cd)
/https://preview3d-images.cults3d.com/variants/g7zt2mum7bsf20xrvsx2myedc78m/848ec152657411c3fb217bef17c5a518f412feacc875ce6f22e14239149a46cd)
/https://preview3d-images.cults3d.com/variants/wndbj0cmqb0j0hygs5m1gta9x8i6/848ec152657411c3fb217bef17c5a518f412feacc875ce6f22e14239149a46cd)
/https://preview3d-images.cults3d.com/variants/sn2gj1jmosa55hsh8t7ll48slwhd/848ec152657411c3fb217bef17c5a518f412feacc875ce6f22e14239149a46cd)
/https://preview3d-images.cults3d.com/variants/sth605odqnjwmte85ree6j4qajpp/848ec152657411c3fb217bef17c5a518f412feacc875ce6f22e14239149a46cd)
/https://preview3d-images.cults3d.com/variants/l2xa11s5lcsku40soen7gxz0aqw8/848ec152657411c3fb217bef17c5a518f412feacc875ce6f22e14239149a46cd)
/https://preview3d-images.cults3d.com/variants/gj5zlh1qovest3ezaxg9bse7x5n5/848ec152657411c3fb217bef17c5a518f412feacc875ce6f22e14239149a46cd)
/https://preview3d-images.cults3d.com/variants/5xwox0b6xxli7ty73arfwelxfa4o/848ec152657411c3fb217bef17c5a518f412feacc875ce6f22e14239149a46cd)
/https://preview3d-images.cults3d.com/variants/43ffyrqsg79ylisrgnniup5c9f8y/848ec152657411c3fb217bef17c5a518f412feacc875ce6f22e14239149a46cd)


