Skip to content

Flying Extruder for Kossel w/stock motor

Advertising
Advertising
?
Creation quality: 5.0/5 (1 vote)
Evaluation of members on the printability, utility, level of detail, etc.

  • 2.2k views
  • 5 likes
  • 34 downloads

License
3D design format
STL Folder details Close
  • flying-extruder-bungie-loop.stl
  • flying-extruder.stl

Learn more about the formats

Publication date 2020-01-16 at 10:12
?
Published to Thingiverse on: 2019-12-07 at 06:25
Design number 98834

3D printer file info

3D model description

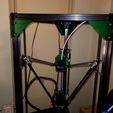
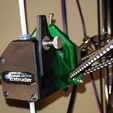
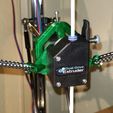
This is my stab at a flying extruder using the stock motor.
I'm using a gear-reduced dual-drive (Bondtech BMG clone) extruder, so the stock motor is serious overkill. If you have a pancake motor 23mm or less, you'll be more interested in my other flying extruder (https://www.thingiverse.com/thing:4088469) design.

I originally designed this so a simple 3mm cap-screw could be used in each of the holes to attach surgical tubing (with a zip tie) going to the carriages. Then I found these mini-bungie cords at Home Depot, so I made the bungie-loop to mount them. They turned out to be the perfect length.
The position of the holes for the bungies (whatever type you end up using) was as close as I could get to evenly distributing the mass among the 3 carriages. This does make the rear bungie a bit loose (if you use the ones mentioned above), so I simply tied a knot in the cord behind the metal hook to shorten it up (if you see the design of those bungies, this will become obvious).
The reason for the row of holes along the diagonal top beam is I wanted a bit of flexibility with a counterweight. I saw someone post elsewhere (sorry, forgot where) about a nice (professional-quality) retractable key-ring that has plenty of pull (made for a huge keyring) called a "KEY-BAK SUPER48". I got the 13oz model since I'm using the heavy stock extruder. I actually haven't installed it yet as the stock motors actually hold this setup when unpowered (which I didn't expect).


After installing this, I dropped my retractions all the way to 2mm. After switching the bowden tube to a 1.9mm ID one, I was able to drop my retractions to 0.4mm!
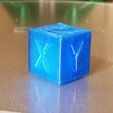
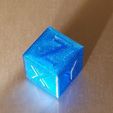
The cube in the pictures was printed in 3D Solutech See Through Blue PETG. The two things that helped the most were this flying extruder setup and my corner reinforcements (https://www.thingiverse.com/thing:4015353).

Advertising


Issue with this design? Report a problem.

Would you like to support Cults?

You like Cults and you want to help us continue the adventure independently? Please note that we are a small team of 3 people, therefore it is very simple to support us to maintain the activity and create future developments. Here are 4 solutions accessible to all:

  • ADVERTISING: Disable your banner blocker (AdBlock, …) and click on our banner ads.

  • AFFILIATION: Make your purchases online by clicking on our affiliate links here Amazon.

  • DONATE: If you want, you can make a donation via Ko-Fi πŸ’œ.

  • WORD OF MOUTH: Invite your friends to come, discover the platform and the magnificent 3D files shared by the community!


Sharing and downloading on Cults3D guarantees that designs remain in makers community hands! And not in the hands of the 3D printing or software giants who own the competing platforms and exploit the designs for their own commercial interests.

Cults3D is an independent, self-financed site that is not accountable to any investor or brand. Almost all of the site's revenues are paid back to the platform's makers. The content published on the site serves only the interests of its authors and not those of 3D printer brands who also wish to control the 3D modeling market.

100% secure payment by credit card, PayPal, Apple Pay, Google Pay, etc.
View all payment options.