Skip to content

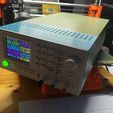
Riden RD6006 power Supply Case

Advertising
Advertising
?
Creation quality: 5.0/5 (2 votes)
Evaluation of members on the printability, utility, level of detail, etc.

  • 5.9k views
  • 3 likes
  • 85 downloads
  • 1 make

License
3D design format
PDF and STL Folder details Close
  • 12v_PWM_Fan_Controller.pdf
  • AFB0612VHC-R00.pdf
  • Front_Section_FINAL.stl
  • Main_Base_FINAL.stl
  • Main_Top_FINAL.stl
  • Martek_DC-DC_Down_Converter.pdf
  • PWM_Fan_Controller.pdf
  • RD6006.pdf
  • Rear_Panel_Extension_FINAL.stl
  • Rear_Panel_NO_Extension_FINAL.stl
  • ZF1X4-1707_PWM_Fan_Controller.pdf

Learn more about the formats

Publication date 2020-02-11 at 17:55
?
Published to Thingiverse on: 2019-12-29 at 19:54
Design number 107743

3D printer file info

3D model description

WARNING:

This project includes Mains wiring. If you are uncomfortable with that, PLEASE seek help from someone who is suitably qualified. I can't therefore be held responsible for any unintended consequences.


Legal Requirements:

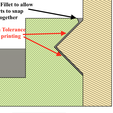
Iā€™d also wished I could have made this project COMPLETELY ā€™snapā€™ together, but as Iā€™m an Electrical Engineer, I know that in my jurisdiction, there is a requirement that the ONLY way you should be able to touch a mains power cable is by use of a tool!. Iā€™ve kept the top case & base snap together, & the front section as well. To satisfy the legal requirements, Iā€™ve included two bolts at the rear of the case, between top & bottom parts. The IEC socket ā€˜snaps into place, & is kept below the ā€™surfaceā€™ of itā€™s holding, so fingernails canā€™t pull it out, only a knife or screwdriver can. This SATISFIES the legal requirements, & I would ask that ANYONE who completes this project use two countersink 12 mm screws for safety sake.


This is my second 'Thing', & also my second 'Fusion 360' design.

My other project--> https://www.thingiverse.com/thing:4033653


Front Section:

Parts List:

  1. 3D printed "Front Section FINAL"

Instructions:

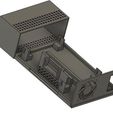
Iā€™ve deliberately made this a tight fit for the RD6006, I didnā€™t want to put holes in the side, to allow the the nubs on the power supply module to poke through, for reasons of aesthetics. You may therefore have to lightly sand the entry points, (depending on your 3D printer). Iā€™ve included nubs for the mid section of my case to ā€˜clickā€™ into, & a series of ventilation holes, (with fillets to smooth the top & bottom to the touch) to both top & bottom of the front of the case to allow passive cooling, but ALSO to allow cooling air an entry point to be drawn in, by my rear panel fan.


Rear Panel:

Parts List:

  1. 3D printed "Rear Panel Extrusion FINALā€ OR "Rear Panel NO Extrusion FINALā€
  2. Four M3 X 16r bolts
  3. Four M3n nuts
  4. 60 x 60 x 13 Fan (AFB0612VHC, Data Sheet included)
  5. IEC Fuse Chassis Male Power Plug with Switch PP4003 (see https://www.instructables.com/id/Wire-Up-a-Fused-AC-Male-Power-Socket/) for wiring diagram.
  6. 7 spade connectors & 3 fork connectors
  7. Ceramic Fuse (4Amp for 240v, 8A for 110v)

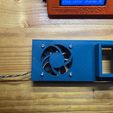
I made the fan shroud, using ā€˜arcsā€™ & the ā€˜circular patternā€™ feature in Fusion 360, & it matches the structure of the AFB0612VHC fan to allow maximum airflow. If you use a different fan, you may impede this. The IEC PP4003 socket hole was made to be tight, since Iā€™ve not used bolts (you may need to slightly sand the hole, depending on your printer)

Instructions:

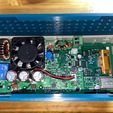
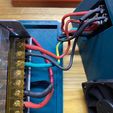
I've include PDFs about the fan, so it is a simple matter to put the nuts inside the fan's case, & tighten the M3 x 16r bolts, making sure to have the fan correctly orientated so that air travels in through the front ventilation holes, alongside the LED power supply, & then from the case. Also make sure to put a fuse & spare inside the IEC Socket assembly. Wire the IEC Socket & Switch using the diagram in the Post Printing for reference. You can use ā€™Crimp Connectorsā€™, but I personally ALSO solder the wire inside the connector (especially on the earth connections). Push the IEC socket through the hole in the rear panel, & using spade forks, attach them to the power supply.


Main Base:

Parts List:

  1. 3D printed ā€œMain Base with Martek Holder FINALā€
  2. Four M4 x 12 bolts (for power supply)
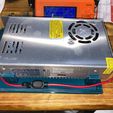
  3. LED Power Supply with outputs of 60V 10A. Model S-600-60 (http://www.gyuspw.com/productshow.php?cid=62&id=189)
  4. In-Line Fuse 15Amps with 12AWG Wire ā€™tailsā€™
  5. 450mm each of 12AWG Red & Black Silicon cable (DONā€™T use anything less)
  6. 450mm each of 18AWG Red, Black, Yellow Silicon cable (for connection of 12V sections to drive fan)
  7. Four M3 x 12b bolts (to attach Top to Base, this is ESSENTIAL to meet legal requirements)

Instructions:

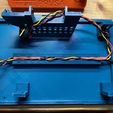
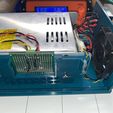
Iā€™ve made it possible to solidly mount the power supply, whilst also allowing air to flow freely both under & over it, being finally drawn out by the rear fan.

Main Top:

Parts List:

  1. 3D Printed ā€œMain Top FINALā€ (Printed with supports ā€˜on build plate only)

Instructions:

When attaching top, slide rear section screw attachments first, then ā€˜clickā€™ the top onto ā€˜Main Baseā€™.

Advertising


Issue with this design? Report a problem.

Would you like to support Cults?

You like Cults and you want to help us continue the adventure independently? Please note that we are a small team of 3 people, therefore it is very simple to support us to maintain the activity and create future developments. Here are 4 solutions accessible to all:

  • ADVERTISING: Disable your banner blocker (AdBlock, ā€¦) and click on our banner ads.

  • AFFILIATION: Make your purchases online by clicking on our affiliate links here Amazon.

  • DONATE: If you want, you can make a donation via Ko-Fi šŸ’œ.

  • WORD OF MOUTH: Invite your friends to come, discover the platform and the magnificent 3D files shared by the community!


Sharing and downloading on Cults3D guarantees that designs remain in makers community hands! And not in the hands of the 3D printing or software giants who own the competing platforms and exploit the designs for their own commercial interests.

Cults3D is an independent, self-financed site that is not accountable to any investor or brand. Almost all of the site's revenues are paid back to the platform's makers. The content published on the site serves only the interests of its authors and not those of 3D printer brands who also wish to control the 3D modeling market.

100% secure payment by credit card, PayPal, Apple Pay, Google Pay, etc.
View all payment options.