I share this under Attribution-NonCommercial-ShareAlike (CC BY-NC-SA) licence.That means anyone is free and welcome to use this design, adapt it, remix it, add to it, hopefully improve it, but you cannot use it for commercial purposes and you must share all derivates of it under these same rules. Attribution would be nice but i wont make a fuss about it.
- Nobody is allowed to make this mask or remix this design and then sell it under any circumstance. -
UPDATE: 28.03.20
New version 3.1.2 added.
Adjusted the shape for better fitting, increased the size of strap holders, the mask is now a little bit smaller. Requires less supports. Prints faster.
Update: 29.03.20
Added a second "Filter pressing part" 1mm smaller then the first one, for better fitting with added filtering material. (cut the filters to have 1-2 cm bigger size then this part.)
Update: 31.03.20
Added several pictures to clarify the option of adding a soft tube to the rim of the mask and how to add filtering materials.
Important Facts:
The best measure you can do to avoid the Sars-Cov-2 (Covid 19 or Corona) virus is to stay away from other people and wash and disinfect your hands and surfaces you touch the most.
This should include various food products and packaging as well as money and other everyday items. Follow the official guidelines and advice's of your country medical professionals as best as you can.
Commercial and professional masks of this kind are better then any of these kinds of DiY items. If you can buy or get those use those instead. If you cant get them for any reason, then you should consider the next two options.
The next best option in terms of functionality are Cloth face masks, because they cover more of the face, fit around the faces much better and provide bigger breathing areas. There are many videos and tutorials on how to make some. The best ones are made like big pockets so users can change the filtering materials as often as necessary. They are easy and cheap to make. Materials for them and decent quality filters can be easily found in any home.
Here is a link to a good roundup of best DiY materials for filters
https://smartairfilters.com/en/blog/best-materials-make-diy-face-mask-virus/
And a good example n how to make a cloth face mask such as a doctor would use:
https://mustsharenews.com/cloth-face-mask/
All that being said, there is a need and use for 3D printed masks and face shields. The number of different ideas, approaches and iterations is crucial in finding the most useful designs before things become dire. That is why im adding this design to the general pool and hope other designers and makers will try it and improve on it.
- If you use one of the 3D printed masks of this kind, you will need to disinfect it often. And change the filtering material. Same goes for any cloth masks. Ordinary soap works great against Sars-Cov-2 virus and many others like it. For these reasons it is better to print the mask from PETG, rather than PLA, as PETG is more resilient to chemicals, heat and UV light.
The design:
To start I printed several of the 3D printable masks that are popular and found them lacking in two crucial features. They don't fit well to the face and have air intakes that are too small or in wrong positions. In all those models i tried the air keeps coming in under the edges of the masks instead of through the breathing intakes, even without any filters. The best one was a mask made by lafactoria3d which i used as a starting point for my own design. https://cults3d.com/en/3d-model/tool/covid-19-mask-easy-to-print-no-support-filter-required
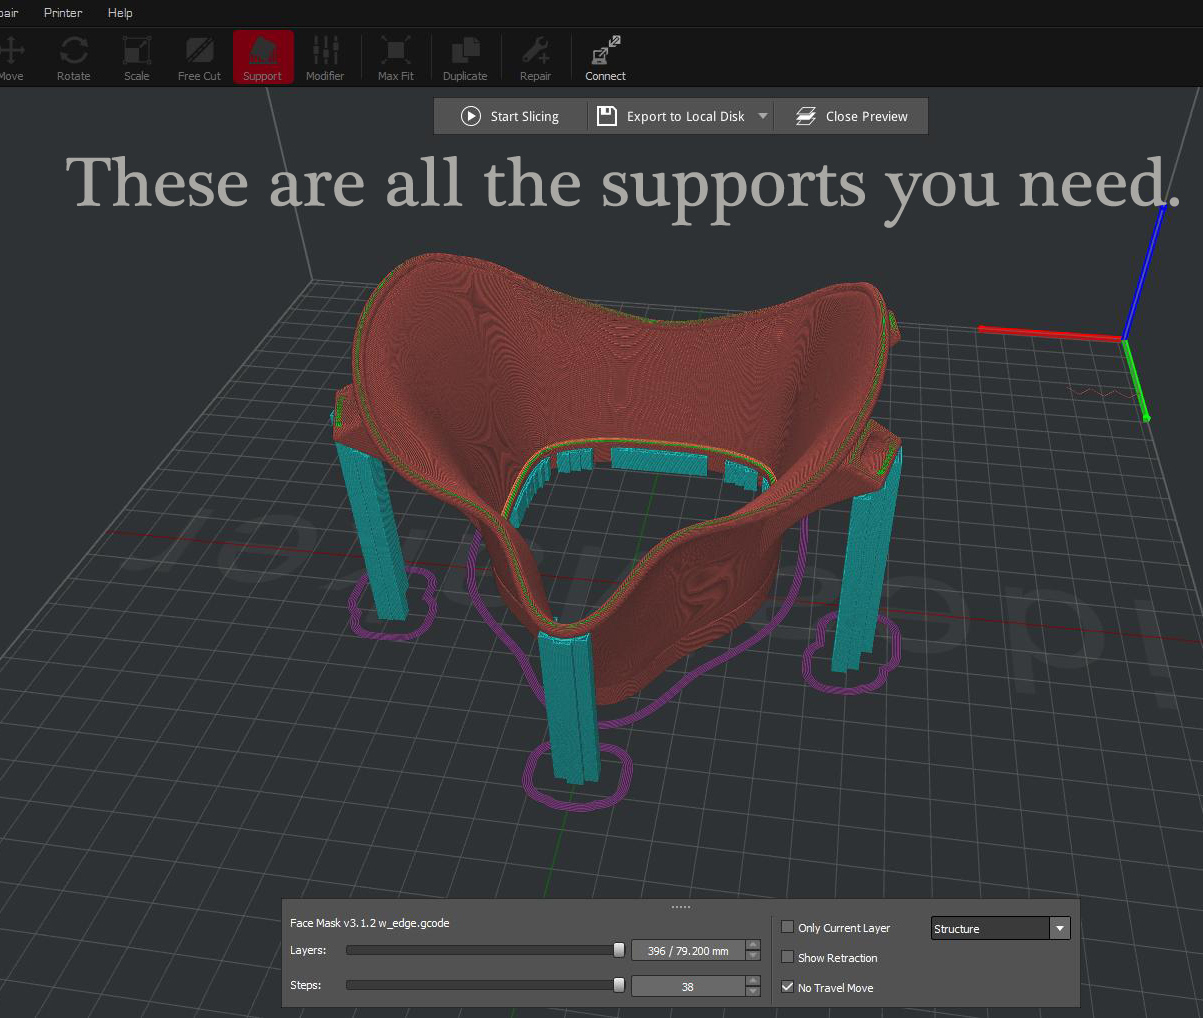
My design tries to improve on those problematic features - while trying to make it as simple for 3D printing as possible.
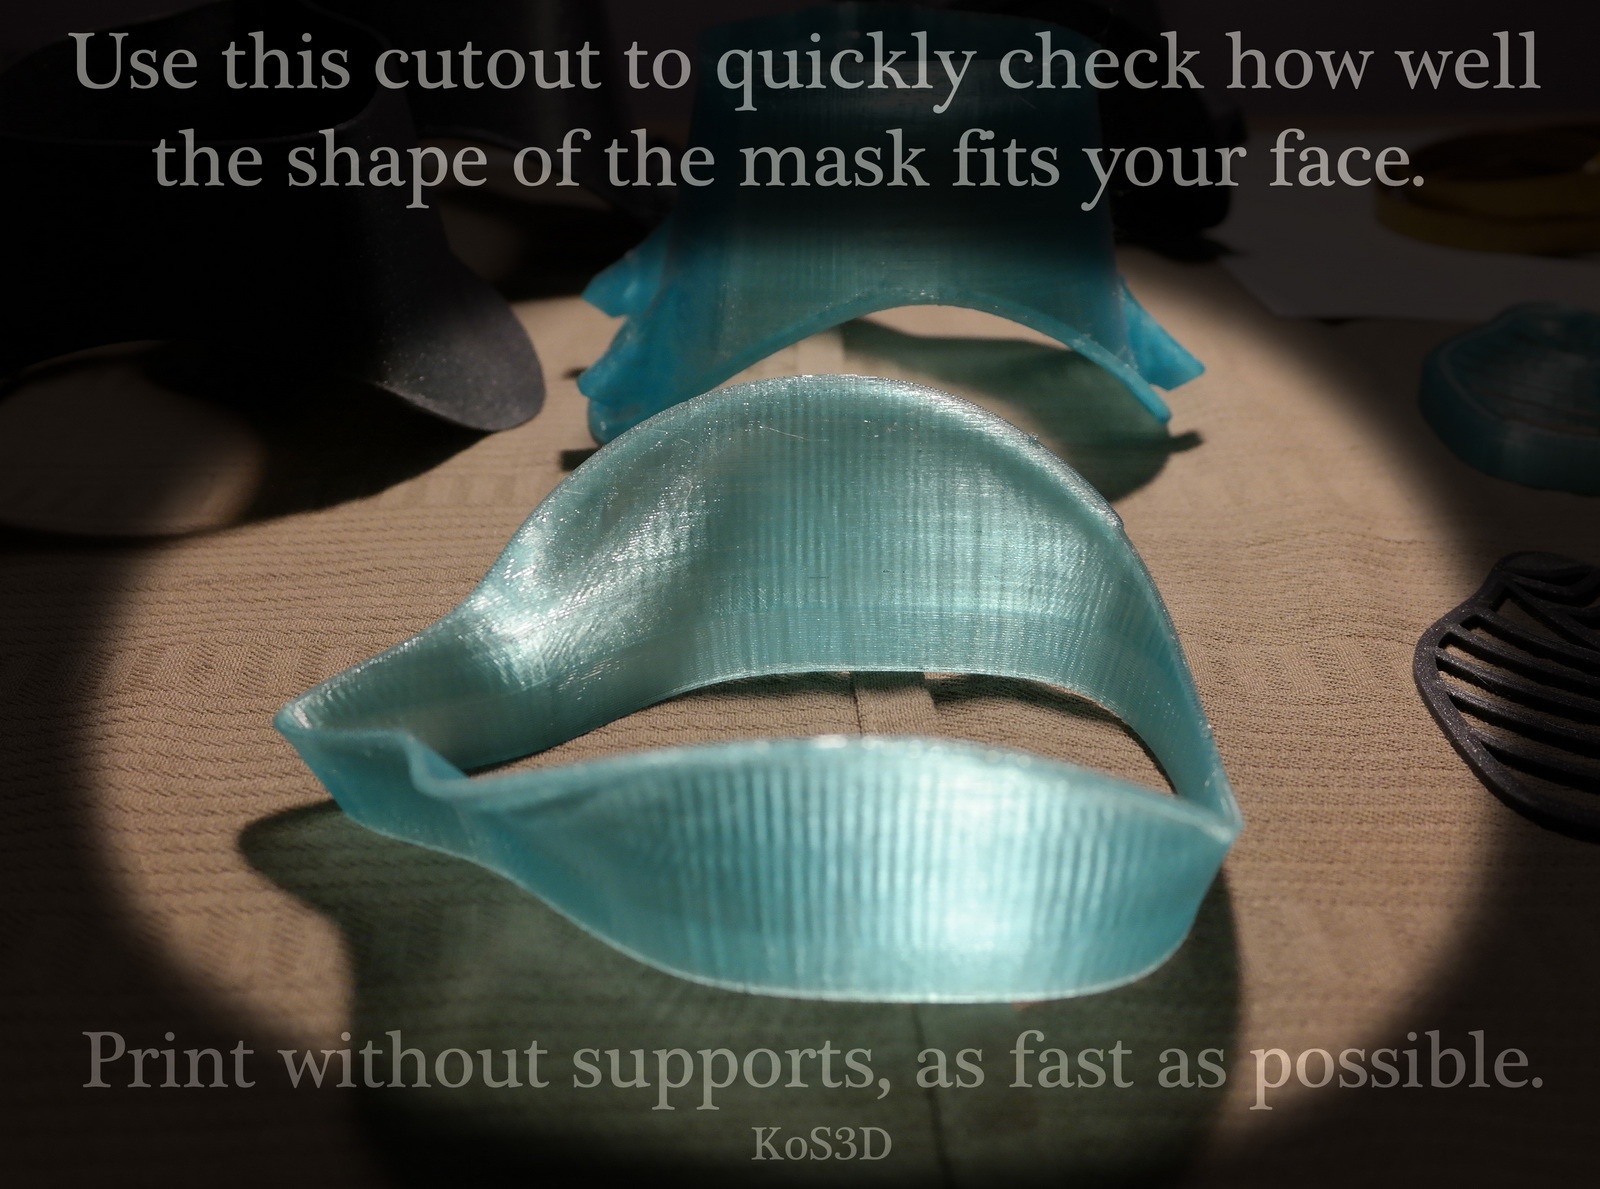
I made the first version then used a hot gun to additionally mold the mask shape better to my face contours, then tried to design a new version based on that, then repeated the process until i got something that fits very well to my own face. It is impossible to make a mask of any rigid material to fit all faces, but i think this is a good starting point.
Specifics of design:
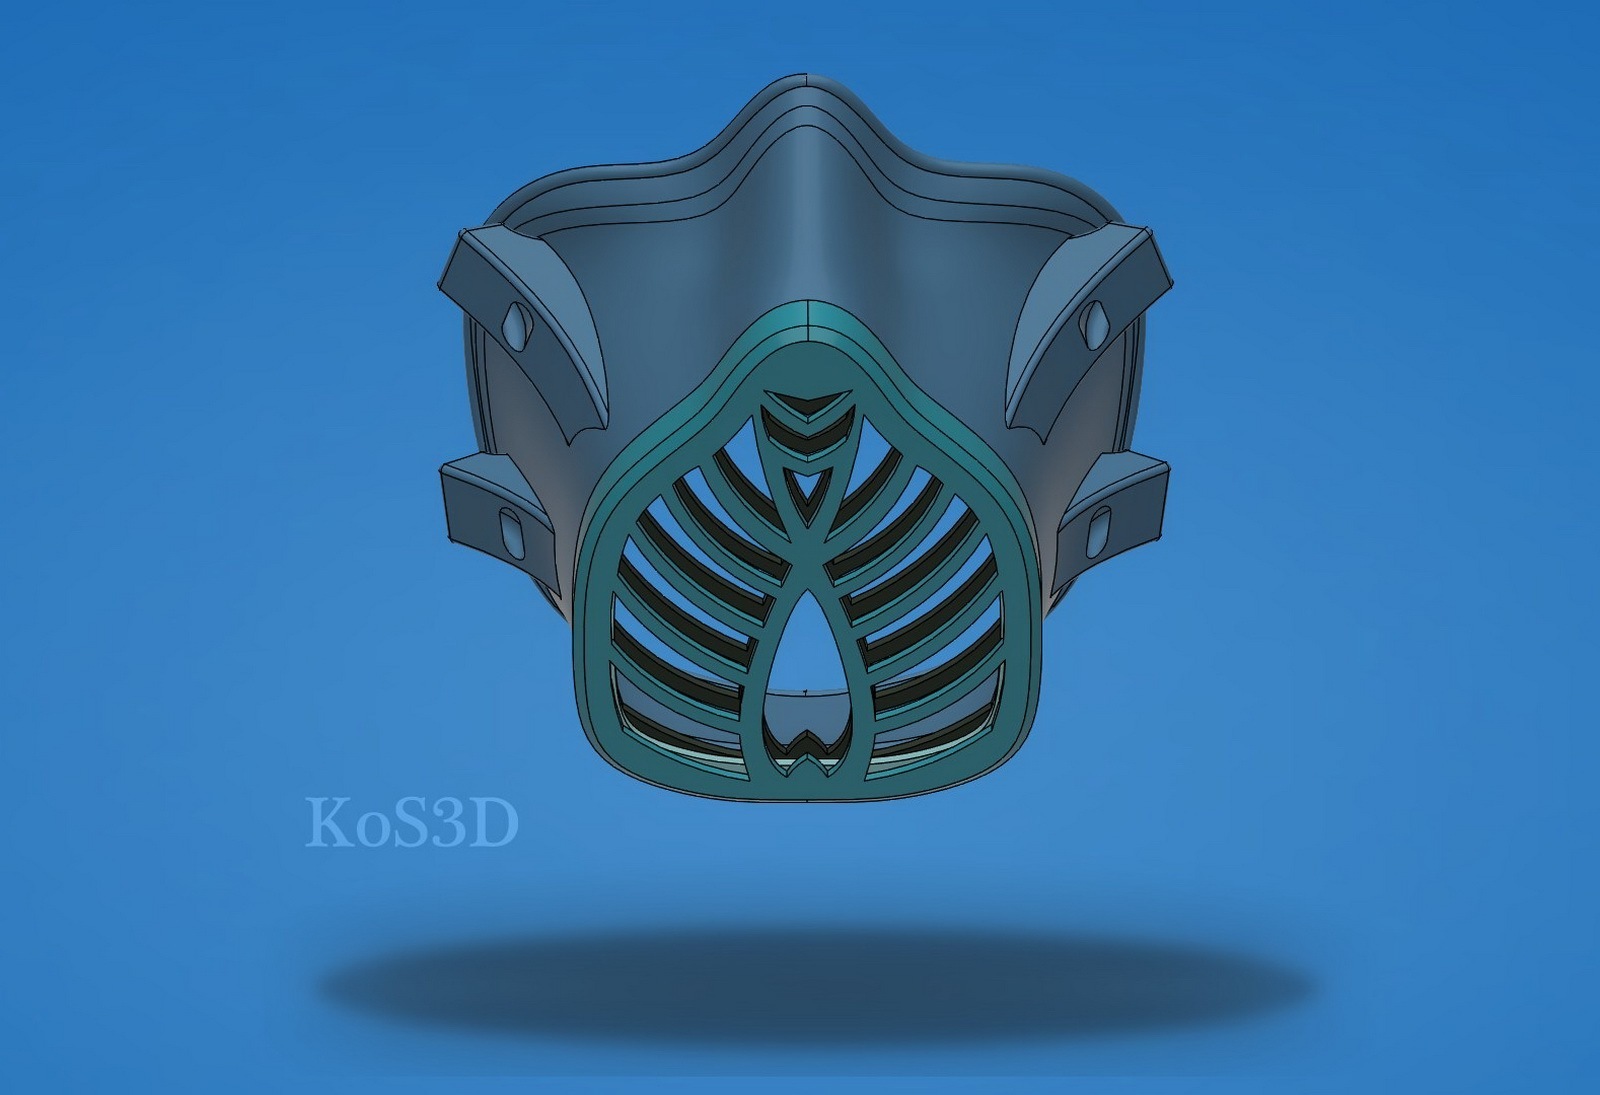
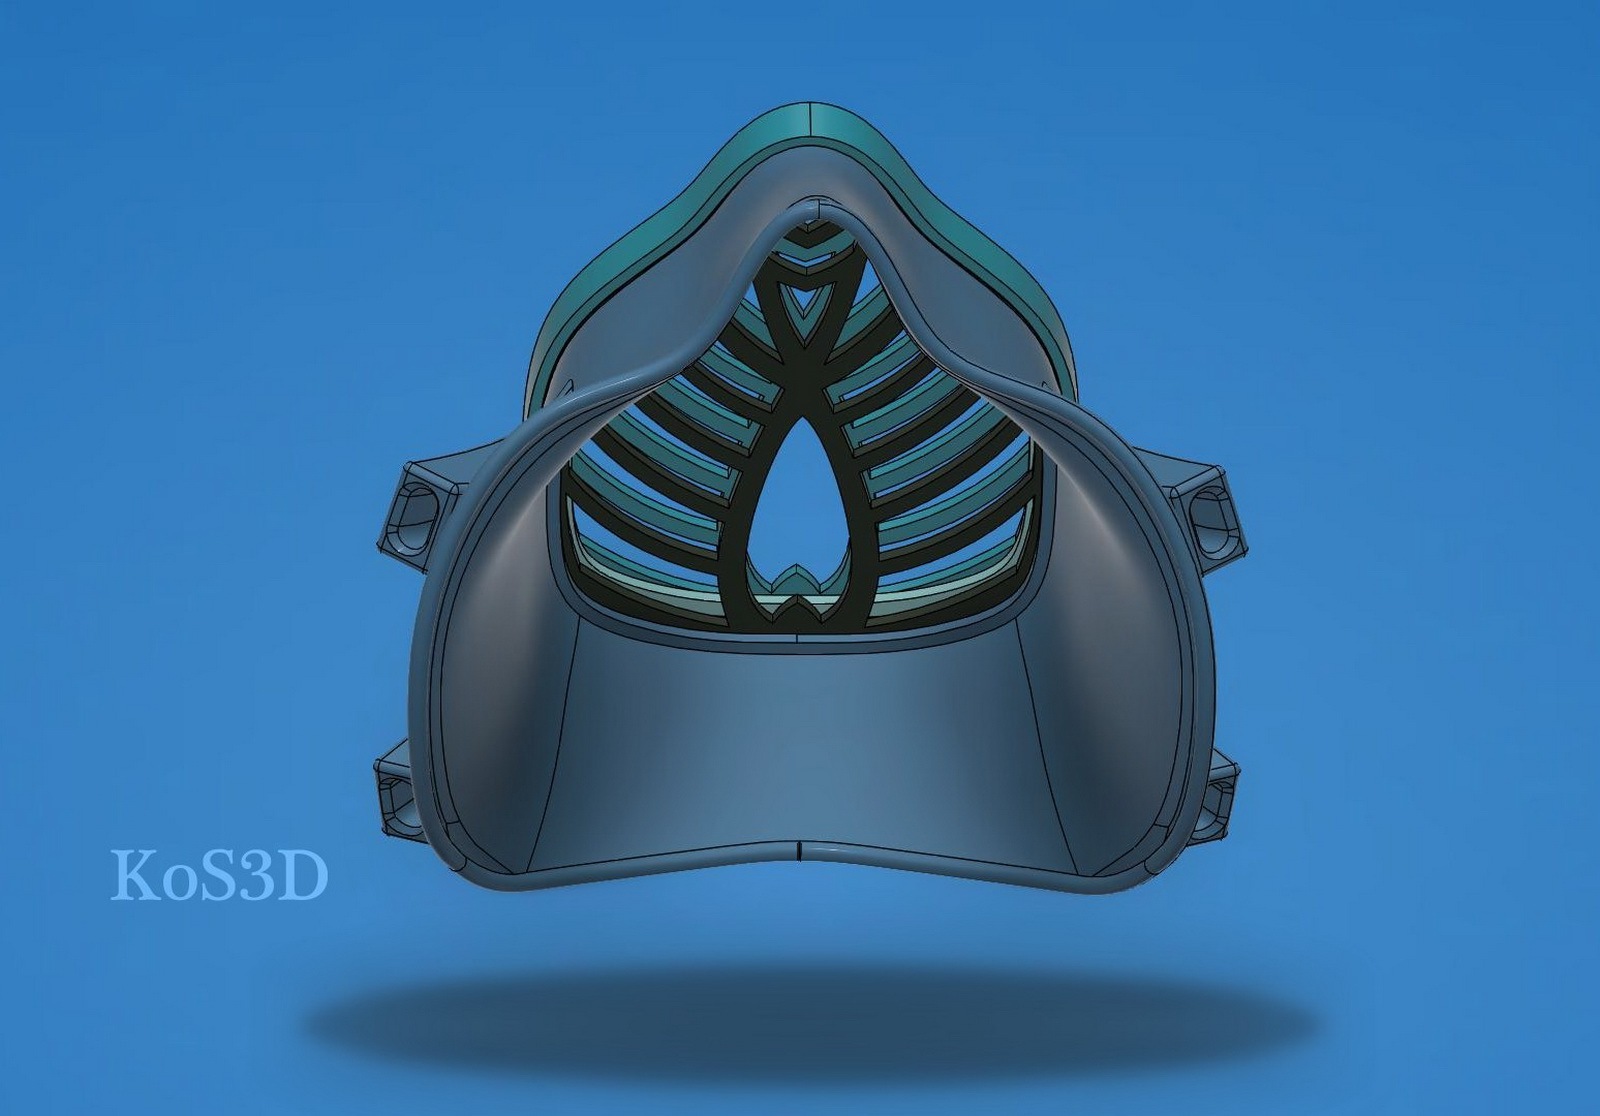
Kos mask doesn't just touch the face with its edges but snugs against the cheeks too for a better sealing effect.
I enlarged the air intake space, because i dont see the point of making them small. You wont get less viruses through a smaller opening. How useful and functional any mask is comes down to what kind of filters are used - and how well you can breathe through them.
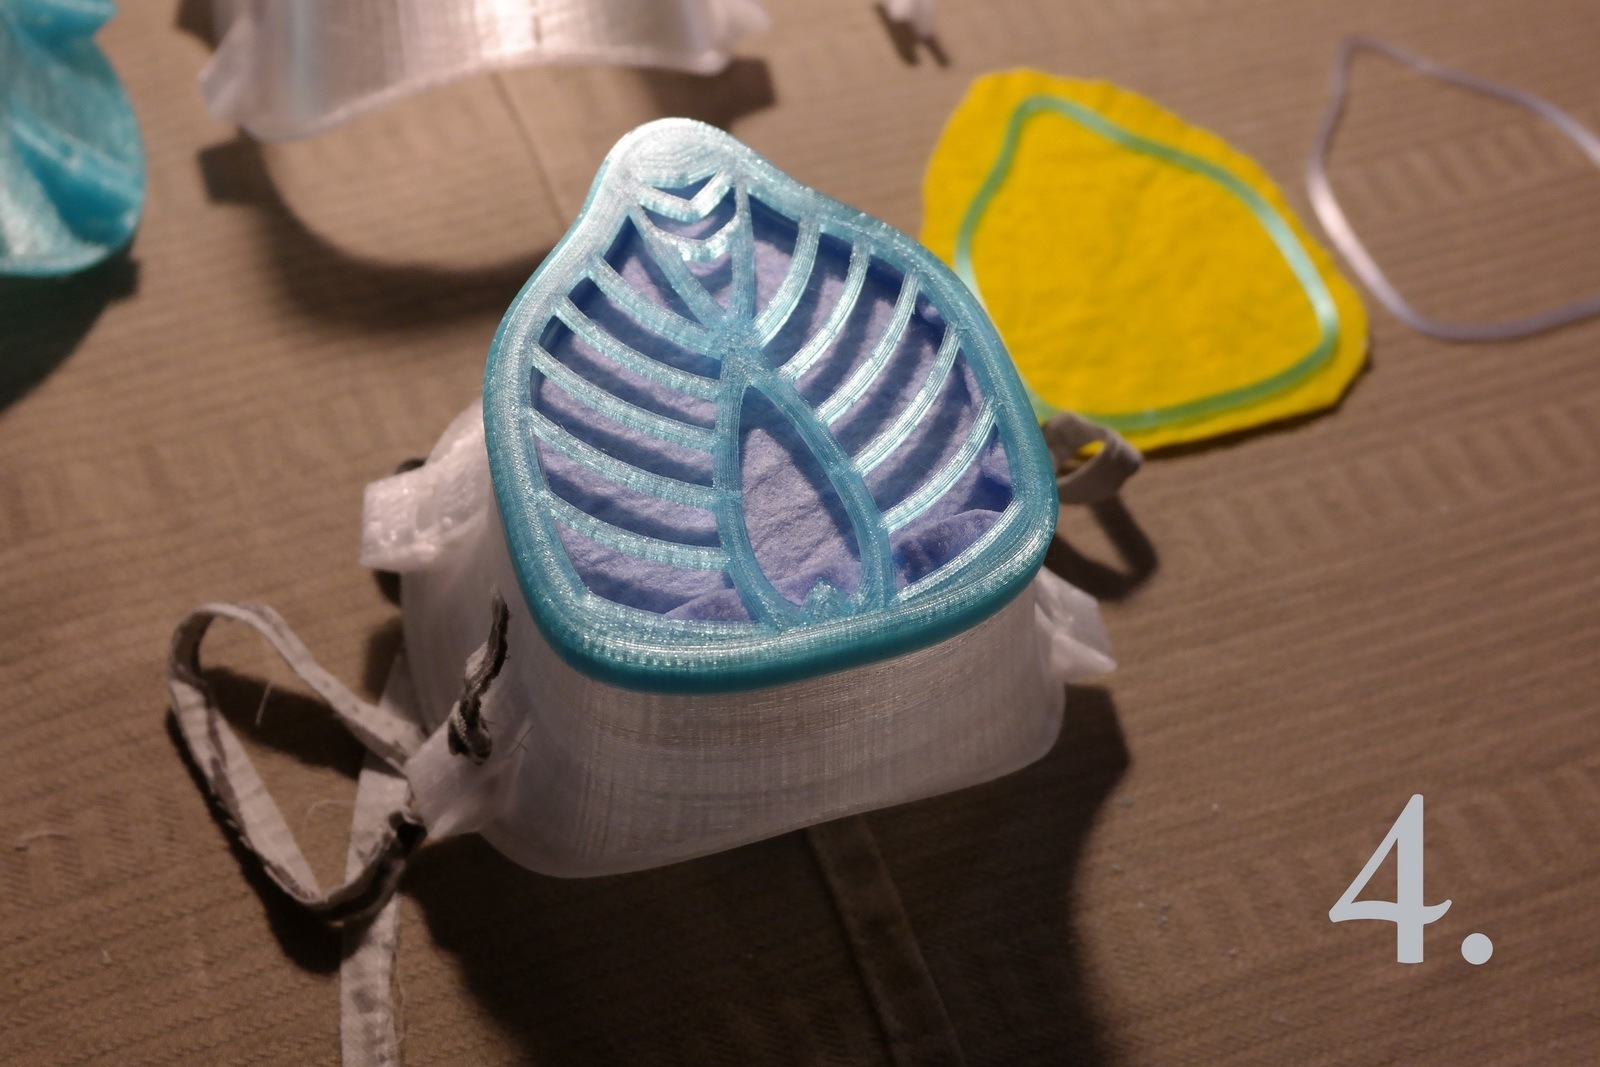
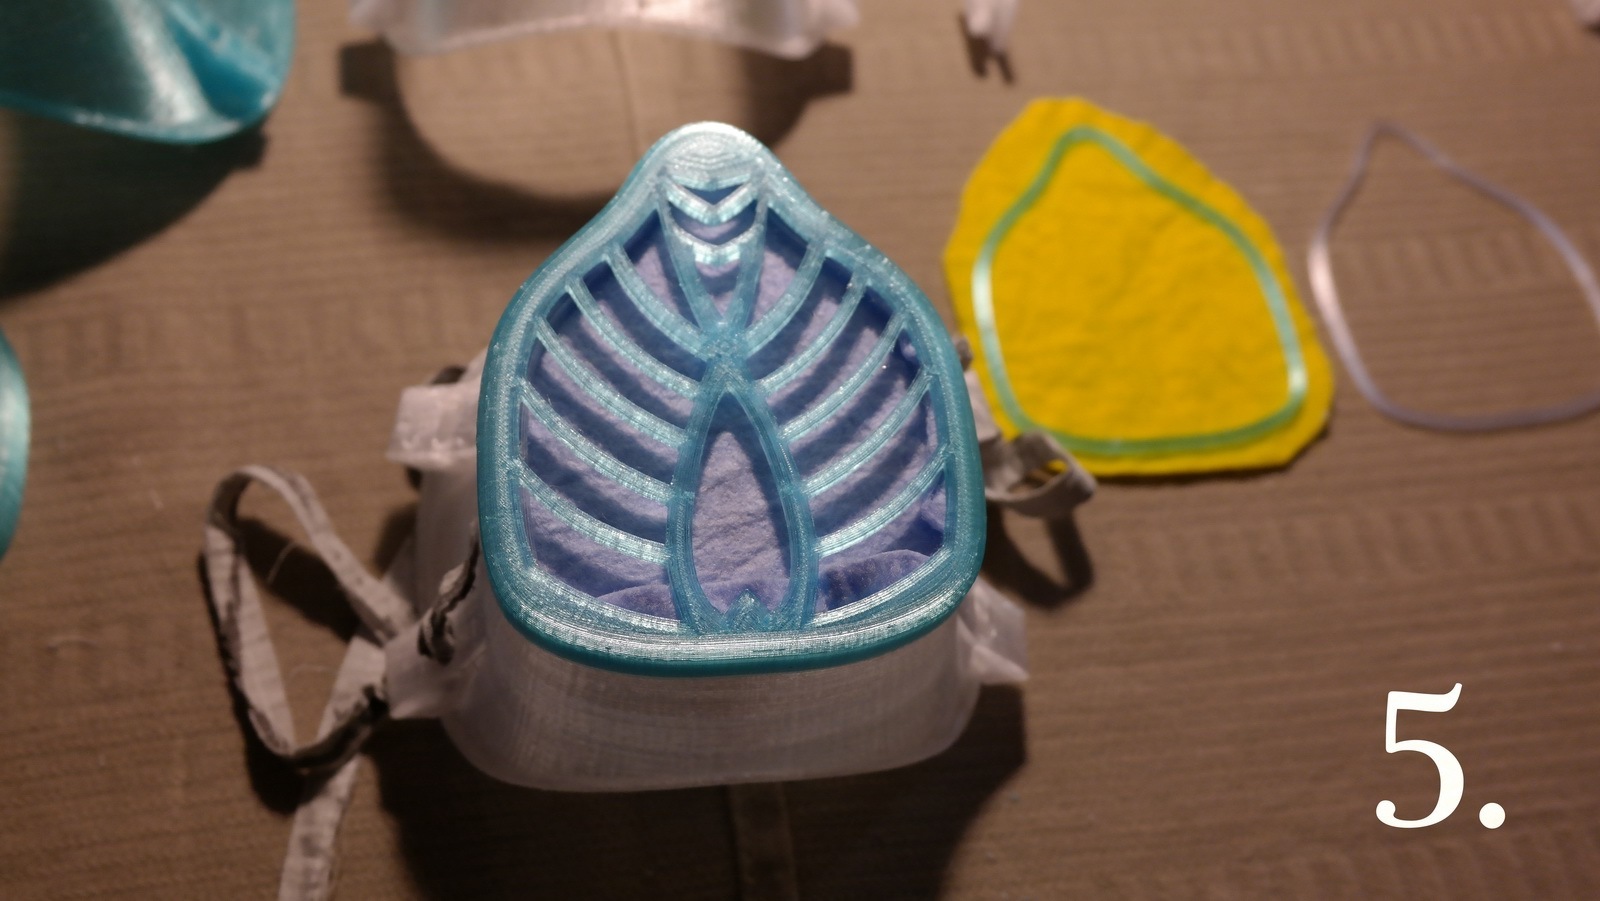
This mask, as any other similar DiY mask will do absolutely nothing without adding filtering materials into the air intake, as described and presented in the pictures.
There is an additional "filter pressing" part, colored white-gray in the pictures. It serves to secure the filtering material firmly inside in between the inner grill (dark color) and the Air intake cover (green).
It can also be used to cut any filtering material to appropriate shape. (Cutting should be done by following the outside rim of it, but dont cut too close, leave 1 or 2 centimeters extra distance - check the pictures).
Depending on how much of filters you put into the mask or how thick the filtering material is, you can leave the "pressing part" out, or even make it thicker in your 3D printing slicer "resize" options.
I added a second file for this part, named "Filter pressing part redux". It is 1 mm smaller so it fits better with thicker or several layers of filtering materials.
The tube rail:
Unlike other masks of this kind ive seen, this one has an extra addition that will help with fitting and sealing off the air from coming in under the edges.
Reddit user GeorgieWashington came up with this very good idea of adding a soft silicone or rubber type of a tubing around the facemask edge.
So i added a rounded edge to my mask, which should serve to hold any such tubing with similar interior diameter. The silicone or rubber tube only needs to be cut lengthwise (if it isnt cut already) and wrapped around this rounded edge as a sleeve, as can be seen in example pictures.
Similar tubing can be printed from flexible filaments too.
This rounded edge or rim of the mask can be easily adjusted for any required inner diameter of tubing, either by me or anyone with moderate knowledge of Fusion 360 software. All it takes is changing one single measure in the design, in one single sketch drawing named "Tube inside diameter" which is inside a separate "Tube Edge" component. (in the F3D file i share among other files) The model will update to those new measures.
I hope all other designers and makers will consider using this idea for their own mask designs.
- If you cant do it yourself send me a message and ill make a new model for you with the diameter you need. It can also be some other shape if thats necessary, not just a round circle.
:format(webp)/https://fbi.cults3d.com/uploaders/14407158/illustration-file/9b2a41db-261f-425e-a52e-59305f62e404/Kos%20Mask%20v3.1.2%20W11.jpg)