𝐍𝐎𝐓𝐄 𝐎𝐍 𝐒𝐓𝐀𝐂𝐊𝐄𝐃 𝐕𝐄𝐑𝐒𝐈𝐎𝐍: 𝐑𝐄𝐀𝐃 𝐈𝐍𝐒𝐓𝐑𝐔𝐂𝐓𝐈𝐎𝐍𝐒 𝐁𝐄𝐋𝐎𝐖 𝐎𝐑 𝐈𝐓 𝐖𝐈𝐋𝐋 𝐌𝐎𝐒𝐓 𝐋𝐈𝐊𝐄𝐋𝐘 𝐅𝐀𝐈𝐋!
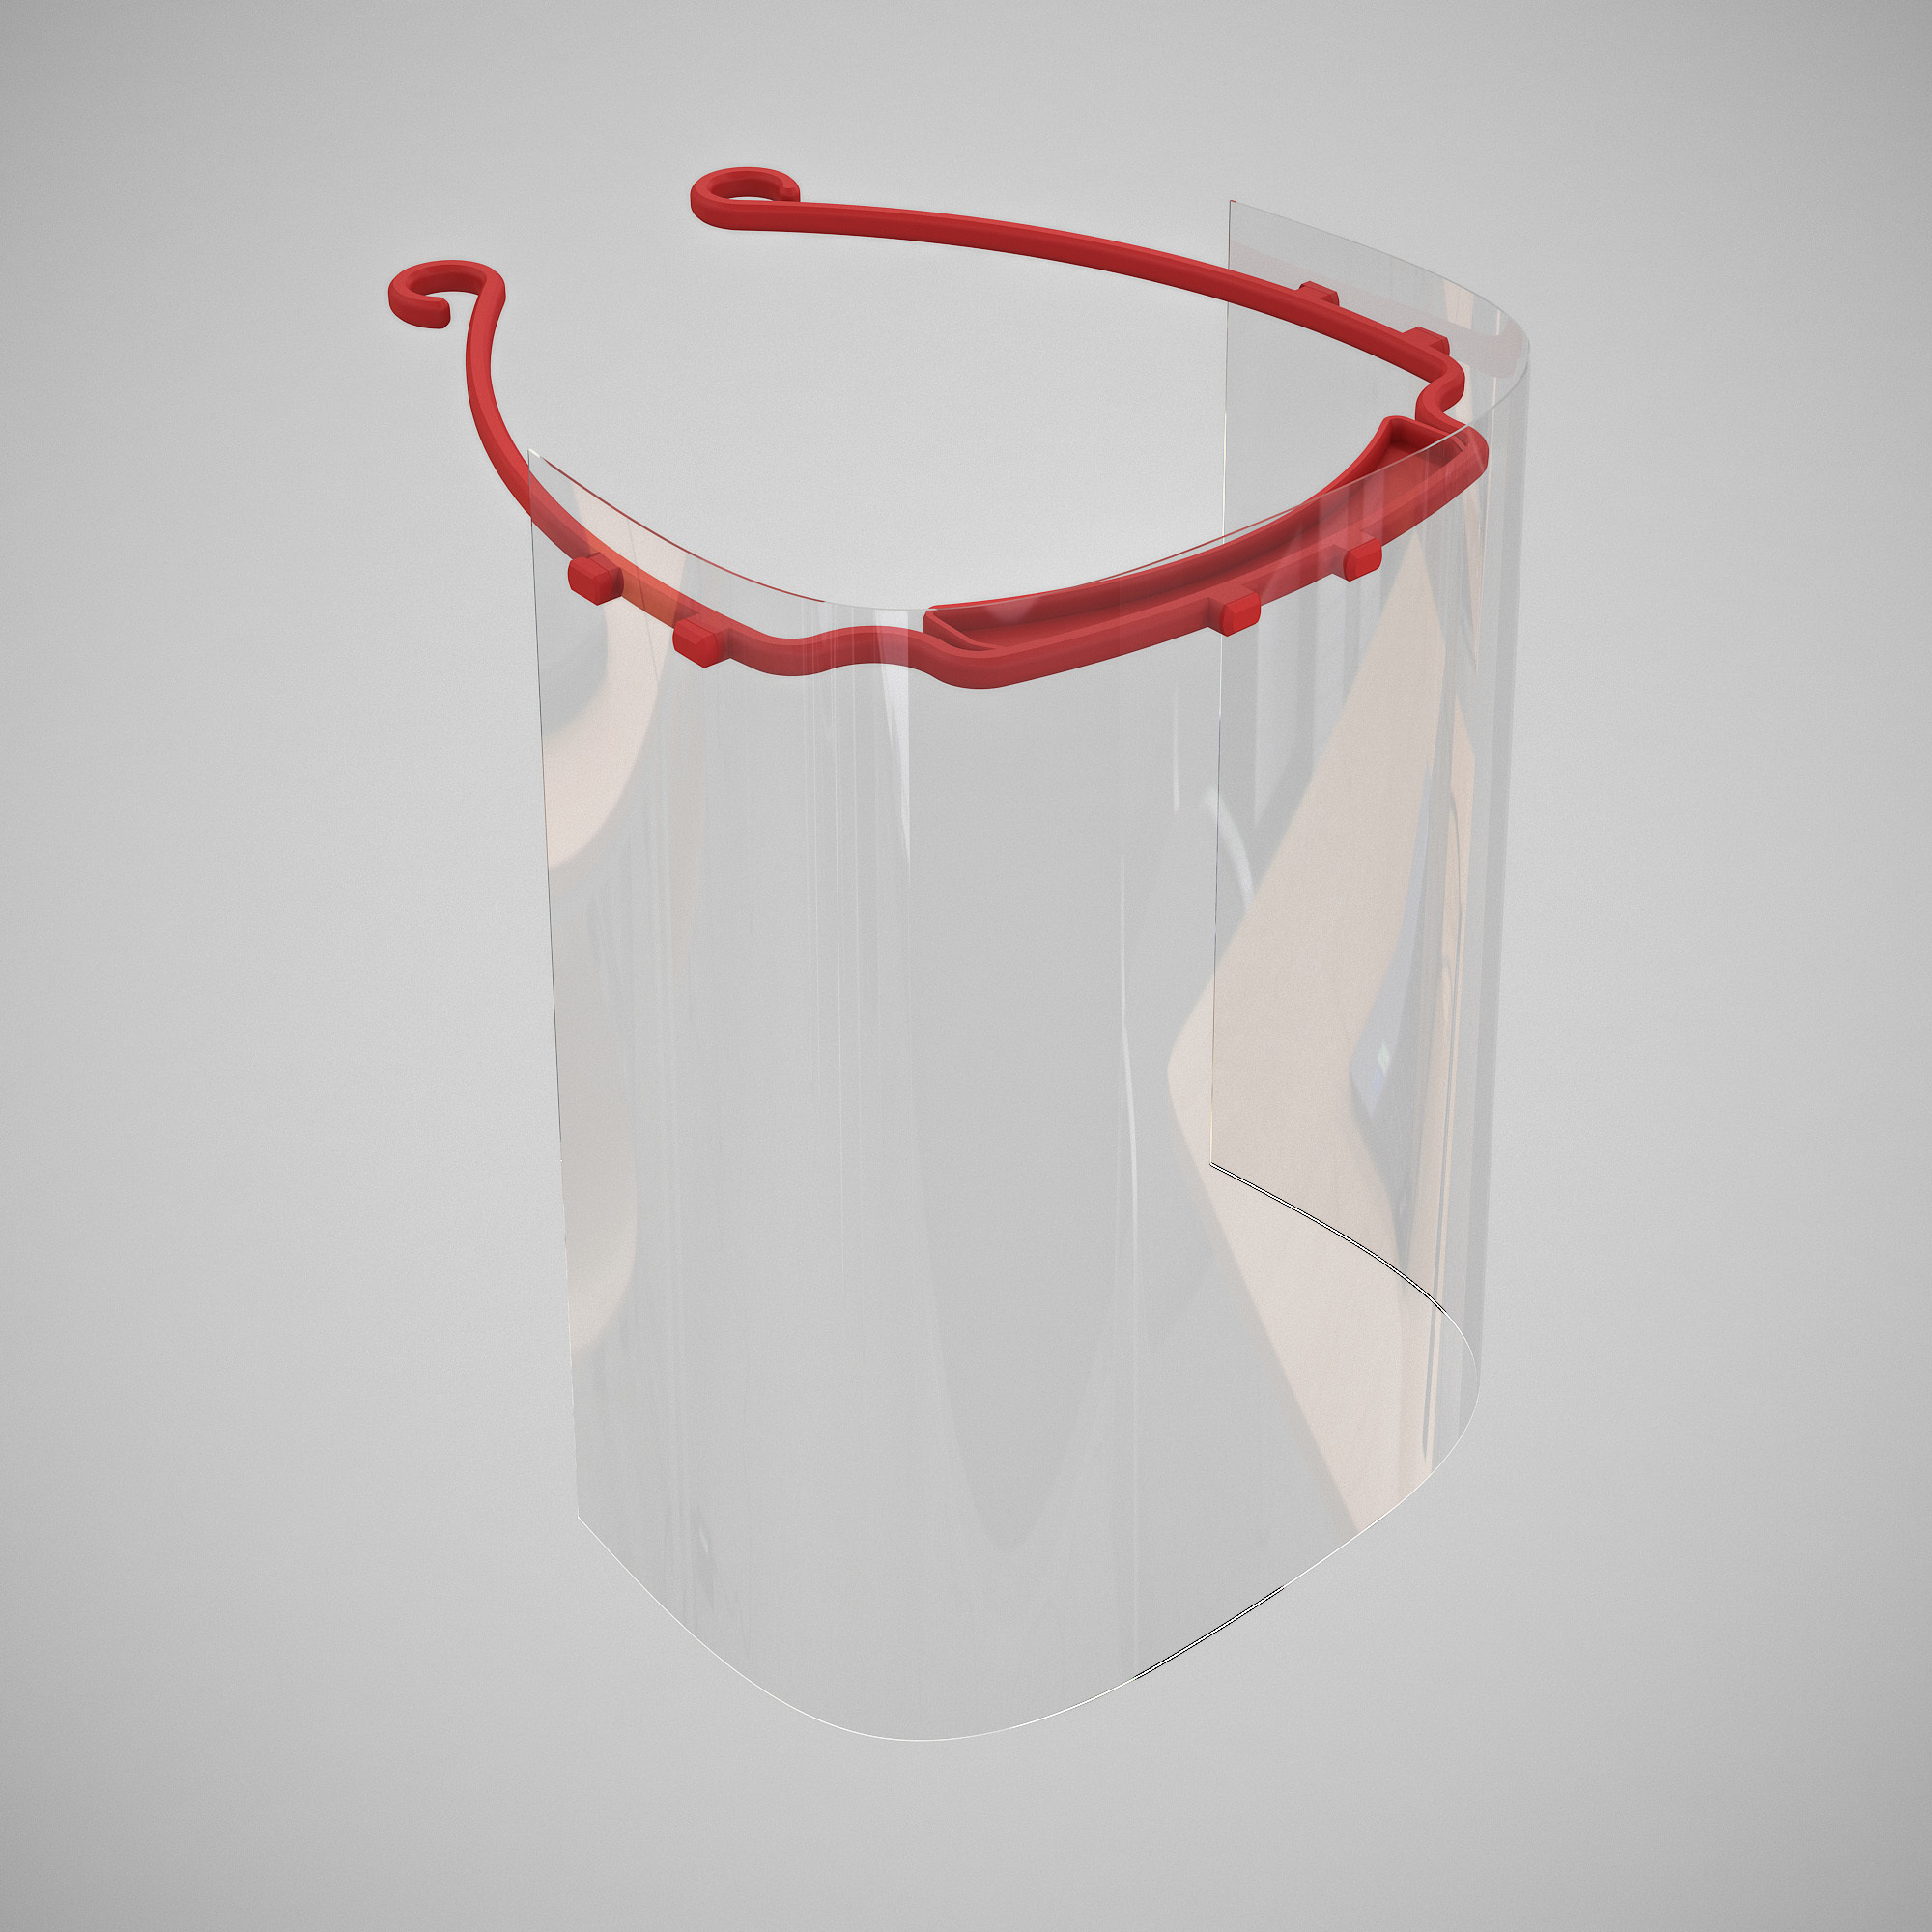
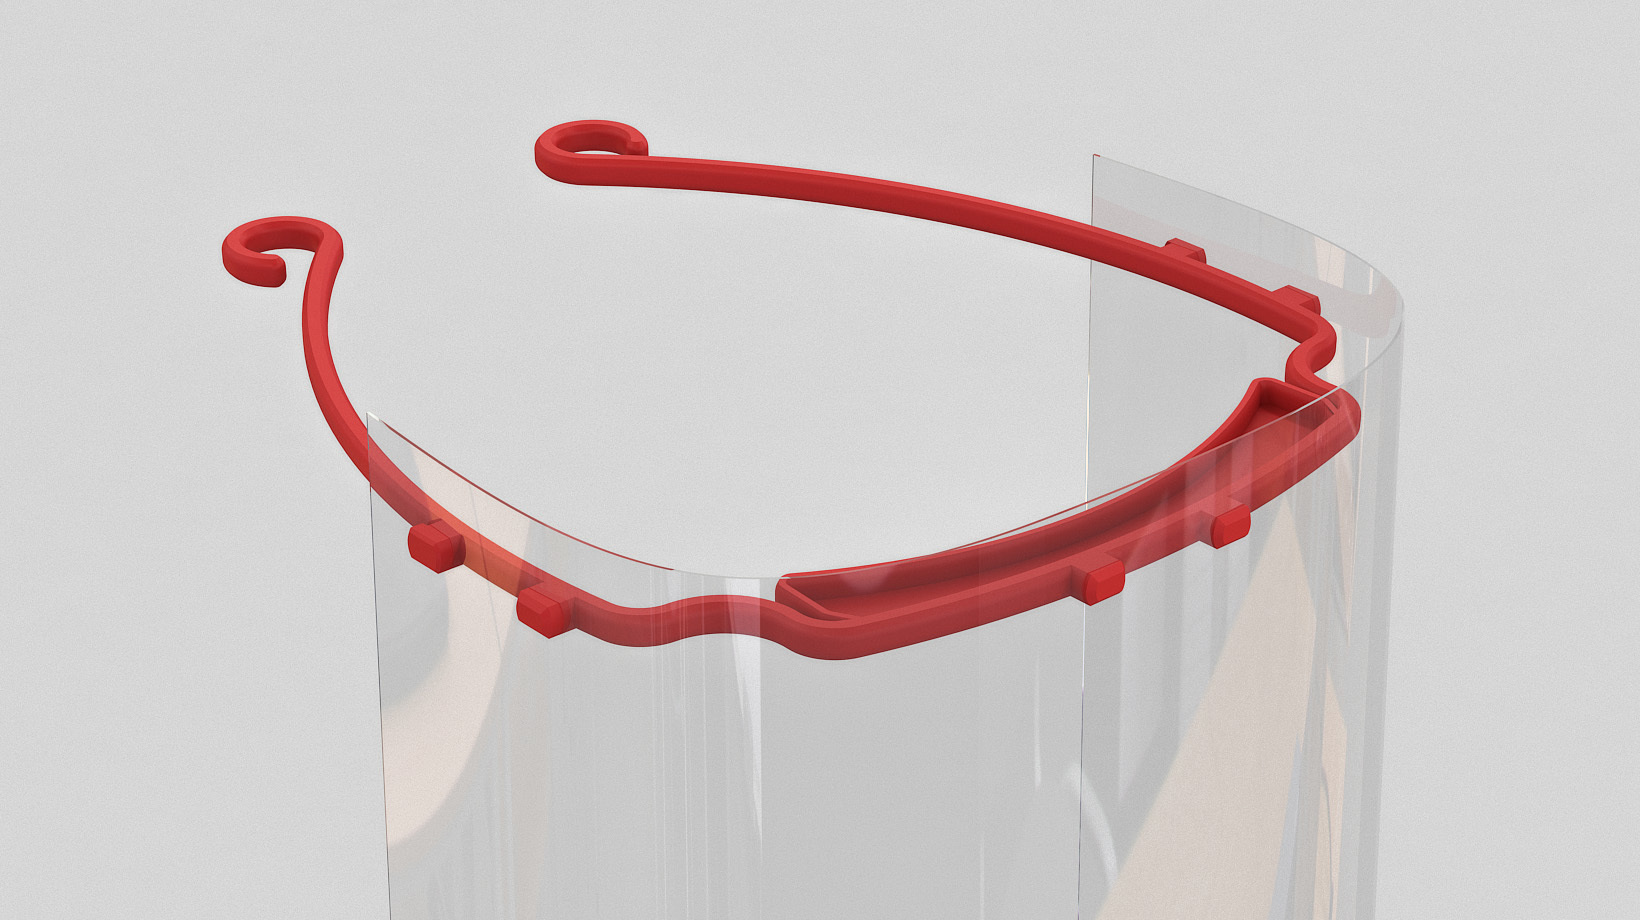
I remodeled it to remove all sharp edges (that would dig into your forehead while you're wearing this for long shifts).
I also modeled a stacked version that REQUIRES NO GAPS. Gaps are complicated to get right and come out messy. This one just has mainly 1 setting you need to get right, comes out clean, can be printed with any nozzle size and at most layer heights (tested from 0.2mm to 0.6mm layer heights).
This stacked version uses less filament/prints faster and comes out much cleaner than most other stacked versions.
𝐒𝐓𝐀𝐂𝐊𝐄𝐃 𝐕𝐄𝐑𝐒𝐈𝐎𝐍 𝐈𝐍𝐒𝐓𝐑𝐔𝐂𝐓𝐈𝐎𝐍𝐒 (𝐖𝐈𝐋𝐋 𝐌𝐎𝐒𝐓 𝐋𝐈𝐊𝐄𝐋𝐘 𝐅𝐀𝐈𝐋 𝐈𝐅 𝐘𝐎𝐔 𝐃𝐎𝐍'𝐓 𝐑𝐄𝐀𝐃 𝐓𝐇𝐈𝐒):
(Stacks of 2-30 are in zipped folders)
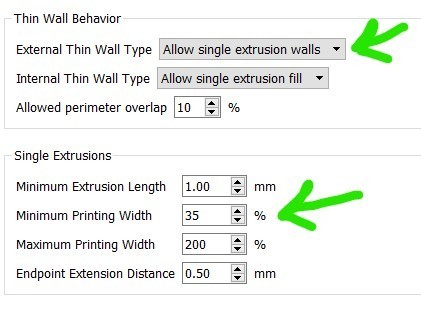
𝐄𝐍𝐀𝐁𝐋𝐄 𝐓𝐇𝐈𝐍 𝐖𝐀𝐋𝐋𝐒!!!
𝐄𝐍𝐀𝐁𝐋𝐄 𝐓𝐇𝐈𝐍 𝐖𝐀𝐋𝐋𝐒!!!
𝐄𝐍𝐀𝐁𝐋𝐄 𝐓𝐇𝐈𝐍 𝐖𝐀𝐋𝐋𝐒!!!
^If you don't enable thin walls in your slicer, the print will fail. You need to have external thin walls enabled. This is because this model needs to print a thin, single wall in between each part.
𝐋𝐚𝐲𝐞𝐫 𝐡𝐞𝐢𝐠𝐡𝐭𝐬 𝐭𝐡𝐚𝐭 𝐰𝐨𝐫𝐤:
- 𝟎.𝟐𝐦𝐦
- 𝟎.𝟐𝟒𝐦𝐦
- 𝟎.𝟐𝟓𝐦𝐦 - 𝐫𝐞𝐜𝐨𝐦𝐦𝐞𝐧𝐝𝐞𝐝 𝐟𝐨𝐫 𝟎.𝟒𝐦𝐦 𝐧𝐨𝐳𝐳𝐥𝐞𝐬
- 𝟎.𝟑𝐦𝐦 - 𝐫𝐞𝐜𝐨𝐦𝐦𝐞𝐧𝐝𝐞𝐝 𝐟𝐨𝐫 𝟎.𝟒-𝟎.𝟓𝐦𝐦 𝐧𝐨𝐳𝐳𝐥𝐞𝐬
- 𝟎.𝟑𝟕𝟓𝐦𝐦 - 𝐫𝐞𝐜𝐨𝐦𝐦𝐞𝐧𝐝𝐞𝐝 𝐟𝐨𝐫 𝟎.𝟔-𝟎.𝟖𝐦𝐦 𝐧𝐨𝐳𝐳𝐥𝐞𝐬
- 𝟎.𝟒𝐦𝐦 - 𝐫𝐞𝐜𝐨𝐦𝐦𝐞𝐧𝐝𝐞𝐝 𝐟𝐨𝐫 𝐧𝐨𝐳𝐳𝐥𝐞𝐬 𝐥𝐚𝐫𝐠𝐞𝐫 𝐭𝐡𝐚𝐧 𝟎.𝟖𝐦𝐦
- 𝟎.𝟓𝐦𝐦
- 𝟎.𝟔𝐦𝐦
𝐖𝐀𝐓𝐂𝐇 𝐌𝐘 𝐕𝐈𝐃𝐄𝐎 𝐖𝐈𝐓𝐇 𝐈𝐍𝐒𝐓𝐑𝐔𝐂𝐓𝐈𝐎𝐍𝐒 𝐀𝐍𝐃 𝐒𝐄𝐏𝐀𝐑𝐀𝐓𝐈𝐎𝐍 𝐓𝐄𝐂𝐇𝐍𝐈𝐐𝐔𝐄𝐒:
https://www.youtube.com/watch?v=PdVkj2SWmTU&t=1s
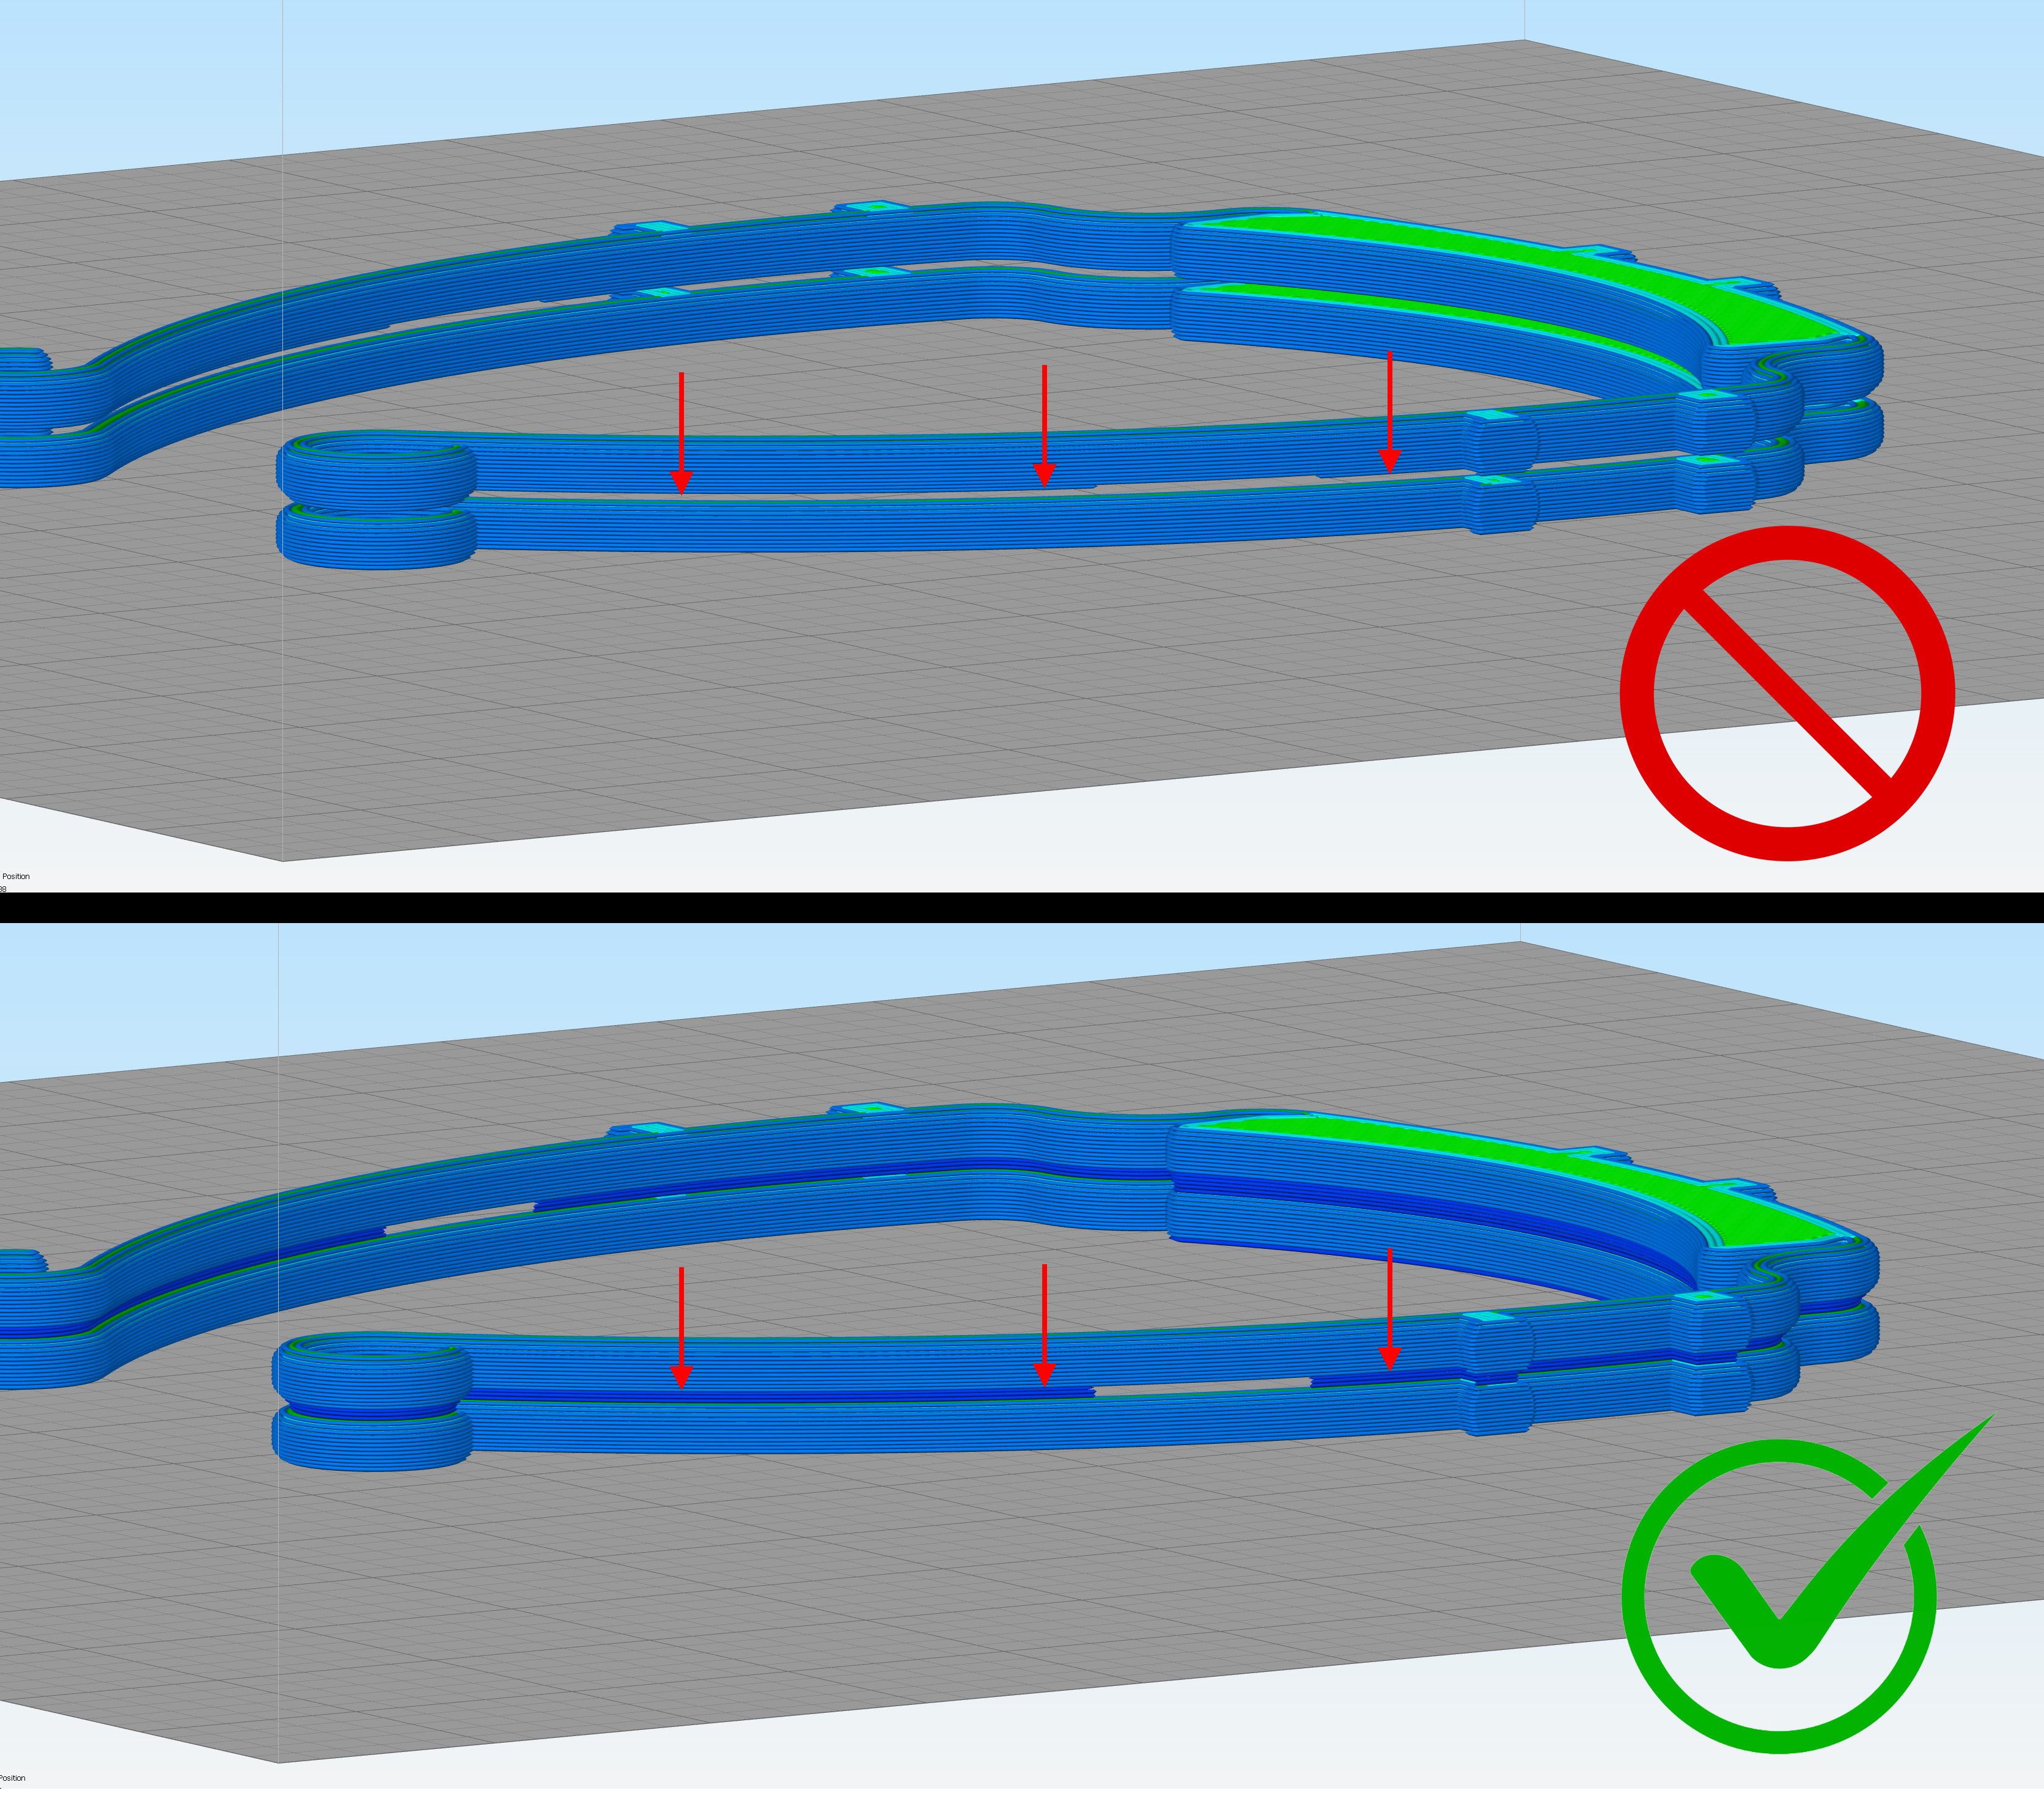
𝐒𝐭𝐚𝐫𝐭 𝐨𝐟𝐟 𝐰𝐢𝐭𝐡 𝐕𝟒 𝐰𝐢𝐭𝐡 𝐭𝐡𝐞 𝟎.𝟑𝐦𝐦 𝐭𝐡𝐢𝐧 𝐰𝐚𝐥𝐥 - it works for most nozzle sizes. There's one for layer heights of 0.2-0.4mm and another for layer heights of 0.5 and 0.6mm. If you see bridging across the curves (see photo), try increasing your temperature or extrusion multiplier slightly. If that doesn't work, try the stack that has a 0.4mm thin wall. If the parts stick together too well, try the 0.2mm thin wall version (all files are labeled accordingly).
𝐖𝐀𝐑𝐍𝐈𝐍𝐆 #𝟐: TEST THE STACK OF 2 FIRST! You want to make sure it works before you start a stack of 5-30. Start with 2, then 3, then 5, then 10, and so on so you don't waste time or plastic.
𝐍𝐎𝐓𝐄: You can set your minimum extrusion width down to 24-50% of the nozzle width and you can set you maximum extrusion width up to 200% of your nozzle width.
𝐈𝐧 𝐲𝐨𝐮𝐫 𝐬𝐥𝐢𝐜𝐞𝐫, 𝐲𝐨𝐮 𝐬𝐡𝐨𝐮𝐥𝐝 𝐬𝐞𝐞 𝐍𝐎 𝐆𝐀𝐏𝐒 𝐛𝐞𝐭𝐰𝐞𝐞𝐧 𝐭𝐡𝐞 𝐩𝐚𝐫𝐭𝐬 𝐞𝐱𝐜𝐞𝐩𝐭 𝐟𝐨𝐫 𝐭𝐡𝐞 𝐞𝐚𝐬𝐲-𝐨𝐩𝐞𝐧 𝐠𝐚𝐩 (𝐚 𝐬𝐦𝐚𝐥𝐥 𝐠𝐚𝐩 𝐭𝐡𝐚𝐭 𝐚𝐥𝐥𝐨𝐰𝐬 𝐲𝐨𝐮 𝐭𝐨 𝐢𝐧𝐬𝐞𝐫𝐭 𝐚 𝐟𝐥𝐚𝐭-𝐡𝐞𝐚𝐝 𝐬𝐜𝐫𝐞𝐰𝐝𝐫𝐢𝐯𝐞𝐫 [𝐨𝐫 𝐬𝐢𝐦𝐢𝐥𝐚𝐫] 𝐟𝐨𝐫 𝐞𝐚𝐬𝐲 𝐬𝐞𝐩𝐚𝐫𝐚𝐭𝐢𝐨𝐧). 𝐒𝐞𝐞 𝐩𝐡𝐨𝐭𝐨 𝐞𝐱𝐚𝐦𝐩𝐥𝐞 𝐢𝐧 𝐢𝐦𝐚𝐠𝐞𝐬.If you see only a gap between the parts, it means you do not have thin walls enabled (watch the video).
^That is the most important setting for printing these stacks, but here are some other basic settings that help:
𝐒𝐎𝐌𝐄 𝐎𝐓𝐇𝐄𝐑 𝐈𝐌𝐏𝐎𝐑𝐓𝐀𝐍𝐓 𝐒𝐄𝐓𝐓𝐈𝐍𝐆𝐒:
- Infill: You may see small holes in the flat part of the print where it bridges/infills. If you do, increase your infill extrusion width until those little holes go away (only seen in prints, not slicer). You can set infill percentage to 0% though as long as you have enough top and bottom layers.
𝐃𝐎 𝐍𝐎𝐓 𝐔𝐒𝐄 𝐒𝐊𝐈𝐑𝐓! This creates an additional piece that you have to rip or cut off and often leaves sharp points that can puncture skin. If you're having bed adhesion issues, you need to find another solution besides skirts.
Optimize start points for fastest printing speed.
Outline/Perimeter Shells: 2-4 on a 0.8mm nozzle or 2-8 on a 0.4mm nozzle.
Top and bottom solid layers: Just set both to something like 20. The idea is just to make the part solid.
Brims are optional. If you have a purge command (where it wipes away plastic ooze before it starts the print), then you probably don't need it.
𝐍𝐎 𝐒𝐔𝐏𝐏𝐎𝐑𝐓𝐒! Do not print with supports on.
Outline Direction: Outside-in (starts with outer layer then does inner layers next).
Bridging angle: 90 degrees (or whatever makes the bridging angle parallel to the parts (for shortest bridging distance).
𝐖𝐀𝐑𝐍𝐈𝐍𝐆: 𝐔𝐒𝐄 𝐏𝐑𝐄𝐂𝐀𝐔𝐓𝐈𝐎𝐍 𝐖𝐇𝐄𝐍 𝐒𝐄𝐏𝐀𝐑𝐀𝐓𝐈𝐍𝐆!!! Knife safety 101: Never cut towards yourself, always cut away from yourself. Besides, this one should not require much force at all, it's more about twisting. Watch the video :)
The plastic shield can be made out of any semi-stiff plastic sheet between 0.1 and 1mm, including overhead film, cover sheets for binding machines etc, as long as it is available in a suitable format. We're using the Letter Size PVC Binding Covers that you can find at office supply stores or online (most common).
Link:
https://www.amazon.com/dp/B077H4635Y/?coliid=I2DCRSBQPD3T1Q&colid=2XMBKI62YTJEU&psc=1&ref_=lv_ov_lig_dp_it
The templates for punching the holes are also attached (can use a 3 hole punch for expediency).
You need at least a 160x190mm build area to print these.
Big thanks to Alaukik Bhatt for going back and forth with me on this design and thanks to everyone else that helped test it out and gave feedback. Feel free to comment if you have suggestions or problems printing the stacks.
Attribution:
Erik Cederberg / 3DVerkstan
:format(webp)/https://fbi.cults3d.com/uploaders/14682977/illustration-file/4b545755-388d-4b57-af31-77fbf196a400/Smooth%20Face%20Shield%20V1%20Rendering%2001.jpg)


/https://preview3d-images.cults3d.com/variants/3veksclrs7ahzsqiiqed3vipnh5e/9ce1a1278a90847fe525f7bdea66ae6081035e320afa813bf6efbbbe4c5d9f85)


