Skip to content

Dial gauge indicator holder for manual bed leveling

Advertising
Advertising
?
Creation quality: 5.0/5 (1 vote)
Evaluation of members on the printability, utility, level of detail, etc.

  • 2.4k views
  • 1 like
  • 14 downloads

License
3D design format
STL Folder details Close
  • dial_holder.stl
  • dial_holder_cone.stl
  • dial_holder_shaft.stl

Learn more about the formats

Publication date 2020-03-30 at 23:38
?
Published to Thingiverse on: 2020-03-28 at 09:50
Design number 125755

3D printer file info

3D model description

Designed for Creality Ender 3:
I have a warped bed with a well in the middle. I want to use the magnetic plate but the warped bed gives a headache.

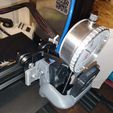
This is a set of accessories for manual bed leveling using a dial indicator.
It can be mounted just with pushing it on the hotend carrier cart plate (from the top).
The measuring tip is appx. 10 mm in -Y direction [0,-10] from the nozzle; still much closer than other methods. Your configuration may vary.

NOTE:
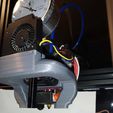
In my configuration the Shaft and Cone (the measuring tip) is located below the printer's heat block. Be careful.

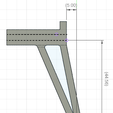
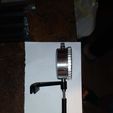
The real photos are showing the first prototype but the second version is very similar. See the models.

How do I use it?
I have the manual_bed_leveling enabled in Marlin. I can launch the procedure of Bed_leveling in printer's menu.
- First, the assembled Holder with gauge is placed on the Hotend cart plate.
- Activate the Corner bed leveling in menu
- Adjust bed height wheels to read all corners at same elevation on the Dial scale
- Activate Bed leveling procedure in menu
- Go through all measuring points and adjust the Z offset on screen by turning the control knob to read the same elevation on the dial (same as corners)
- When finished, Store settings in menu
- At last, the Live-Z method of finetuning the first layer shall be used
- Use the menu option during printing: Tune -> Z-offset (adjust to have perfect first layer)

After this procedure the first layer shall be very homogenous across the warped bed.

Print settings:
Dial holder shall be stiff use several perimeters, layers at 0.2 or 0.24 mm.
The Cone is small, use low speeds and layers around 0.08 mm
The Shaft bottom part shall be stiff, use enough top and bottom layers (4+4)

The Dial Holder is inspired by another gauge holder, I need to find the reference to express my gratitude to the author for inspiring me.

Advertising


Issue with this design? Report a problem.

Would you like to support Cults?

You like Cults and you want to help us continue the adventure independently? Please note that we are a small team of 3 people, therefore it is very simple to support us to maintain the activity and create future developments. Here are 4 solutions accessible to all:

  • ADVERTISING: Disable your banner blocker (AdBlock, …) and click on our banner ads.

  • AFFILIATION: Make your purchases online by clicking on our affiliate links here Amazon.

  • DONATE: If you want, you can make a donation via Ko-Fi πŸ’œ.

  • WORD OF MOUTH: Invite your friends to come, discover the platform and the magnificent 3D files shared by the community!


Sharing and downloading on Cults3D guarantees that designs remain in makers community hands! And not in the hands of the 3D printing or software giants who own the competing platforms and exploit the designs for their own commercial interests.

Cults3D is an independent, self-financed site that is not accountable to any investor or brand. Almost all of the site's revenues are paid back to the platform's makers. The content published on the site serves only the interests of its authors and not those of 3D printer brands who also wish to control the 3D modeling market.

100% secure payment by credit card, PayPal, Apple Pay, Google Pay, etc.
View all payment options.