3D model description
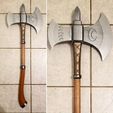
I was inspired by my girlfriend's love of Persona 5 to create Noir's axe for her Noir cosplay.
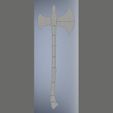
I started by modeling the complete axe. If you just want to print a miniature model of the axe, no need to read further. To make a life-sized prop, I then cut that model into each individual piece, adding features to help facilitate assembly. I designed the pieces to allow for 0.25" aluminum rod to be used to reinforce the assembly.
You will need the following lengths of 0.25" aluminum rod:
- 1 x 130 mm (for parts 10, 11, 12)
- 1 x 95 mm (for parts 09, 10)
- 1 x 460 mm (for parts 01, 05, 06, 07, 08, 09)
- 1 x 45 mm (for parts 01, 04)
- 2 x 40 mm (for parts 01, 02, 03)
These lengths are undersized by about 5 millimeters to account for printer variance and possible debris in the holes.
Notes:
- Ensure the printed pieces fit together before doing final assembly. The fit should be close but not tight.
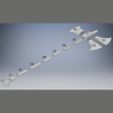
- Ensure the aluminum pieces fit into the holes. The fit should be close but not tight. Refer to the exploded view and the above listed aluminum lengths to determine which aluminum pieces go where.
- I used 2 part epoxy when doing final assembly. I've yet to find an adhesive that works better and lasts longer for 3d printed parts.
- I assembled the pieces that will be painted the same first into subassemblies, painted those, and then performed final assembly.
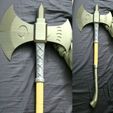
- To achieve a realistic wood look to the handle, I used a woodfill PLA, sanded it smooth, then used a low grit sandpaper to scratch in some fake grain. I then stained it with a dark stain, let that sit a while before wiping and gently sanding away the surface, so only the grain had the dark stain. I then stained the whole thing with a lighter stain before giving it a clear coat. I find that woodfill PLA takes stain differently than real wood, and since there are no natural dark/light bands, this two-stage stain and sand is necessary to achieve that look.
- I used a faux-leather wrap around the bottom pieces as that is what it looks like in the game.
- It's not shown in the picture, but I eventually painted over the "X" shapes with a matte acrylic to help them stand out against the metallic bronze.
3D printing settings
The three largest pieces are the following dimensions (mm):
- 01 Block: 195 x 60 x 60
- 02 Big Blade Top: 165 x 141 x 30
- 04 Small Blade: 169 x 125 x 34
Make sure your printer can accomodate these sizes before purchasing.
If you scale these parts at all, 0.25" aluminum rod may not work in the existing holes, so you'll either need to modify the hole diameter, or use a different material.
I printed in mostly in PETG, as I'm always concerned about people bumping into my props at conventions. I printed 07 and 08 in woodfill PLA. Plain PLA, HTPLA, PLA+ all work perfectly well for all parts if that's your jam. Just make sure you can maintain dimensional accuracy with your chosen filament.
If you're bringing this to a convention, I recommend at least 3-4 wall thickness and 20% infill. Otherwise, use whatever settings work best for you.
Print with supports from bed.

/https://fbi.cults3d.com/uploaders/14394007/illustration-file/6bf42ef9-4948-4135-b5f8-e6ac5db3bb69/axe.jpg)


