Build plate scraper/pusher for automatic prints


Build plate scraper/pusher for automatic prints
Published 2020-04-08T10:10:16+00:00
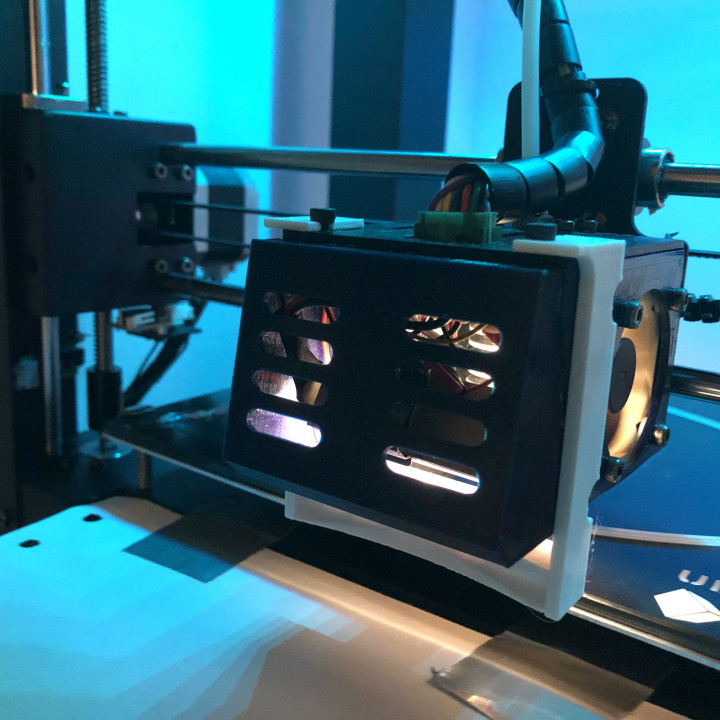
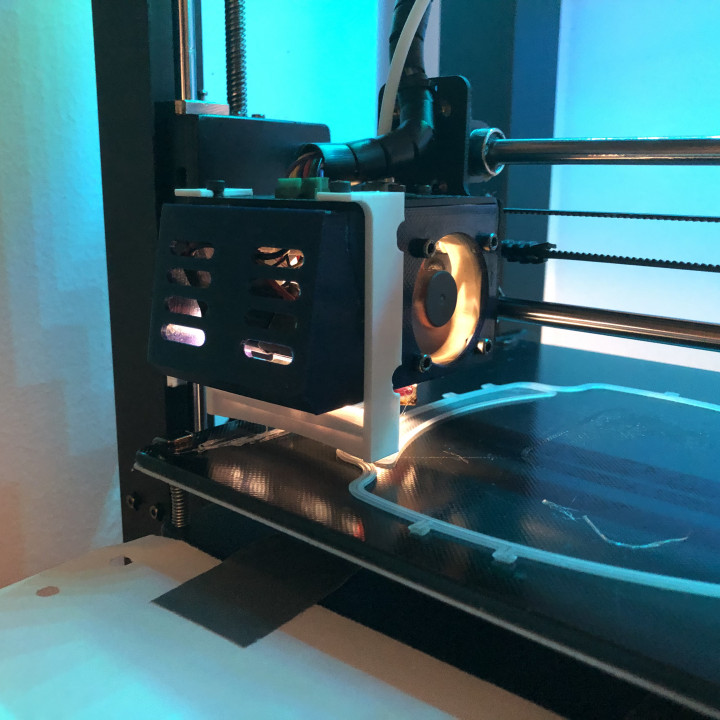
This Is a handy tool for the anycubic I3 Mega in order to make your 3d printer an automatic producing machine. This is especially interesting now when the makercommunity wants to help out in the Covid-19 pandemic by printing face shields. For my example below i used the faceshield made by 3dverkstan.
It is Designed in a different orientation in Fusion so please flip the part before printing it. You don`t need any supports if you print it in the correct positioning.
after printing this out you can follow this guide below to make a automatic pushing procedure.
For Automatic process I Did this:
1: Choose your prefered slice-profile in your slicer.
2: Go in to printer options an choose start-end gcode and copy/Paste the following:
Start Gcode:
M107 ;start with the fan off
M109 S[first_layer_temperature]
G28 X0 Y0 ;move X/Y to min endstops
G28 Z0 ;move Z to min endstops
G92 E0.0
G1 X2 Y0.0 Z0.2 F3000;
G1 Y60.0 E9.0 F1000.0 ; intro line
G1 Y100.0 E12.5 F1000.0 ; intro line
G92 E0.0
M117 Printing...
End GCode:
G1 X75 Y220 Z20 F3000; move up and Back
M190 R40; Wait for bed to Cool to 40 degrees
G1 X75 Y220 Z0.5 F3000; Lower
G1 X75 Y180 Z0.5 F3000; Move Forward
G1 X75 Y170 Z0.5 F3000; Move Backward
G1 X75 Y50 Z0.5 F3000; Move Forward
G1 X75 Y70 Z0.5 F3000; Move Backward
G1 X75 Y50 Z0.5 F5000; Move Forward
G1 X75 Y70 Z0.5 F5000; Move Backward
G1 X75 Y0 Z0.5 F5000; Move Forward
G1 X75 Y220 Z20 F3000; move up and Back
:#M104 S0 ; turn off extruder
:#M140 S0 ; turn off bed
:#G28 X0 ; home X axis
:#M84 ; disable motors
3: Slice Your file, Make sure that the travel movements look okay (tick the box "show travel moves" in your slicer)
4: Save the Gcode
5: Open Up your Gcode with notepad++
6: Erase all the commented lines in the bottom of the code (i.e all lines that start with ; (semicolon) )
7: Select all gcode, Copy and then Paste as many faceshields you want (if you want 5 shields, paste 4 times).
8: Erase all the Hashtags (#) from the last lines to make them active.
9: Go to the top and copy the line "G1 X2 Y0.0 Z0.2 F3000;" (Or what prime distance X you have)
10: Go to the search-bar (Ctrl+f) and paste the line. now, search for the line and each time it finds this line you will change the value X in the Gcode so the second cycle the line will be: G1 X3 Y0.0 Z0.2 F3000; and the third cycle: G1 X4 Y0.0 Z0.2 F3000;
11: increase these as many cycles as you have.
12: Save the file (don´t forget to put .gcode in the end because otherwise the printer won´t recognize it as gcode.
13: Print it like normal Gcode via usb, SD-card or octoprint.
14: make sure to be near the printer the first cycle to see that it works properly, be ready to turn the printer off if something goes wrong.
15: That´s it, you god yourself a shield-making automatic machine. :)
Please let me know if i missed some details so i can add it in this text, thanks.


| Date published | 08/04/2020 |
| Support Free | YES |
