Quick tool change mod - 3 in 1 - printer ploter and milling machine


Quick tool change mod - 3 in 1 - printer ploter and milling machine
Published 2020-09-27T16:00:21+00:00
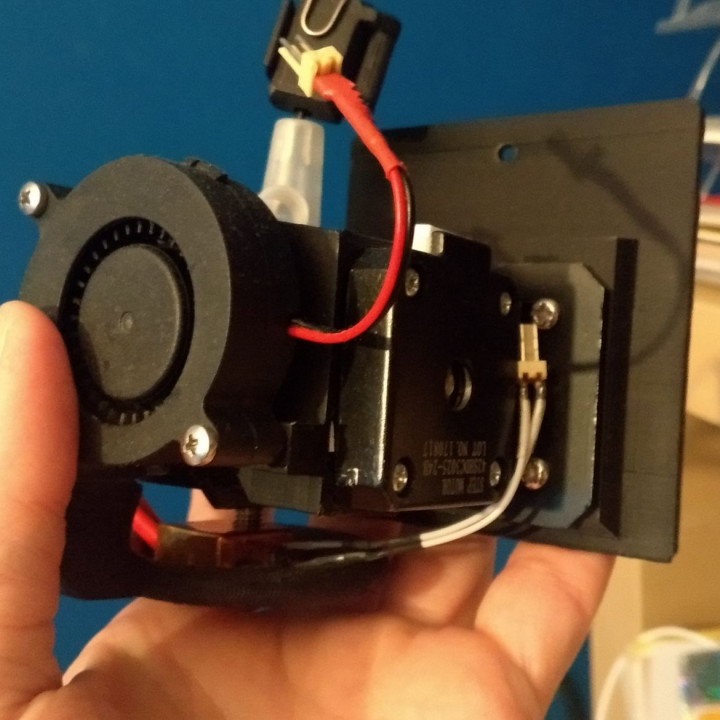
The wiring
One the first things I did to my AnetA8 was to cut all the wires coming in and out of the carriage (both fans, heater and its temperature sensor) and solder in apropriate pins and sockets. I've used the simplest ones with exception to heater - high current requires somethiing bigger. I've used something like this: https://www.reichelt.com/de/en/t-type-high-current-plug-socket-hstt-stbu-p207645.html (not an affiliate link)
That kind of setup will be helpful with the motor mount to provide the power without having to provide new wires. Or you can use new wires - it's up to you.
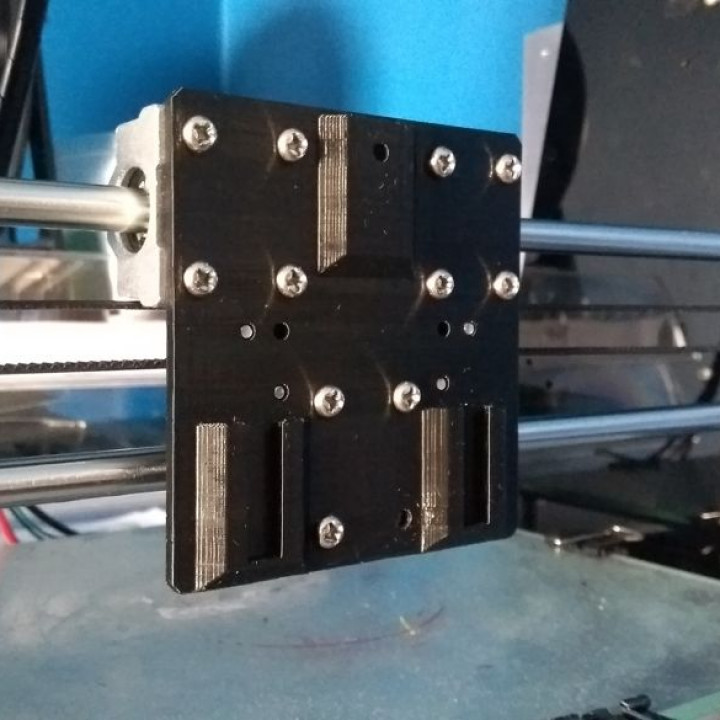
Replacing metal plate
Just unscrew the metal plate from bearings and screw in the printed CarriagePlate.stl with a M3 nut inserted in its hole (near the top).
X-belt holder can be screwed to it as well - all the holes are there.
All other parts are to be pressed from top onto this plate and scewed into place using one M3 screw.
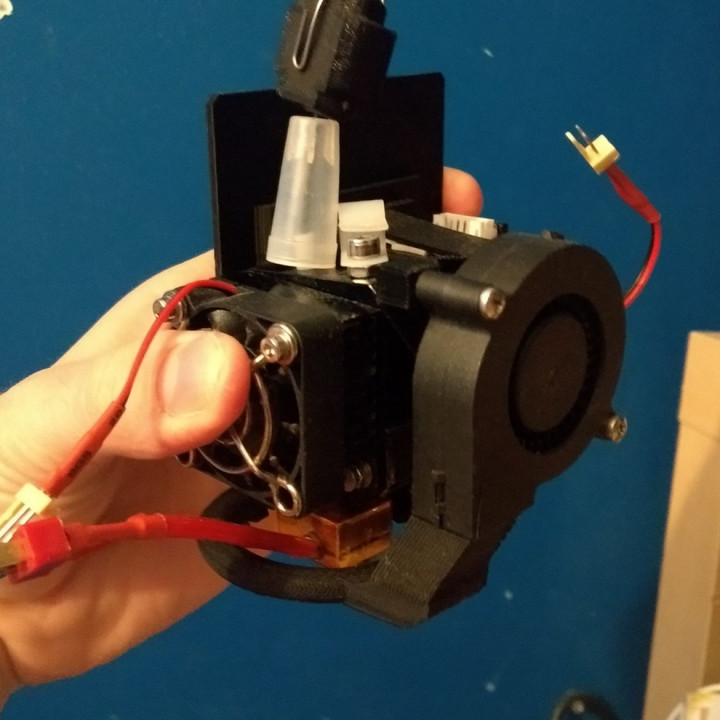
Extruder mount
To mount the extruder you'll need an _Extruder Mount Plate_ like this one: https://www.amazon.co.uk/GEEETECH-MK8-Extruder-mount-plate/dp/B06XHPDFP1 (not an affiliate link)
Screw this plate onto printed ExtruderHolderMount.stl and build the extruder on it.
Nema17_fan_holder.stl and a little bit of hot glue or double-sided sticky tape can be used to stick the cooling fan to extruder motor.
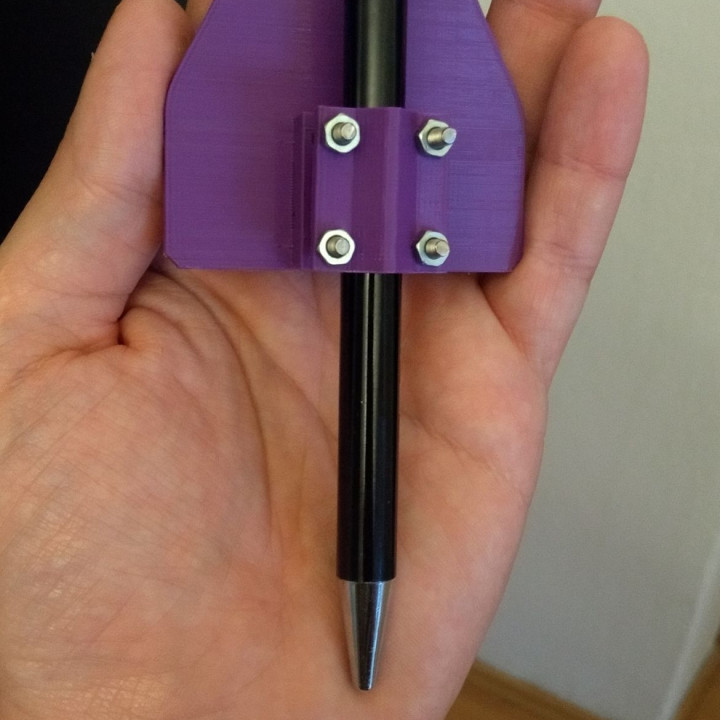
Pen mount
Just place the pen between two printed parts and screw in all four M3 screws into the nuts.
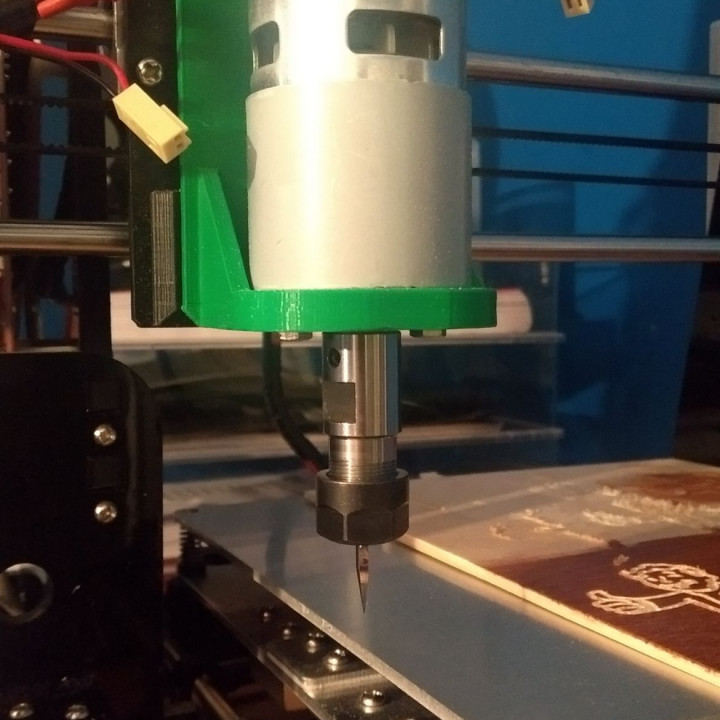
Motor mount
Use two M4 screws to secure a 775-Motor in place.
WARNING! Motors shaft with a tool holder on it and some tool might be long enough to collide with the printer itself during Z-Home movement. Watch out for that!


All parts are designed with perfect fitting.
I've printed them with Horizontal Expansion setting in Cura set to -0.15mm.
The best way to find your own perfect fit is to print the CarriagePlate.stl as you usually do and then print couple of FittingTester.stl changing Horizontal Expansion each time until you can push into the Plate without using to much force.
A little sandpaper work might be required on surfaces touching CarriagePlate.stl. Layered structure causes a lot of friction so it's a good idea to smooth it down. A drop of machine oil is also a good idea.
| Date published | 27/09/2020 |