3D PRINTER AUTO POWER OFF (FILAMENT RUNOUT/PRINT END)
The aim of the project is to auto power off the 3d printer:
a) when filament runs out or;
b) when the print ends (requires a simple g-code modificaiton described below)
using external hardware (no influence to internal parts of the printer).
WARNING: Safety First! Dealing with high voltage (ie 110/220V) is dangerous and may harm you or worse. Please disconnect all electricity plugs before you do any modification on the power outlets/plugs and cables. Take care of short-cuts, weak cables, connections and switches which may also casue burns and other fire risks.
WARNING & DISCLAIMER: This DIY project is not a proffessional study. Failure of proper working of the parts or devices may cause harm to you and to your printer (including power off through unpluging process instead of using the original on/off switch on the printer and force Z stepper to exceed "print-end" switch height). Accordingly, install and use the Project at your own risk. I assume no resposibility in this respect.
THE PROJECT:
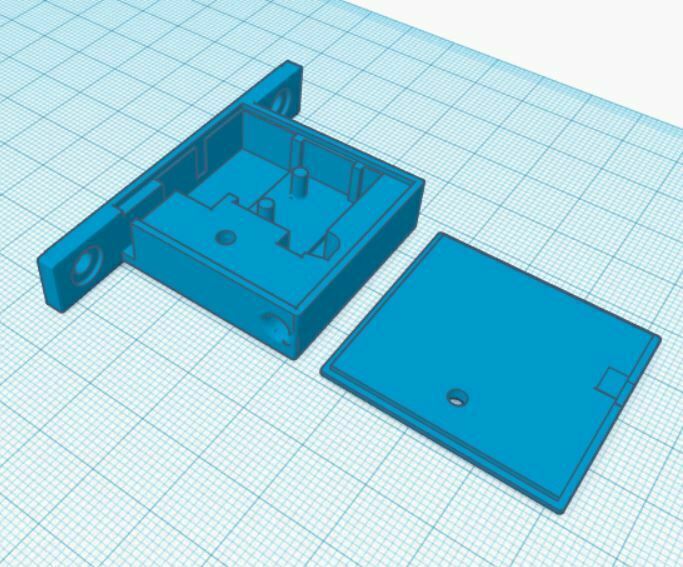
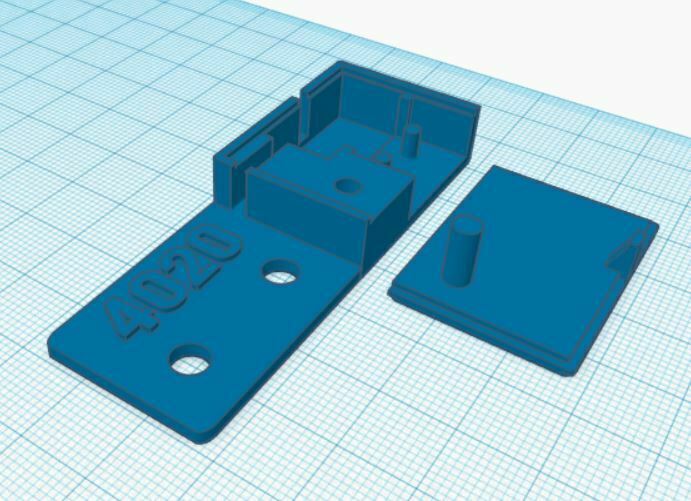
The project is composed of three 3 units:
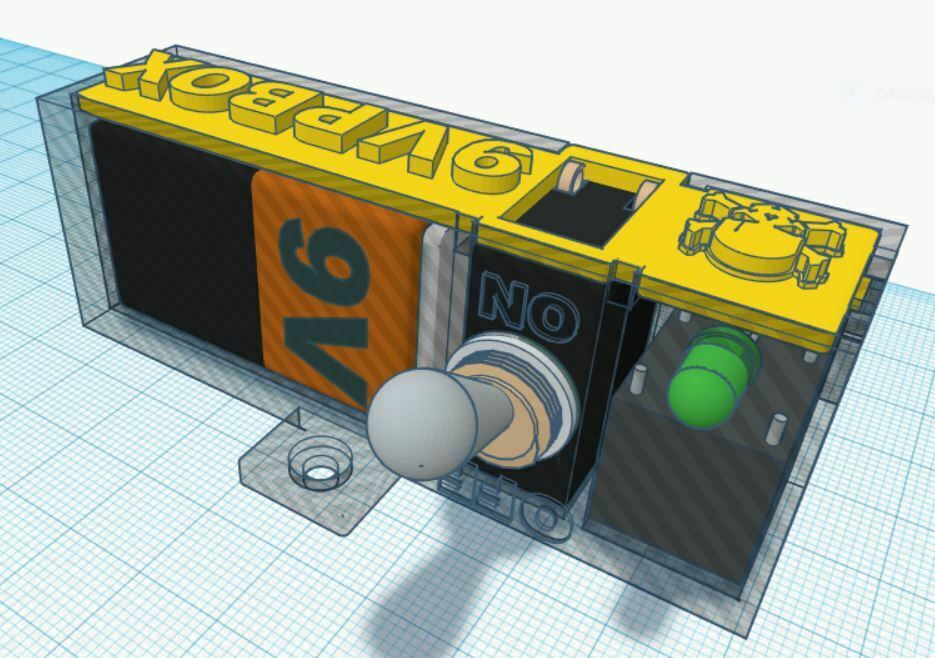
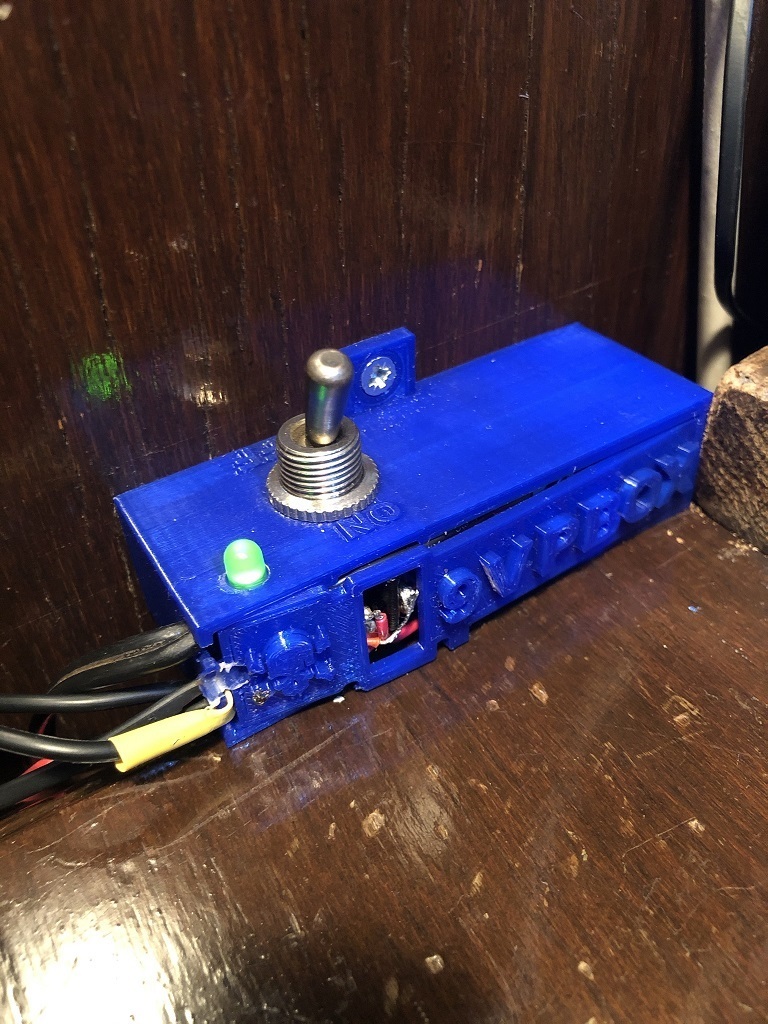
a) The 9V Power Control Box (2 things: The box and the lid)
b) The Filament Runout Sensor Box (2 things: The box and the lid)
c) The Print End Sensor Box (2 things: The box and the lid)
All can be printed at once and without any support.
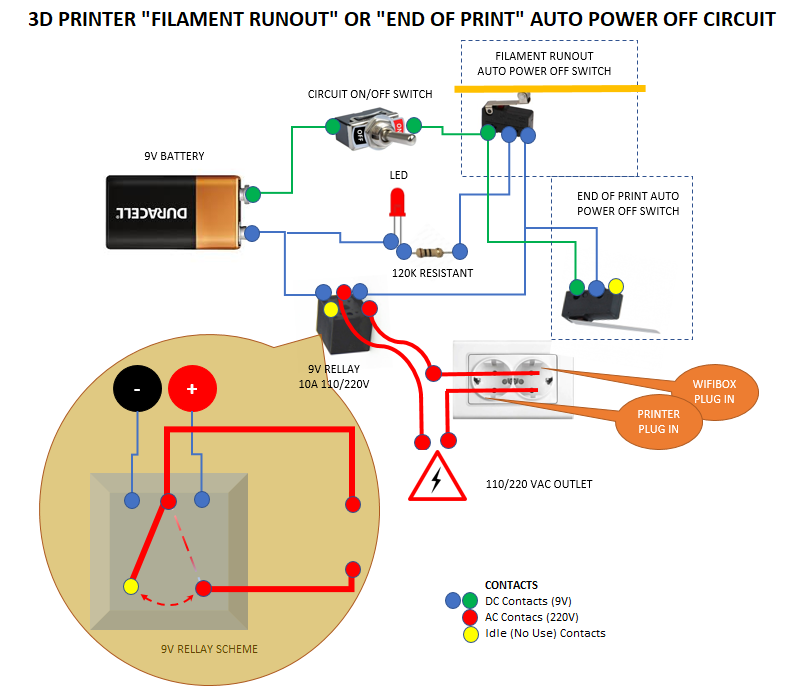
The relay in the 9V Power Control Box is activated if the Filament Runout Sensor switch is "opened" or if the Print End Sensor is "closed".
Micro end-limit switches are composed of 3 contacts. One for line, one for open position and one for closed position (usually the one in the middle). So when connecting the switch for filament runout, use the "line" and the contact on the other end of the switch to complete the circuit and activate the relay which will switch off the mains electricity. However, when connecting the switch for print end, use the "line" and the contact in the middle of the switch to complete the circuit and activate the relay which will again switch off the mains electricity and turn -off the printer. You can use the middle contact of the filamant runout switch to activate the led (connecting with a serial a 120K ohm ressistance not to burn the led) which will indicate that the power control box is active and ready to power off the printer for both cases (filament runout of print end). The connection diagram is in the pictures above.
If the toggle switch on the power box is off then the "auto power off" system is completely inactive and your printer would work normally (no risk for auto-off). If you turn the power box toggle switch on, then the "auto power off " system will be active for both cases and the led will be on.
I measured that the led connected with a serial 120K Ohm uses only 0.1 micro amps which will last your 9V battery for very long time. And don't forget that it will be in use only when the "auto power off system" is activated. So, I recommend to activate the "auto power off system" only when required (ie when you really want to power off the printer after print-end or if you feel that the filament is not enough and may runout during the print).
MOUNTING:
Mounting the power control box: There is only one ordinary screw hole (4mm wide) to srew it any where on your desk.
Mounting the filament runout box: I put two ordinary screw holes to screw it anywhere where the filament easiy flows between the spool and the extruder. You can also include filament guides on the course of the filament flow. See the picture for my case.
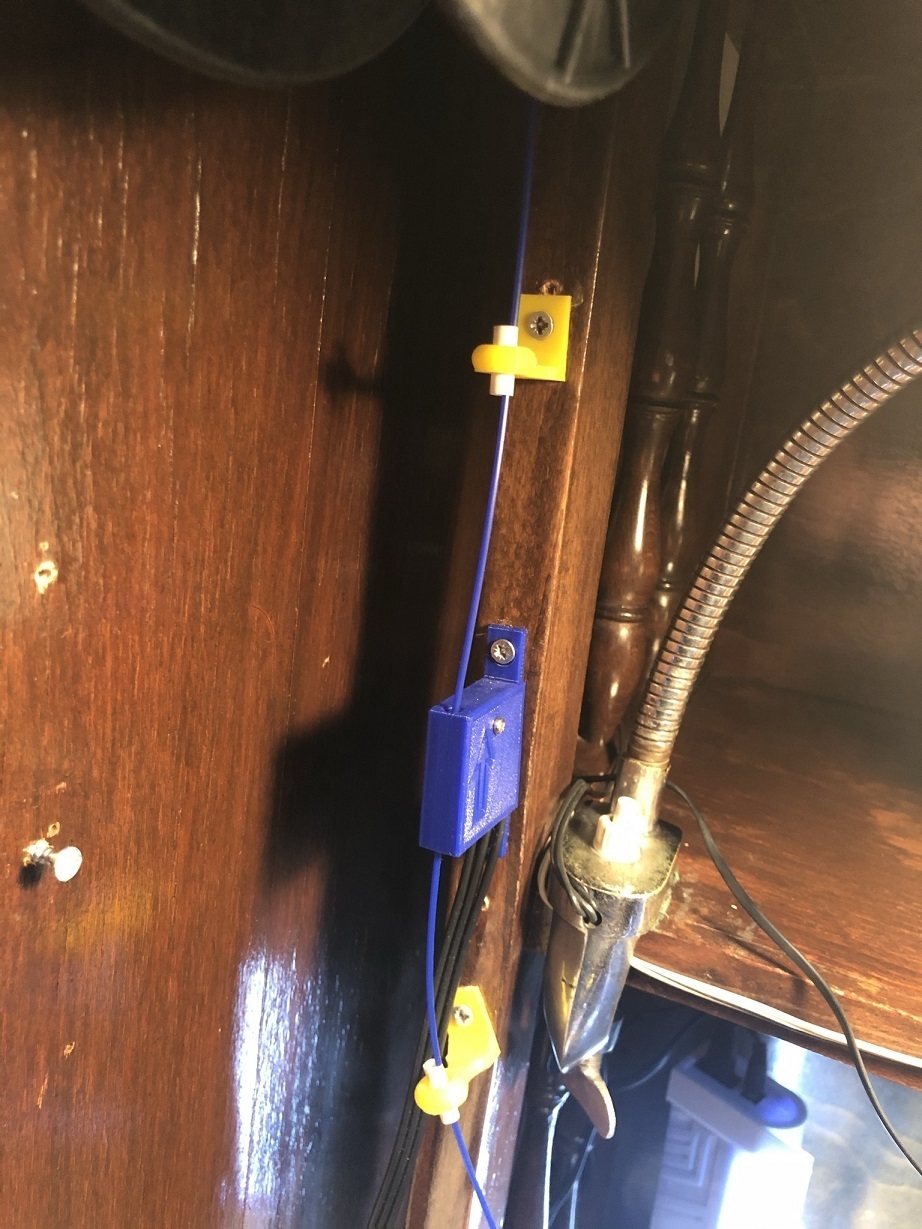
Mounting the print-end switch box: I created an additional g-code script for auto power off activation after print ends, by using CURA where the code instructs the vertical (Z) axis to move up to 250mm at the end of the print, but after cooldown. This will push the micro end limit switch which will activate auto power off system to power off the printer.
G-CODE AMMENDMENT:
You need to ammend the following G-Code scripts to the very end of the "End G-Code" of your printer settings in CURA (or in an other Slicer):
;OPTIONAL AUTO POWER OFF SCRIPT*
M109 R40 ;Wait until hotend temprature is down to 40 degC to avoid filament jamming
G0 Z250 ;Raise Z Axis to 250mm to push the micro end-stop switch
;END OF AUTO POWER OF SCRIPT
To do so (in CURA) go to Settings-->Printer-->Manage Printers-->{Choose your printer}-->Machine Settings-->End G-code. Add the above (4) lines (of which only two in the middle are active) to the very end of the g-code and close.
When the print ends, the machine will present the print and then start cooling process and wait for the hotend temp to cool down to 40 degC. When the hotend is down to 40 degC then the Z axis will raise to 250mm and X axis stick/carrier will push the micro switch at the very top right corner of the printer where it's mounted on 4020 profile. See picture.
ADD ANOTHER PRINTER:
In addition, I would advise you to add another Printer in CURA with the same settings of your original printer in use, and name it as something like "Auto Power Off" with the G Code ammendments above. So, you would not deal with modifying the G Code each time when you want to use auto power off option but instead you would choose the printer with the auto power of script from Cura menu before you print. Or if you don't want to use the auto power off option, you can choose your original printer from the Cura settings. To add a new printer (in CURA) go to Settings-->Printer-->Add Printer and follow the instructions and then modify the End G Code as above and finally name the printer something like Auto Power Off.
WARNING: When you turn off the Auto Power Off system by using the toggle switch on the Auto Power Off Control Box, the Auto Power Off System will be shut down (and the led will also go off) and the printer will be powered again as normal. At this point NEVER Auto Home! Because the printer, as a normal part of the Auto Home process, may try to raise the Z axis a little bit more (ie 10mm) which was already at max level and touching the micro switch. This may harm the mechanical parts of your printer or the micro switch box or at least the levelings. So, before Auto Home, manually turn the Z axis lead screw (or coupler) with your fingers to left to decrease Z level a few cantimeters (ie 1-2cms). Then you can Auto Home and continue your printings.
COMPONENTS:
1 9V Battery
1 9V Battery Clip Connector
1 2 pin Toggle Switch (11-12mm dia)
1 JQC-3FF-S-Z DC 12V Coil SPDT 5Pin PCB Electromagnetic Power Relay
1 Green LED
1 120K Ohm resistance
1 Roller Lever Micro Limit Switch SPDT 3 Pins
1 Long Straight Hinge Lever Arm Micro Limit Switch SPDT 3 Pins (for filament runout switch)
2 M5X8 Screw and T-Nuts (for print end switch)
2 Wood screws max 4mm wide (for mounting the power box and the filament runout box)
1 Small screw and nut max 2mm wide (for filament runout switch box lid)
1 3 pin (24-22 awg) wire long enough between control box and filament runout switch
1 2 pin (24-22 awg) wire long enough between control box and print end switch
1 2 pin power cable (16-14 awg) long enough between control box and printer mains plug.
I have used the components I have on hand. Above component parts seem to be similiar or equivalent which I found on Amazon US. I hope they will fit the boxes. In adition I'm not familiar with awgs of the wires and electric cables. I assume they will fit.
Any questions please feel free to contact to me.
Happy printing.
:format(webp)/https://fbi.cults3d.com/uploaders/16688082/illustration-file/b45e11b0-828a-4918-a394-a11236e43ac5/Transparent%20Control%20Box.JPG)


/https://preview3d-images.cults3d.com/variants/kxp22nfsvv2gq6hwa34u705u6fqh/9ce1a1278a90847fe525f7bdea66ae6081035e320afa813bf6efbbbe4c5d9f85)
/https://preview3d-images.cults3d.com/variants/8dcivc6we0rt35miraag6ogbljoq/9ce1a1278a90847fe525f7bdea66ae6081035e320afa813bf6efbbbe4c5d9f85)
/https://preview3d-images.cults3d.com/variants/b1k68ksp9mdtwhnb68glik3m7ljj/9ce1a1278a90847fe525f7bdea66ae6081035e320afa813bf6efbbbe4c5d9f85)
/https://preview3d-images.cults3d.com/variants/a74squ6abpabpase1g9m311zcec4/9ce1a1278a90847fe525f7bdea66ae6081035e320afa813bf6efbbbe4c5d9f85)
/https://preview3d-images.cults3d.com/variants/shvzbztby3xvvg5hmpgtpnt5nart/9ce1a1278a90847fe525f7bdea66ae6081035e320afa813bf6efbbbe4c5d9f85)
/https://preview3d-images.cults3d.com/variants/mhuuukx5h09r6364d700fbfl5jdg/9ce1a1278a90847fe525f7bdea66ae6081035e320afa813bf6efbbbe4c5d9f85)


