Skip to content

Matt's minimalistic j-head mount (v7)

Advertising
Advertising
?
Creation quality: 0.0/5 (0 votes)
Evaluation of members on the printability, utility, level of detail, etc.

  • 367 views
  • 1 download

License
3D design format
SCAD and STL Folder details Close
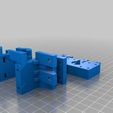
  • jhead_x_carriage_v6.scad
  • jhead_x_carriage_v6.stl
  • jhead_x_carriage_v7.scad
  • jhead_x_carriage_v7.stl

Learn more about the formats

Publication date 2021-01-01 at 07:07
?
Published to Thingiverse on: 2013-07-27 at 17:16
Design number 255679

3D printer file info

3D model description

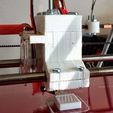
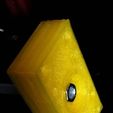
This is my version bowden x carriage and j-head mount for prusa mendel.

I based on http://www.thingiverse.com/thing:45883 (thank you for openscad file I reused).

My main plan was to create 2 X-carriage prusa mendel

main changes:

- allows symmetrical both side 2 X-carriage belts (see part: http://www.thingiverse.com/thing:128514)

- moved hotend 3.5cm higher

v6:

- easier mount of bowden tube

Update (10/19/2013) from v6

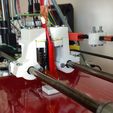
- issues with wobble and not tight grip on linear bearings forced me to create clamps to hold tight to bearing

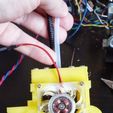
-cutout for hotend cables.

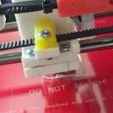
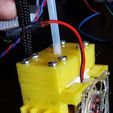
Update (8/06/2013) - printed parts and assembly - pictures

Update (8/05/2013) from v5:

- separated bowden tube mount and j-head mount from carriage

Update (7/30/2013) from v3:

- moved up by another 1.5cm

- slim down design, better positioning of belt clamps, added one belt clamp

- fans mount straight

3D printing settings

Instructions:

1. print parts with support and clean up.

2. put carriage on 2 linear bearings and clamp them with screws

3. drill bowden tube size hole in top plate - bowden tube I used was 3/16 in OD and 1/8 in ID - you can modify the size in parameters on beginning of scad file.

4. put bowden tube through hole and screw on the M5 nut, bowden tube was little squeezed and couldn't pass 3mm filament easly - I used 1/8 in drill to adjust that.

5. assemble part with 4x M3-25mm screws with washers/nuts on bottom. 2 side plates slides into hotend holder. Slide M3 nuts into bottom plate mounts, they should attach quite well, so it will be easier to screw in.

6. mount carriage parts to bearings

7. mount 40mm fans onside

8. mount bowden + j-head mount to carriage with 4 nuts slided into holes in carriage and M3-25mm screws

9. attach belt clamp - I used http://www.thingiverse.com/thing:31482, need little work around with ziplocks becasue my belt wasn't that bold.

10. extruder mount is from thing: http://www.thingiverse.com/thing:25683

11. calibrate bed (z axis)

Improvements of v7?

- move belt on side bottom? (idea from: http://www.thingiverse.com/thing:22887)

Advertising


Issue with this design? Report a problem.

Would you like to support Cults?

You like Cults and you want to help us continue the adventure independently? Please note that we are a small team of 3 people, therefore it is very simple to support us to maintain the activity and create future developments. Here are 4 solutions accessible to all:

  • ADVERTISING: Disable your banner blocker (AdBlock, …) and click on our banner ads.

  • AFFILIATION: Make your purchases online by clicking on our affiliate links here Amazon.

  • DONATE: If you want, you can make a donation via Ko-Fi πŸ’œ.

  • WORD OF MOUTH: Invite your friends to come, discover the platform and the magnificent 3D files shared by the community!


Sharing and downloading on Cults3D guarantees that designs remain in makers community hands! And not in the hands of the 3D printing or software giants who own the competing platforms and exploit the designs for their own commercial interests.

Cults3D is an independent, self-financed site that is not accountable to any investor or brand. Almost all of the site's revenues are paid back to the platform's makers. The content published on the site serves only the interests of its authors and not those of 3D printer brands who also wish to control the 3D modeling market.

100% secure payment by credit card, PayPal, Apple Pay, Google Pay, etc.
View all payment options.