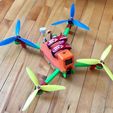
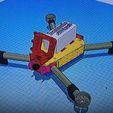
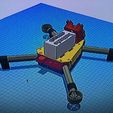
Video / Vidéo : https://youtu.be/cCdJjt94FmM.
(Descendez sous la version anglaise, plus bas, pour trouver la version française!)
UPDATE
2020-04-05 - Made a 25 degrees mount for my GoPro Hero 7 that fits Nd Filters from TBS. Used this thing prior to build my thing : https://www.thingiverse.com/thing:3929524.
2020-02-14 - Made the space between the walls on the front on the TRONIC BAY to fit the micro camera tighter in between.
CONCEPT
This is a concept drone I designed in Tinkercad. I used some parts (the arms and the tube socket test) from the popular T4 drone designed by Brendan22 (https://www.thingiverse.com/thing:261145). I wanted to avoid using screws and bolts. This design only use zip ties to hold pieces together tightly. My goal was to have a solid structure, lightweight, offering a lot of space to fit the electronic in. I wanted it to protect my electronic but gives it a well aerated chamber as well. I wanted it to look great and offer most of the advanced characteristics we can find on the advanced drones we find on the market today but my ultimate goal was to make a drone that was feeling good on the sky; I wanted it to fly very well!!! I think I achieved my goals... Like it and collect it if you download it ;). You will not only have acces to it easily but you will also contribute to render it easily accessible to other people while they are searching for cool stuff like this drone.
ARMS
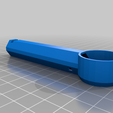
Depending on what props and motors you will want to use (5 or 7 inch propellers), you select the right ARMS for you in the thing files list. Thanks to Brendan22, these parts are awesomely designed and fit perfectly in the sockets! Motors 22xx, 23xx or 24xx will fit in the arms perfectly. If you want to add some round leds PDB under the motors, you can do so, you will find little holes to guide your wires from outside, under the motors to the inside of the arms.
Includes three arm options - 24mm, 28mm, and 30mm motor receiving cup (inside diameter). The 30mm and 28mm cups have slots for 3mm motor bolts. 24mm and 28mm cups also have slots in 2mm motor bolts. These arms come directly from the Brendan22 T4 250 drone. Use the right ones for your motors. I use the 7 inch 30 mm.
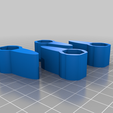
I also made some LANDING PADS that slides on the arms and stays in place because of the tight fit. You can add CA glue if you want to be sure they stay in place.
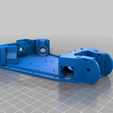
TRONIC BAY (main part)
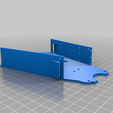
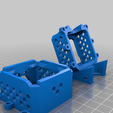
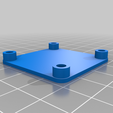
Standard 30.5x30.5 flight controlers have their holes for mounting inside the electronic bay section and there's enough space for a stack like a Diatone Mamba F405 MK2 (which is the one I'm using for my build). There are 2 30.5x30.5 mounting sections inside the electronic bay so you can mount in a lot of components from this size (VTX and other stuff). Also, because there is a lot of space in the electronic bay, you won't rush to place your receiver and all the other components you need to achieve your build. I added a 30.5x30.5 FC STACK PLATE to mount your gears on (https://www.thingiverse.com/thing:3330414).
On the rear section, there's a box to fit in a BN-180 micro GPS which can be purchased cheaply on the web. It generally comes with a circle 3m double-sided tape which allow you to securely fix the GPS in the box and I added a zip tie guide to secure it more. There's also a hole to pass your lipo wire out of the bay and a zip tie (2 hole) guard to tight the wire on the outside back wall. Finally, there's a VTX antenna hole mount for a SMA Pagoda style antenna or that kind of antenna stuff of your choice.
On the front section, you will be able to fit a micro cam like the Caddx Turbo Micro F2 or Foxeer Micro Falkor camera. Any Camera that has 19mmx19mmx19mm size, which is the standard size in the drone industry nowadays.
Since I use Crossfire receiver and because there is no carbon fiber but only plastic on the body of that drone, i drop the two antenna's half's in the front motor arms (in the section where there's only one wire) and it works well. You can also put the antenna's half's on the zip ties you use to hold the parts of the drone together, or use an immortal T antenna underneath the drone, using the IMMORTAL T MOUNT I modified from this design (https://www.thingiverse.com/thing:2973304). You'll find holes on the electronics bay and under the bottom part to fit the immortal T mount with? Yes! Zip ties!
TOP PART
The top part will receive a 1000mah to 2200mah 3s-4s lipo battery without any problems. There's holes for two 20mm wide straps.
Also, I modified a HD CAMERA CASE (https://www.thingiverse.com/thing:3371212) to fit on the top of that part. It has 30 degrees angle. A 38x38x38 action camera will fit in the case, another standard form factor in the industry (GoPro session 4 or 5, RunCam 3S or 5 or Caddx Dolphin or Orca, as example).
BOTTOM PART
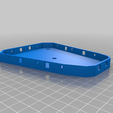
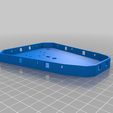
I added a bottom part with square holes to fit some addressable ws2812 leds (glued with CA glue). This part contribute to add some rigidity to the overall structure. There is 2 different versions of it, one with the holes to fit an IMMORTAL T and another without it. You can fit 13 leds in that Bottom part.
MATERIALS AND PRINTING SETUP
I use PLA and TPU. I know, you'll say PLA is bad, PLA is evil! I use it anyway! Use ABS or NYLON or whatever you find is more appropriate for your experience. But PLA gave me good results. Once PLA annealed, parts assembled, and after zip ties are tighten, this build is very strong and doesn't bend easily... No, it's not carbon fiber, I agree, but you'll be amazed how strong it is! I print on a glass bed, using Magigoo. My materials comes from https://filaments.ca/. PLA: I use Engineering Pro APLA+ (https://filaments.ca/collections/all/products/engineering-apla-fire-engine-red-1-75mm?_pos=2&_sid=197738b72&_ss=r). TPU: I use is TPU Flexible and Tough (https://filaments.ca/collections/all/products/polyurethane-tpu-filament-dark-green-1-75mm?_pos=10&_sid=6758b4aab&_ss=r).
NB : IF YOU USE 100% INFILL, YOU DON'T NEED TO ANEAL YOUR PARTS...
Annealing you APLA+ means you heat it to crystallize the material, which gives it an extreme solidity and impact resistance that habitually surpasses ABS. I heat mine on a silicone cooking mat, in a toaster oven, 15 to 20 minutes (more 20 minutes), at 100 to 120 degrees Celsius (110 is good). Once the process is done, I carefully take the part out of the oven and let it cool down for an hour before touching it. If there are thin layers on your part, reduce the temperature or the cooking time!
So, ARMS (x4), ELECTRONIC BAY, TOP PART and BOTTOM PART are printed in Engineering Pro APLA+ (or whatever stronger material you prefer, adjust your settings then). I use CURA!
Layer Height : 0.16
Shell wall line count : 3
Infill : 50%, in OCTET
Tool temperature : 200 deg.
Bed Temperature : 60 deg.
Speed : 30mm/s
Cooling : yes
Support : Only on the tronic bay (for the GPS box) and for the top part (for the vents)
Build plate adhesion : No
Then, HD CAMERA CASE, LANDING PADS (x4), IMMORTAL T SUPPORT and 30.5x30.5 MOUNT are printed in TPU Flexible and Tough.
Layer Height : 0.16
Shell wall line count : 3 for all except 2 for the landing pads
Infill : 80%, in OCTET for all except 20%, in OCTET for the landing pads
Tool temperature : 225 deg.
Bed Temperature : 65 deg on the firsts layers and 60 after.
Speed : 20mm/s to 25mm/s
Cooling : yes
Support : no
Build plate adhesion : No
ASSEMBLING
All parts fits together using standard 4' zip ties. You will need to extend the motors wires before placing them on your arms. Be sure the wires have enough length to reach the esc/flight controller stack that will be placed in the front space of your electronic bay part. Once it's done, screw the motors in place after you passed the wires in the arm (one in one side of the arm and 2 in the other side). Ok, I know, I said no screws, but hey, motors with ties... Common! Slide the Landing Pads over the arms.
Slide the arms in the sockets of the electronic bay till they reach the end of it. You'll see, it's tight! Once it's done, check again to be sure the wires are long enough to reach the esc! More is better than not enough! Then, you'll notice that there's holes under the electronic bay where you can push the zip tie all around the arms, from underneath, in a guided track. Simply push a zip tie in that hole and the end will come back from the other hole, taking the arm slot in its way. Tight it hard! Your arm won't go out from that socket, that's it! No bolts and it's solid as a rock!
Next, put all your electronic's (Flight controller and ESC, VTX, Camera, Receiver, GPS, Antennas, Leds...) to it's place and solder what you need to solder. Put your addressable leds in the holes on the bottom part, glue them with ca glue, solder them together, be sure to give you enough wire length between the bottom part and the flight controller in the electronic bay (leds wire) so you can easily manipulate your zip ties later. There's two little holes in the middle to get the leds wires down from the electronics bay and another one for the immortal T antenna if that's the one you go for. You're done? Great job! Double check that all your electronic works before closing the parts together with the ties... Not that it's expensive in ties but, if something doesn't works well and it's closed, you'll have to cut the ties... It's the only disadvantage of this drone... But hey... A bag of 1000 ties costs less than 10$ and you'll need 14 to close it so...
Everything is good? Close it!!! get the top, the electronic bay and the bottom together. Pass the zip ties in all the holes before tighten them.
- First, on the top part, on the top, 2 holes, start in the hd camera case, go in the top part and come out in the hd camera case. Don't tight it yet!
- On the bottom part, on the back, 2 holes, start in the bottom part, go in and come out from the electronics bay. Don't tight it yet!
- On the bottom part, on each side, 3 holes, start in the bottom part, go in the electronics bay and come out from the top part. Don't tight it yet!
- On the electronics bay, on the top back, 2 holes, start in the back wall, go in and come out from the top part. Don't tight it yet!
- On each side on the front, 2 holes, start from the outside of the wall, go in the electronics bay and up in the hd camera case and down in the top part. Don't tight it yet!
Does all your zip ties are in place? Everything seems to be ok? Sure your electronics works well?
Tight all your zip ties!
Then what? Get out, put a Lipo on the top of that beast and fly it!
Tell me in the comments how you like it (or not). Remix it! Share your builds! Share your memories! Have fun! Happy flying!
THE ELECTRONIC PARTS I'M USING (skip that section if you want)
Motors : Racestar 2306 2400kv (55.50$ on Banggood)
Flight Controller/ESC Stack : Diatone Mamba F405 MK2 F40 (67$ on Banggood)
VTX : Eachine TX-805 (21.50$ on Banggood) (or TBS stuff, it's better but expensive)
VTX Antenna : Realacc Pagoda RHCP Antenna 65mm 5.8G 5dBi (8.25$ on Banggood)
Receiver : Jumper R1 16CH (Frsky D16) (25.25$ on Banggood) (or Crossfire ($$$))
GPS : BN-180 micro (17.65$ on Bangood)
Pilot Camera : Caddx micro F2 16/9 NTSC (31.21$ on Banggood)
HD Camera : Runcam 5 (139$ on Banggood)
Leds : WS2812 IC SMD5050 RGB LED Strip Light Individual Addressable DC5V (11$/30 on Banggood)
Buzzer : DC 5V Active Buzzer Magnetic 12mm x 6.5mm (10$/5 on Banggood)
Propellers : Gemfan 7040 (4) (13$/8 on Ebay)
all prices in canadian dollars, with shipping, can be less expensive on eBay or AliExpress or other sites Challenge : Try to make it the less expensive possible! Use another flight controller, other ESCs, other components! Reduce the price of your build! Make it even better and less expensive!
APROX TOTAL PRICING
PLA and TPU : Really not too expensive... 3-4-5-6$? I didn't count, I love to print, sorry ;) Kind of a joke for a drone frame... Ok, It's not an Armattan frame but, it's still pretty cool I think! It's not lifetime guaranteed but it's lifetime printable-replaceable LOL!!!
Electronics : 400$
And yeah... You will need a RC radio... I use a Jumper T16. It's 159.95$us at Team-BlackSheep.com.
You will also need a pair of FPV googles... Mines are FatShark Attitude V5. 299.00$us at Team-BlackSheep.com.
And finally, you will need SD cards to record your FPV sessions. Here's the one I love : https://www.banggood.com/MIXZA-Shark-Edition-Memory-Card-16GB-Micro-SD-Card-Class10-For-Smartphone-Camera-MP3-p-1058810.html?rmmds=search. 6.87$CA for 16GB!
So that's it. If you like french, I'll repeat the exact same thing in that language in the following text... Have a good one!
Je suis canadien, québécois, français d'Amérique du nord, canadien d'origine française de l'est... Alors voici la version française québécoise d'Amérique du nord français canadien! :)
UPDATE
2020-04-05 : J'ai conçu un support pour ma GoPro 7 Hero à 25 degrés qui accepte les filtres ND de TBS. J'ai utilisé cet objet pour concevoir mon support : https://www.thingiverse.com/thing:3929524.
2020-02-14 - J'ai réduit l'espace entre les 2 murs de la micro caméra à l'avant sur la pièce TRONIC BAY pour qu'elle s'y insère avec moins de jeu.
CONCEPT
Ceci est un concept de drone que j'ai dessiné dans Tinkercad. J'ai utilisé quelques pièces (les bras ainsi que la prise de bras servant à faire les tests) du populaire design de drone T4 de Brendan22 (https://www.thingiverse.com/thing:261145). Je voulais éviter d'utiliser des vis et des boulons. Cette conception utilise uniquement des attaches standard, plus communément appelés "ti-raps" au Québec, pour maintenir fermement les pièces ensemble. Mon objectif était d'avoir une structure solide, légère, offrant beaucoup d'espace pour accueillir l'électronique. Je voulais qu'elle protège mon électronique mais qu'elle lui donne également une chambre bien aérée. Je voulais de mon drone qu'il soit beau et offre la plupart des caractéristiques avancées que nous pouvons trouver sur le marché des drones aujourd'hui. Mais mon objectif ultime était de fabriquer un drone qui se comportait bien dans le ciel; Je voulais qu'il vole très bien !!! Je pense avoir atteint mes objectifs ... Cliquez sur "Like" et ajoutez-le à votre collection en cliquant sur "Collect" si vous le téléchargez ;). Non seulement vous le retrouverez plus facilement, mais en plus, vous permettrez à d'autres personnes d'y avoir accès dans leurs recherches.
ARMS (Bras, pièces en anglais dans la liste des pièces, raison pour laquelle le français des pièces est entre parenthèse)
En fonction des hélices et moteurs que vous souhaitez utiliser (5 ou 7 pouces), vous sélectionnez les bons bras pour vous dans la liste des fichiers d'objets. Grâce à

/https://fbi.cults3d.com/uploaders/14111290/illustration-file/1c1d05aa-c52a-420a-ad55-d8a961113042/IMG_1122.jpeg)
