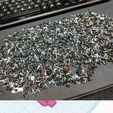
Exact same as the original just modded to use m2.5x10mm Screws commonly found in laptops and adjusted slightly to work better with cheaper FDM printers
I seem to have a HUGE laptop screw assortment from being a computer repair tech and this is a cheaper solution for those who have the smaller 2.5mm screws. and makes more sense to do this being how some people are likely harvesting these 18650 cells from laptops anyway...
Stuff you'll need:
Hardware For Assembly
~8 m2.5x8-10 screws
~1 18650 Cell
~1 battery Charger
These are the Micro USB Chargers I use. https://www.amazon.com/Makerfocus-Charging-Lithium-Battery-Protection/dp/B071RG4YWM/ref=pd_lpo_107_t_0/144-0148923-6444255?_encoding=UTF8&pd_rd_i=B071RG4YWM&pd_rd_r=495a5481-a45d-40bf-b2dc-fca35c324c33&pd_rd_w=XtKLh&pd_rd_wg=tyrft&pf_rd_p=7b36d496-f366-4631-94d3-61b87b52511b&pf_rd_r=CFBEBVH59EDS3VKZ4VP0&psc=1&refRID=CFBEBVH59EDS3VKZ4VP0
I Recommend Testing the cells first and make sure you get a good one before you start.
I use the Liitokala lii-500 for the capacity testing of all my recycled laptop cells
#############################################################
ORIGINAL SUMMARY FROM THE OP.
Hey folks!
At long last, I finally got around to making the successor to my Xbox One 18650 adapter. It only took the boredom of a plague lockdown to push me to get around to it.
So, there were some shortcomings to my original design. For a start, I used the same kind of18650 with flying leads that I use for my lightsabers, and I just figured that if anyone wanted to make my MKI adapter, they'd just go out and find a flying lead 18650 rather than use regular 18650s.
That was kinda stupid of me. So, I've fixed that. The MKII battery holder has inbuilt holes in the battery cap and the battery holder so that you can run some brass bolts through to use as battery contacts. I've also included a feature from ibnalzamuihran's remix, a groove in the battery holder, to run a wire from the bottom contact through the battery holder.
The other thing I've included is space for an inbuilt 0.28" mini DC voltmeter. the biggest drawback of the original was that the battery would die without warning, as an Xbox controller's low voltage warning triggers at a lower voltage than an 18650's cutoff voltage. So, after some head-scratching, I decided to use a 0.28" mini DC voltmeter from eBay. They're cheap and plentiful, the one I used cost £4, with postage. I hooked it up to the TP4056a's output pads.
They are, however, always on. So if you're planning on using one, you need a normally open microswitch wired in. I've included a (very) basic circuit diagram in the pics that should help you wire it up properly
I've also changed the shape of the battery holder, and reinforced the tabs that connect with the Xbox controller. things now connect with M3 bolts and M3 nuts, rather than just tapping threads directly into the plastic. This should make the MKII holder easier to assemble and sturdier. the downside is that support material is now required.
Print Settings
Printer brand:
Prusa
Printer:
i3 MK3
Rafts:
No
Supports:
Yes
Resolution:
0.15mm
Infill:
15% gyroid
Post-Printing
Stuff you'll need:
Hardware For Assembly -6 M3 nuts. Steel or brass is fine -6 M3 bolts, either 8 or 10mm long. I used steel cap heads, pretty much all other types should be fine For the contacts -2/4 M3 Pan Head Brass Machine Screws, 10mm long. -a half dozen M3 nuts. -Wire. 26 AWG will be fine. one 18650, flying leads ideal, but regular ones are fine Optional: -one TP4056a Li-ion recharge board -one 0.28" Mini DC Digital Voltmeter-if you get the kind with three wires, just solder the yellow wire to the red. -one normally open/push to make mini tactile switch Luck/the Force, whichever runs stronger in your family.

/https://fbi.cults3d.com/uploaders/14562941/illustration-file/c5990f37-6a77-4e18-b8a0-76cbb65d821c/Untitled2.jpg)


