This Sith Style Holocron-Like Night Light/Display Box is designed to be built in various ways depending on your level of experience/confidence, the materials you have available, printer setups and the functionality you want out of the build.
The free version is available here if you want to preview the end result.
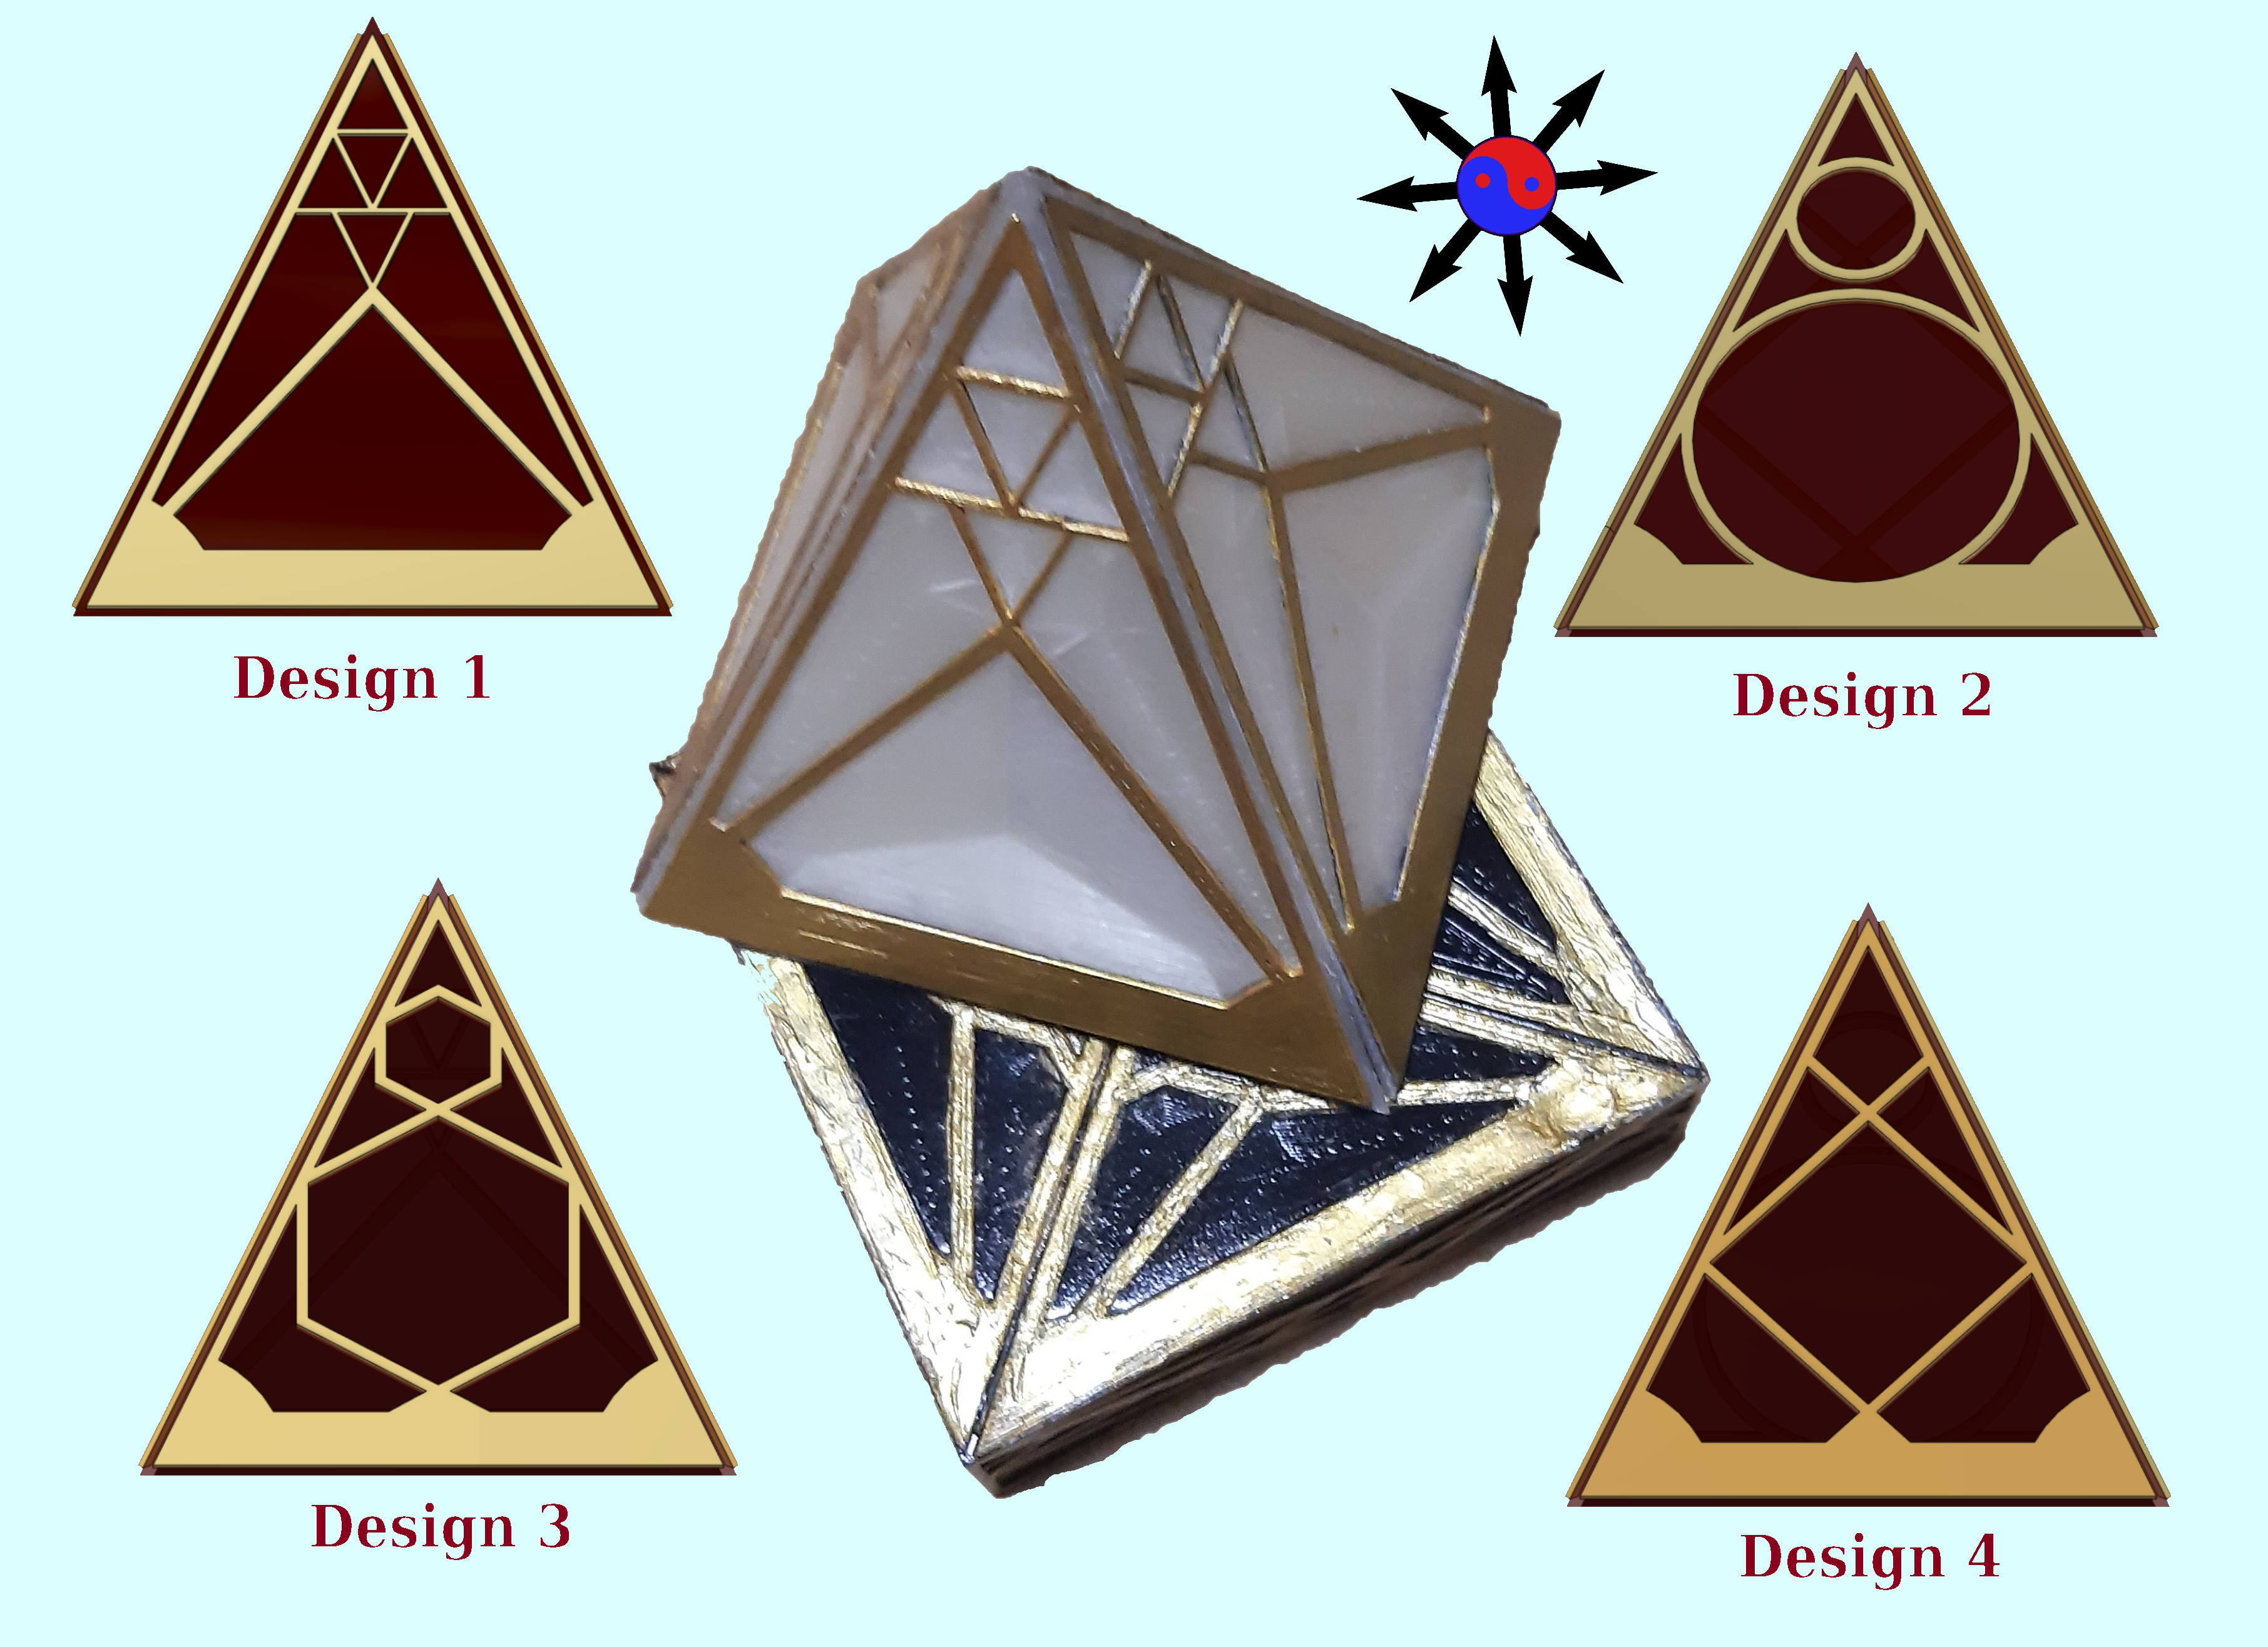
Sith Style Holocron-Like Solid Shape
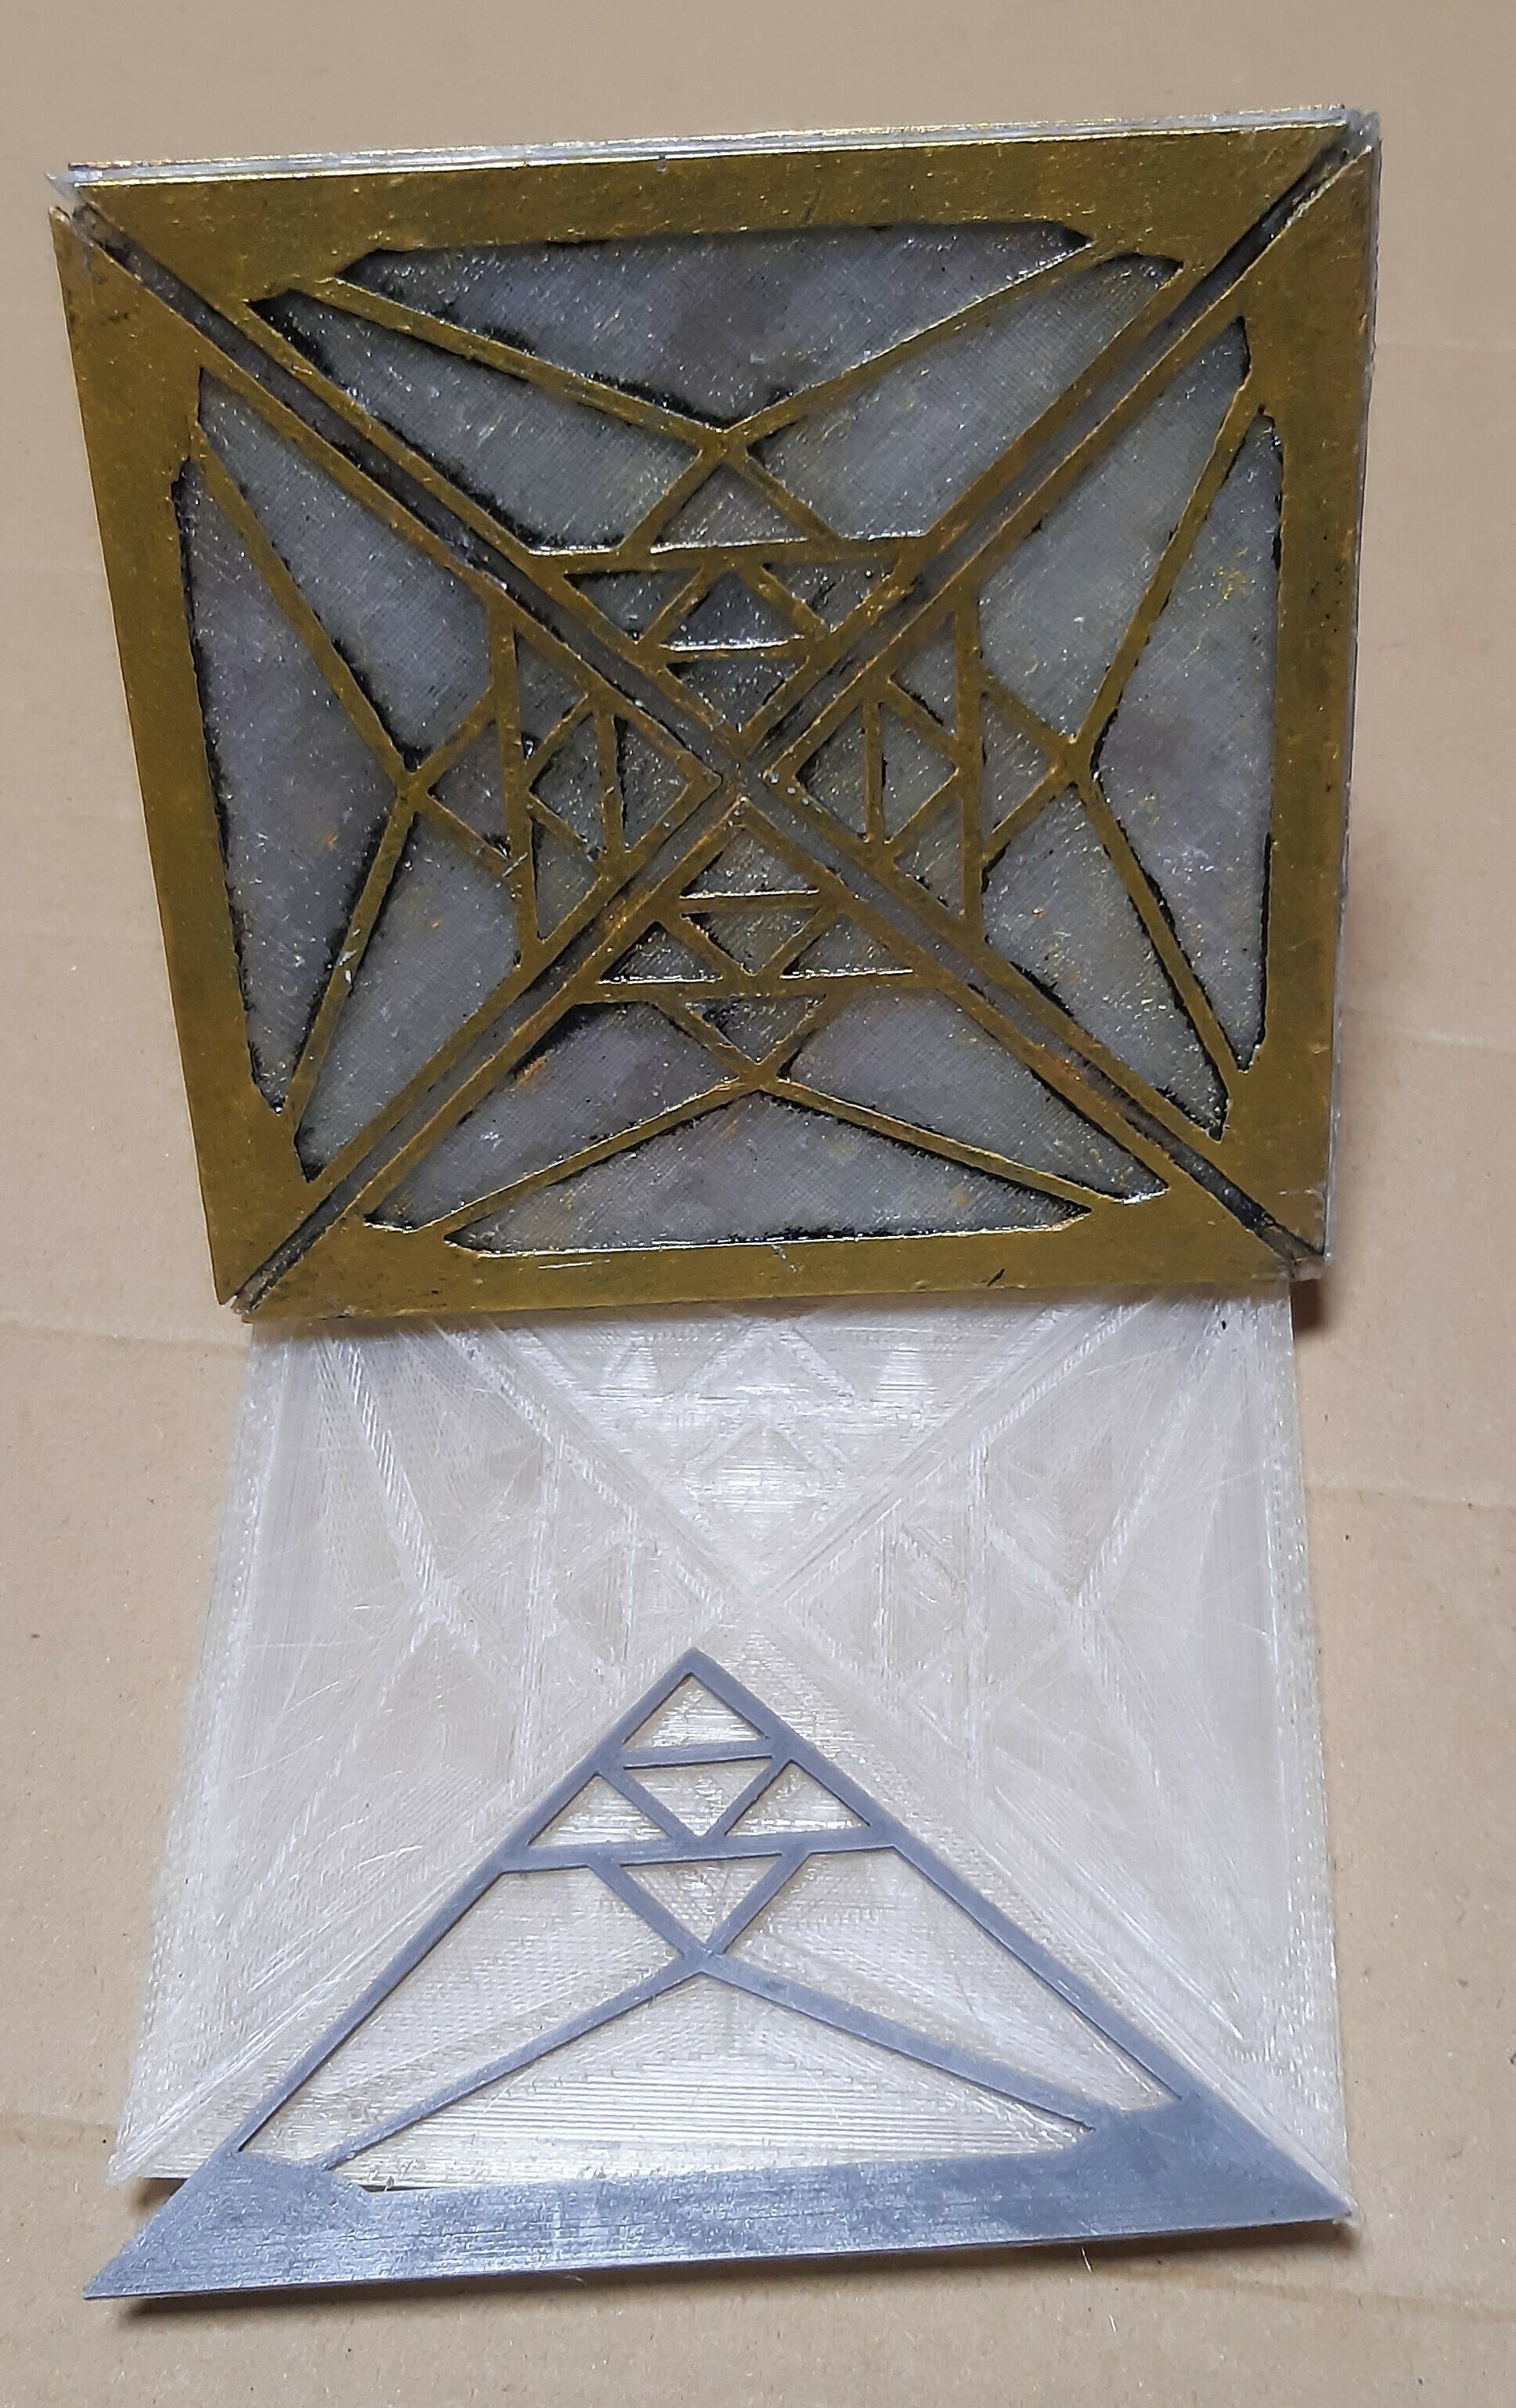
There are currently 4 designs, the original Sith style triangles and 3 others. They're intentionally simple with large window panels to allow easy customisation, like engraving or embossing words into the inlay or custom lithophane details in the window panels. There are likely to be more versions, different/more complex patterns for the inlay and maybe included lithophane details... TBD... Also, matching bases/stands to go with the 3 other patterns will be added fairly soon™.
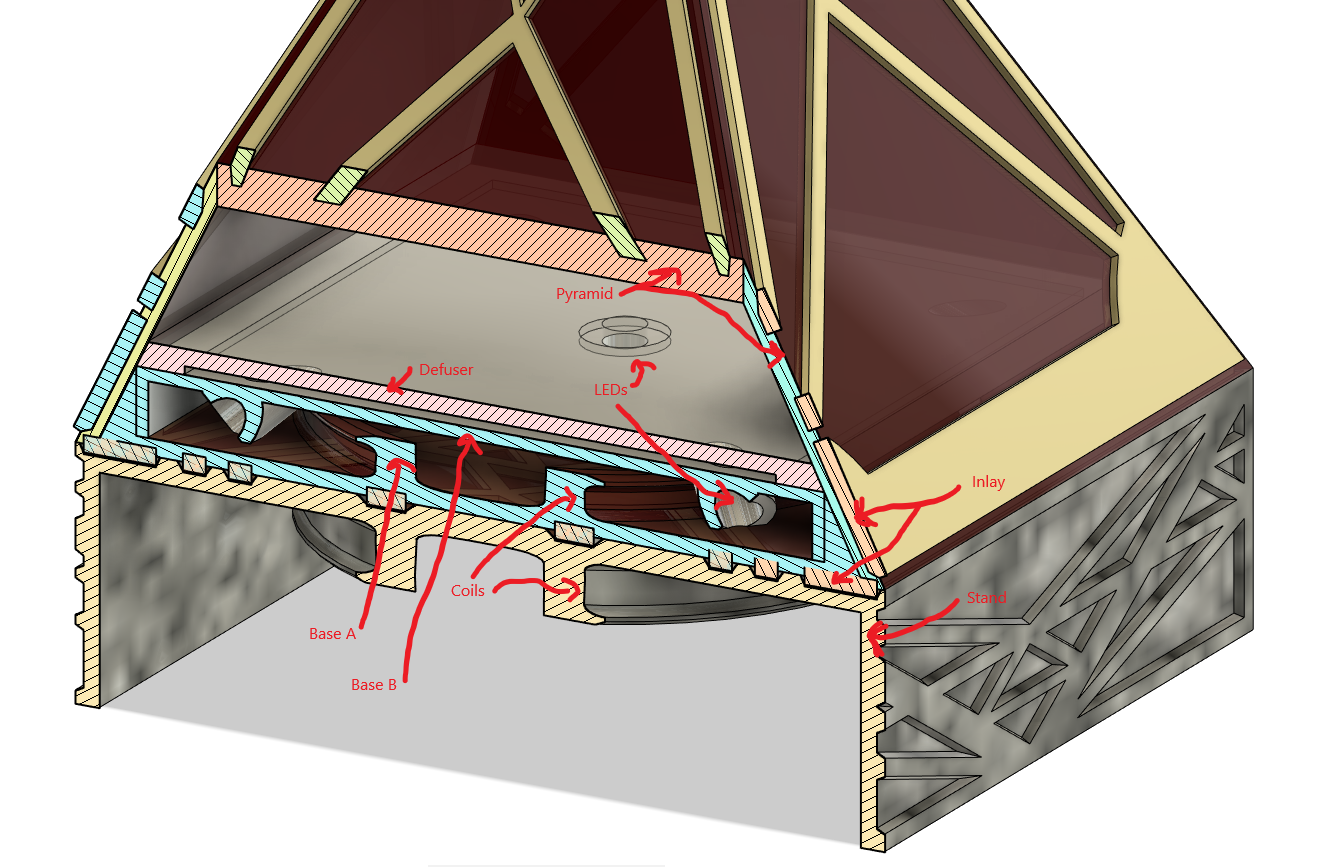
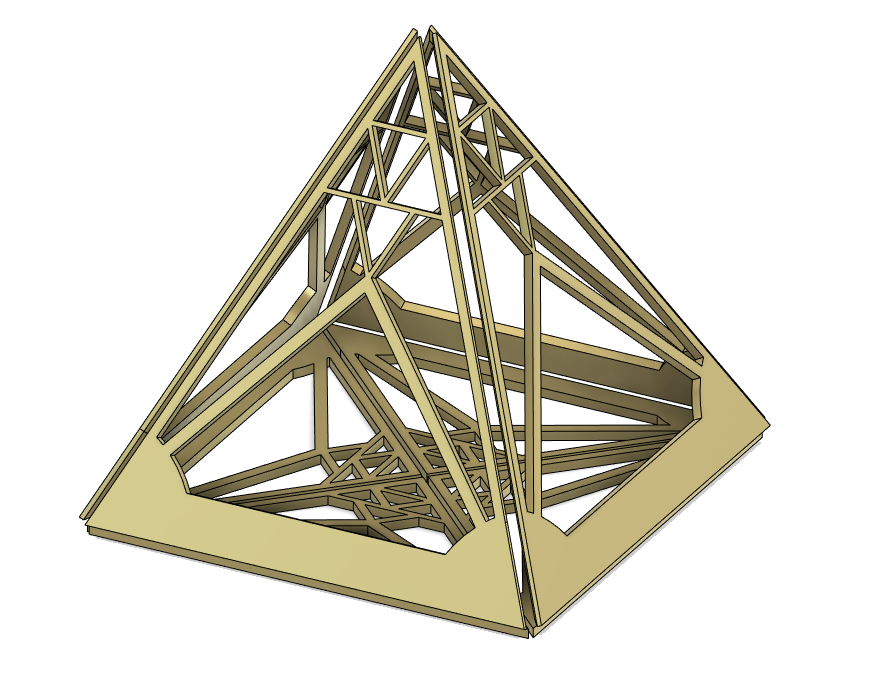
Take the time to familiarise youself with the parts before you chose which ones to print, there are several variants of each part to accomodate different builds. While it takes between 2 and 15 parts to build the holocron, there are 50+ files in the pack and more to come.
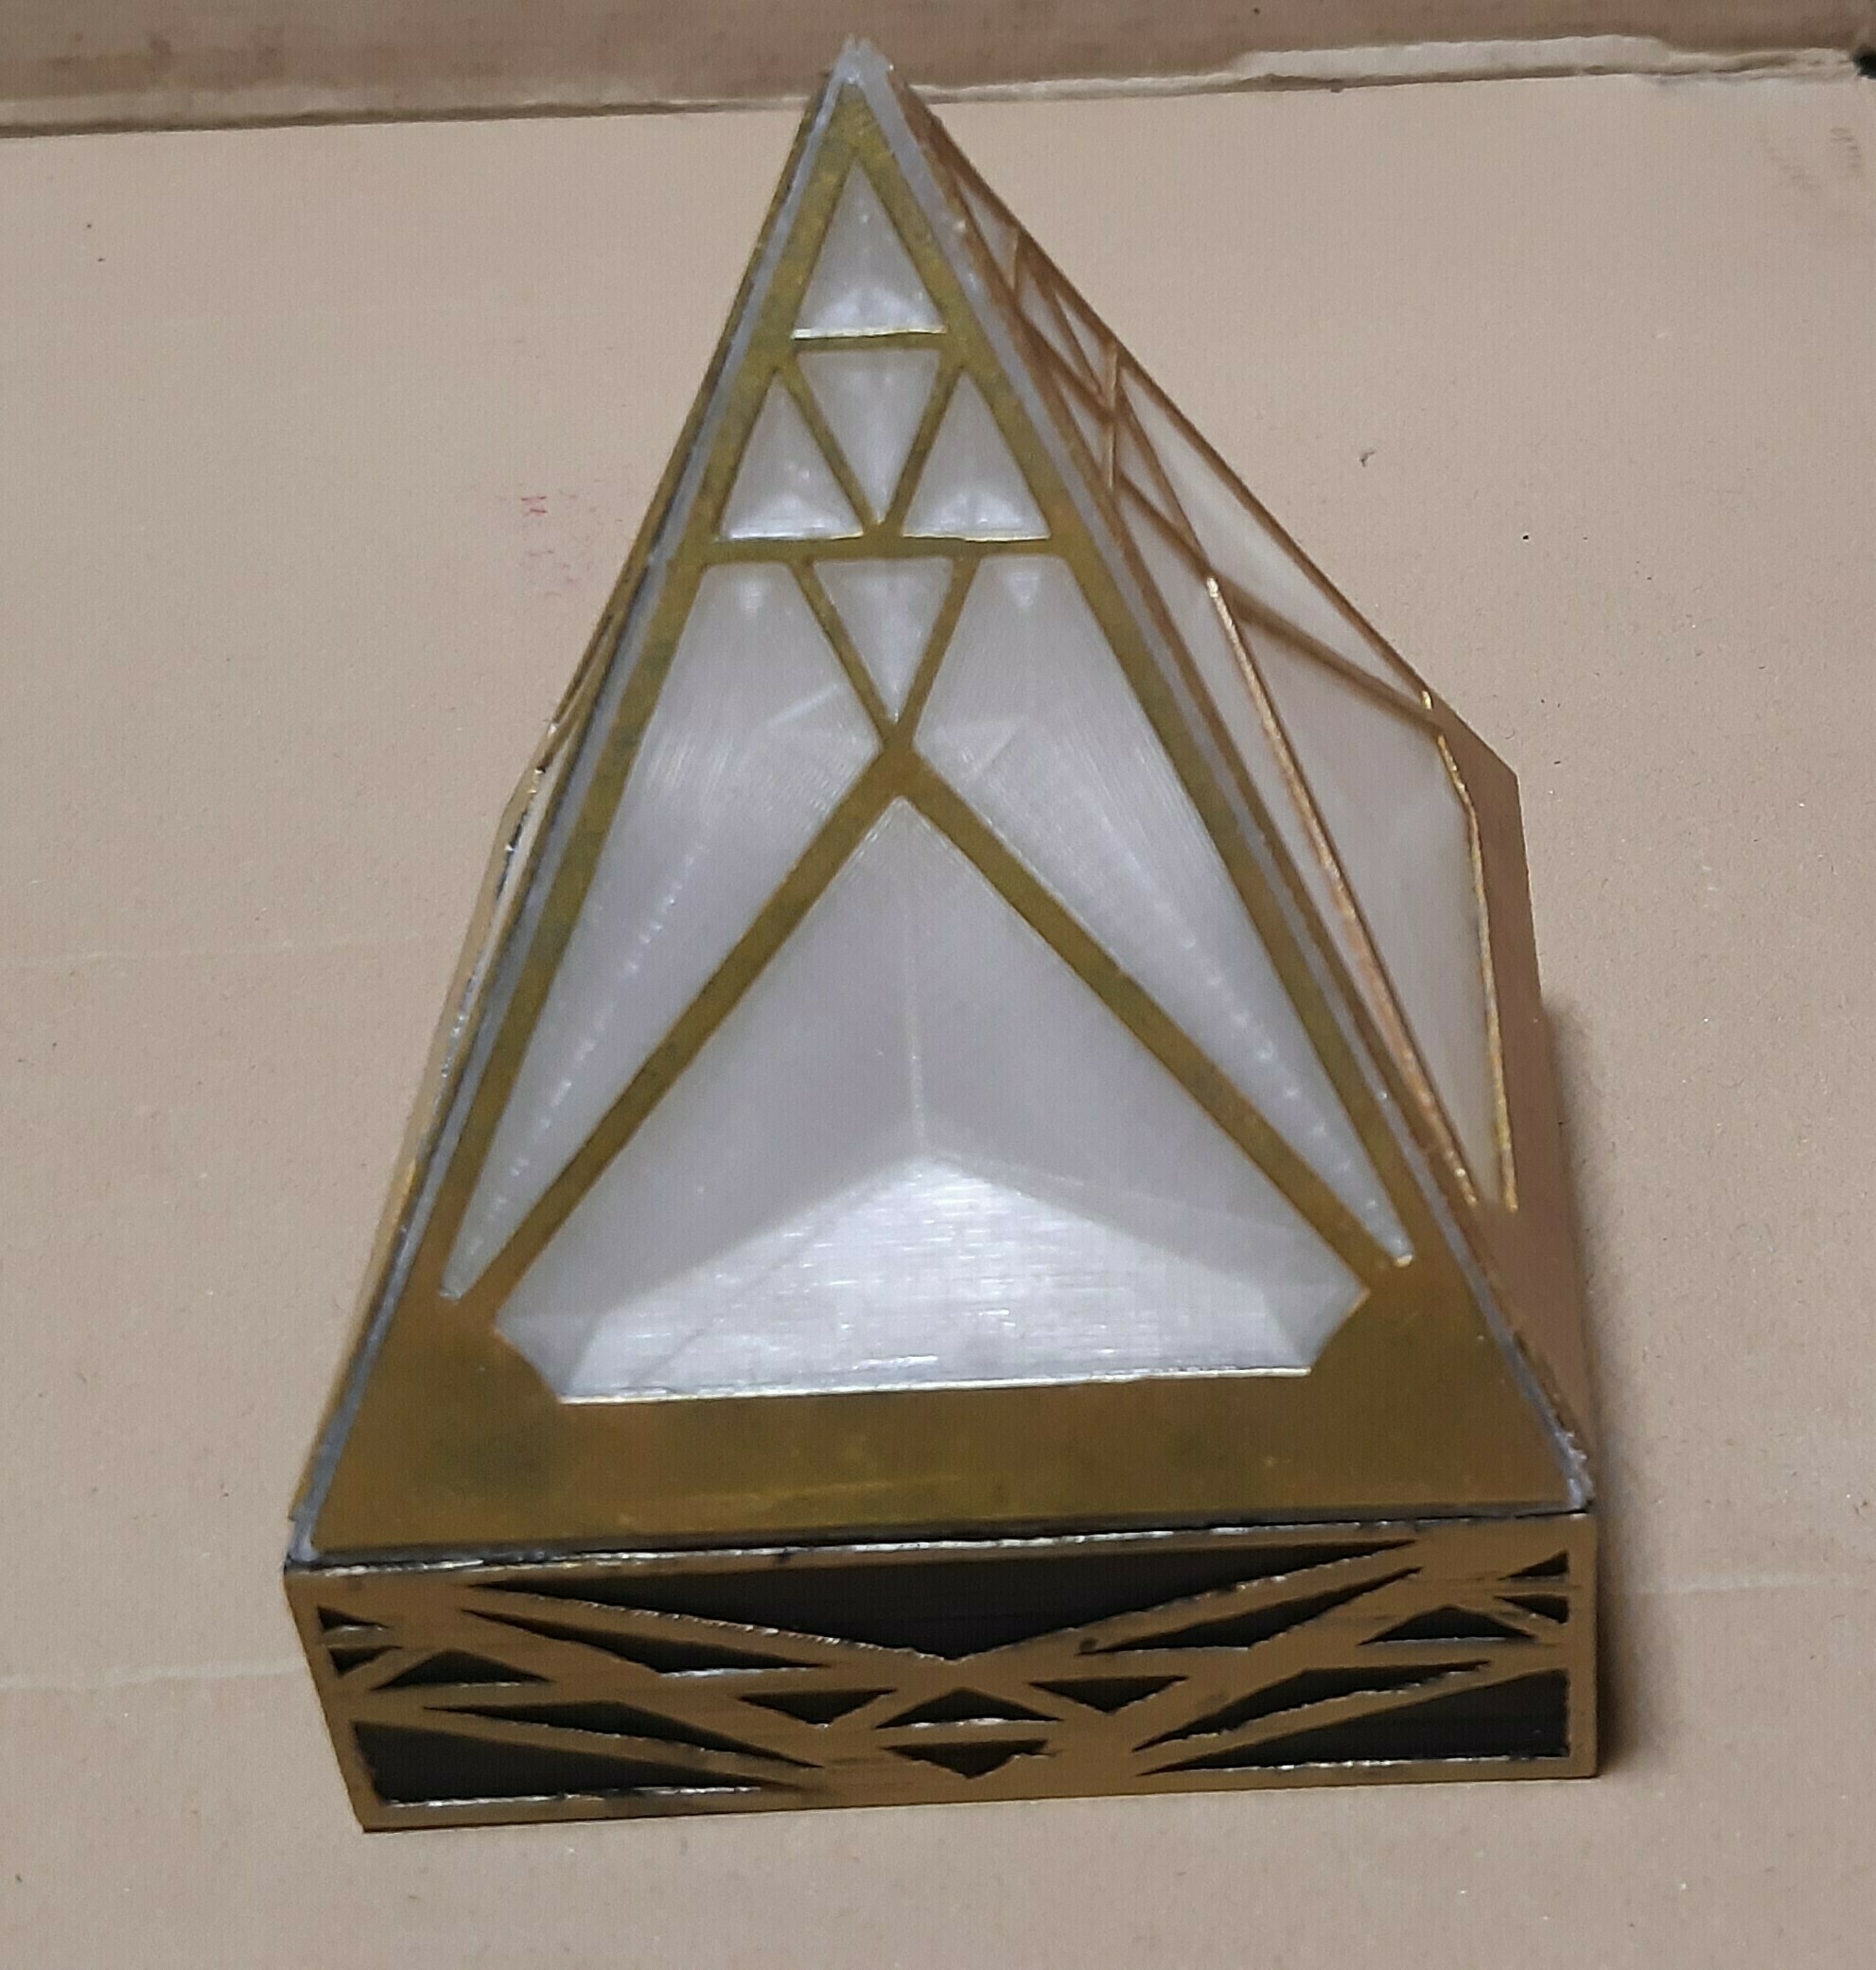
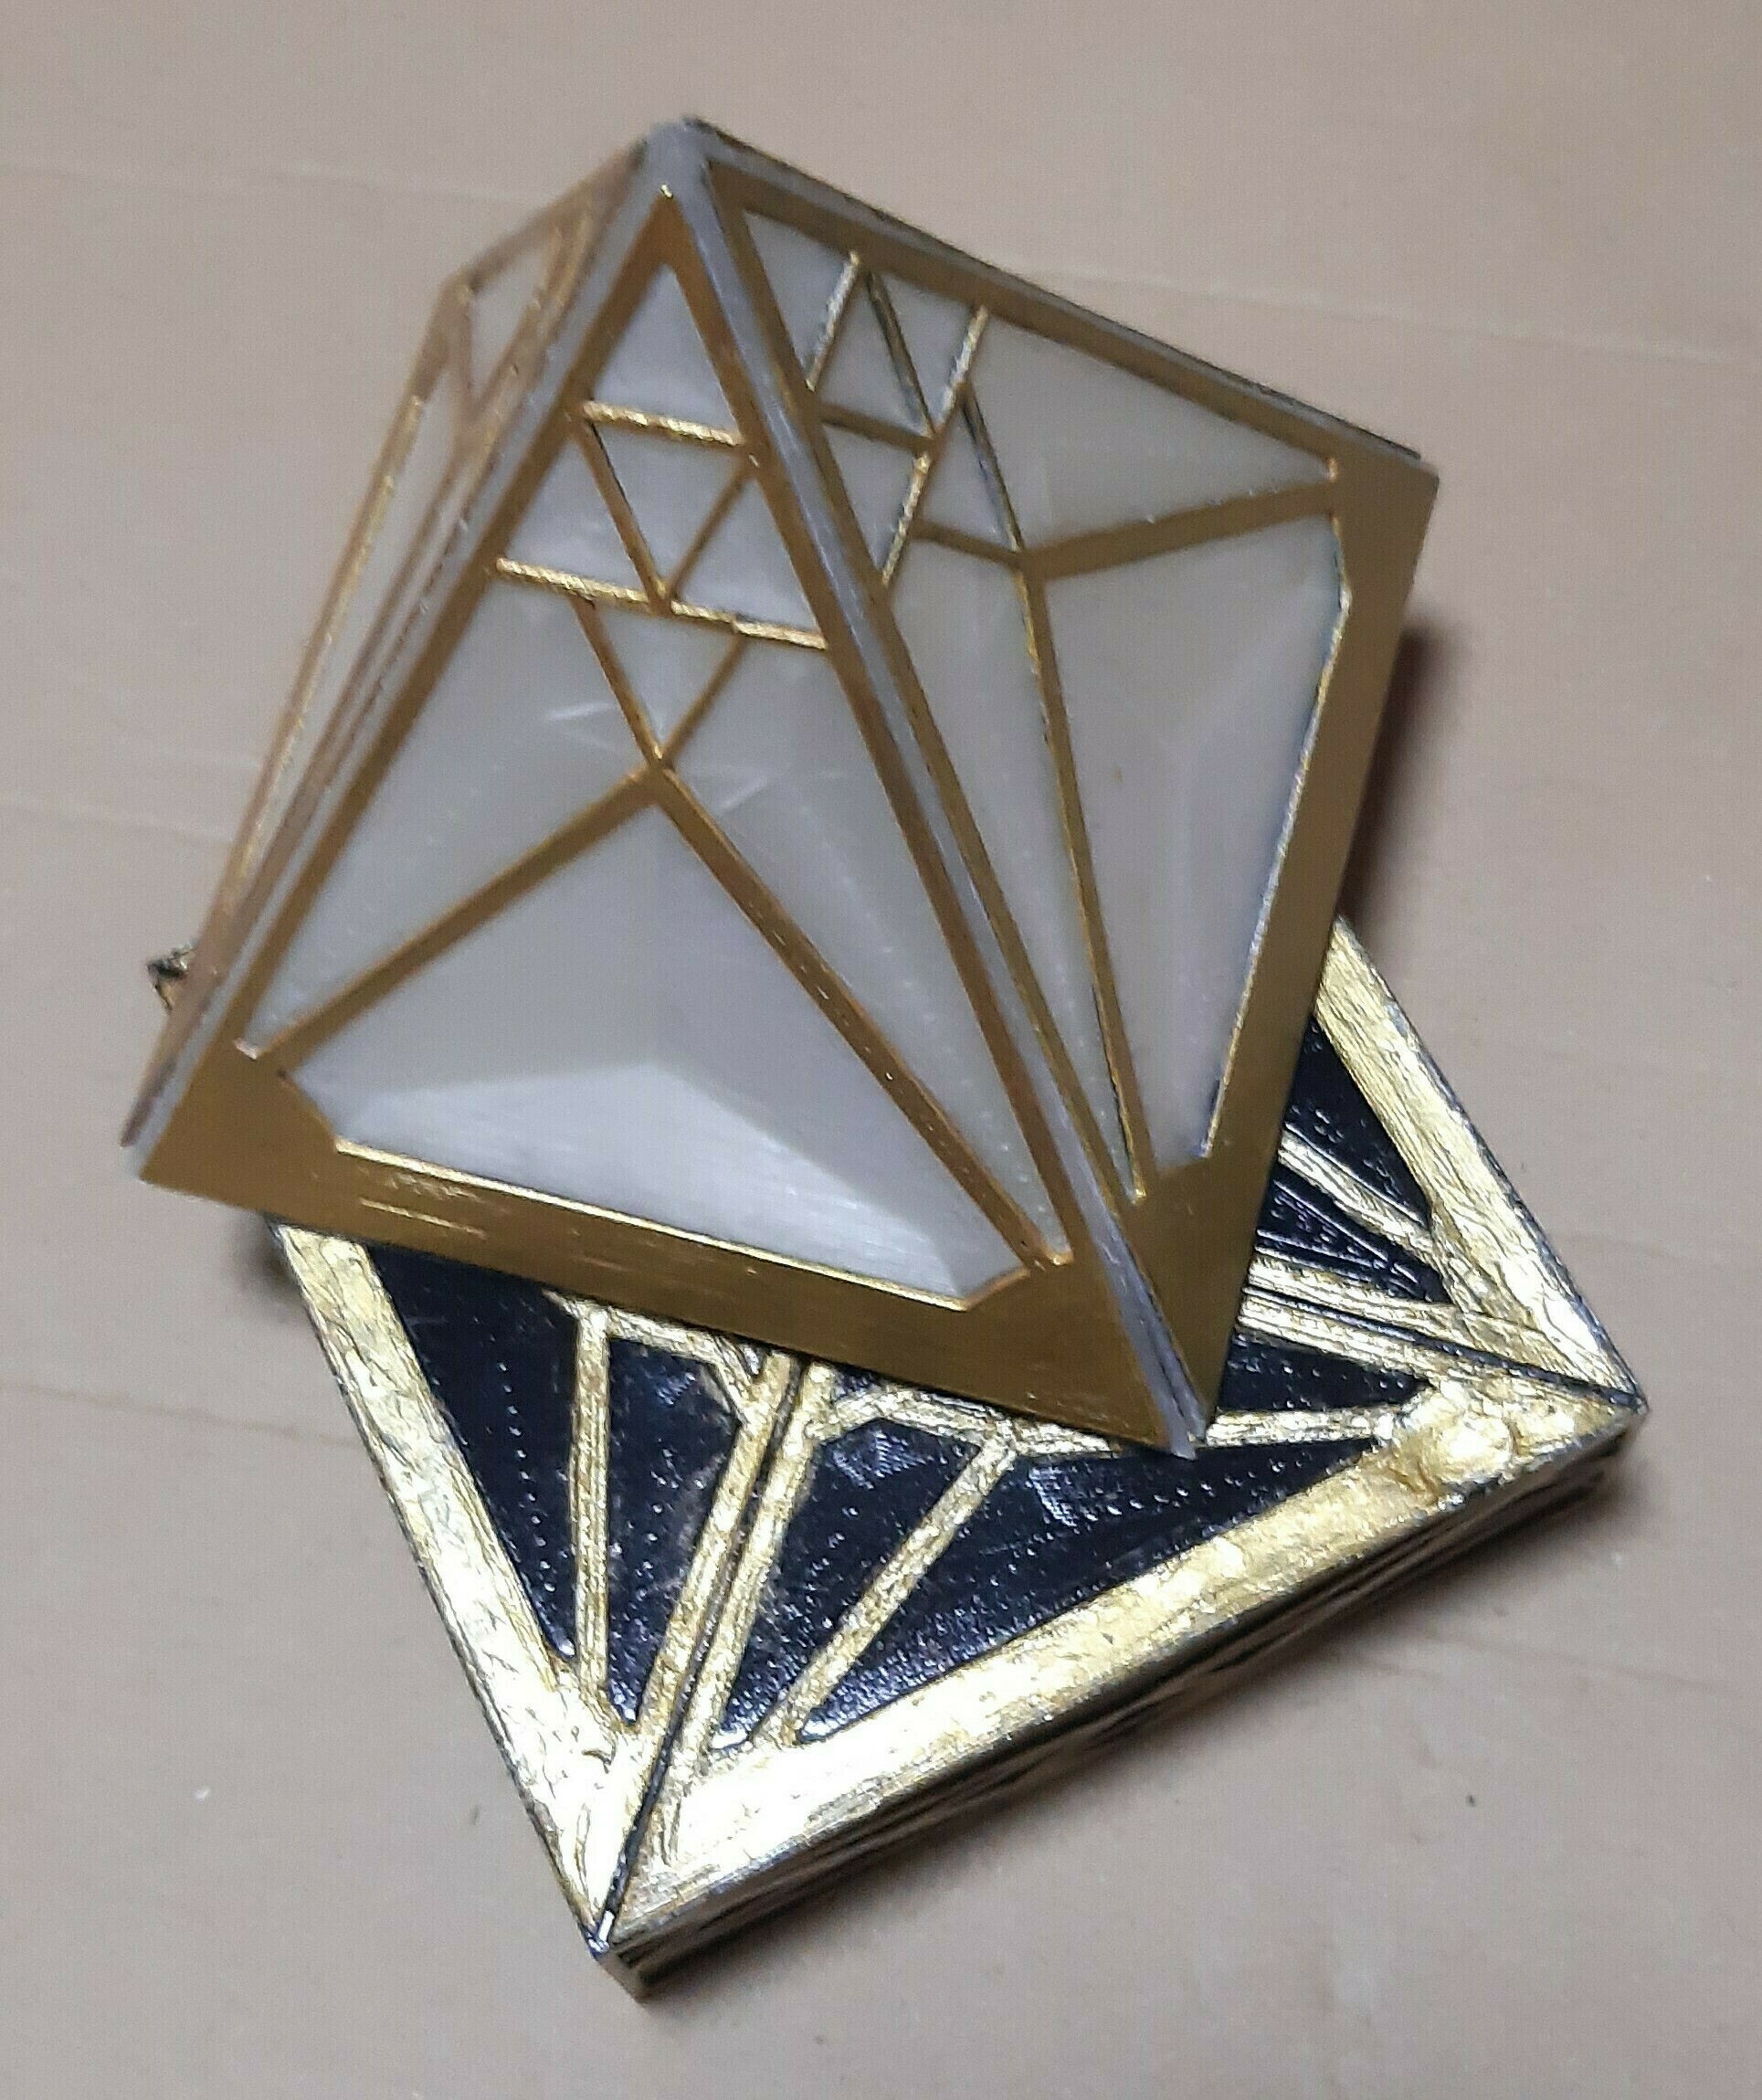
I consider the one I have built (in the photos) to be the working prototype. As such it had various techniques attempted during it's build and therefore isn't as perfect as I would have liked, although since "real" holocrons are ancient, perfection isn't neccessarily the best outcome. It's the proof of concept, the parts fit, the circuit functions, the switch works and it lights up. It does have areas to improve on though and I'll be testing various ideas to make further improvements, including easier disassembly, brighter LEDs, improved power transmission and new designs for the pyramid inlay. Any new versions of parts will be added to these files, with the intent to keep everything as mutually compatible as possible.
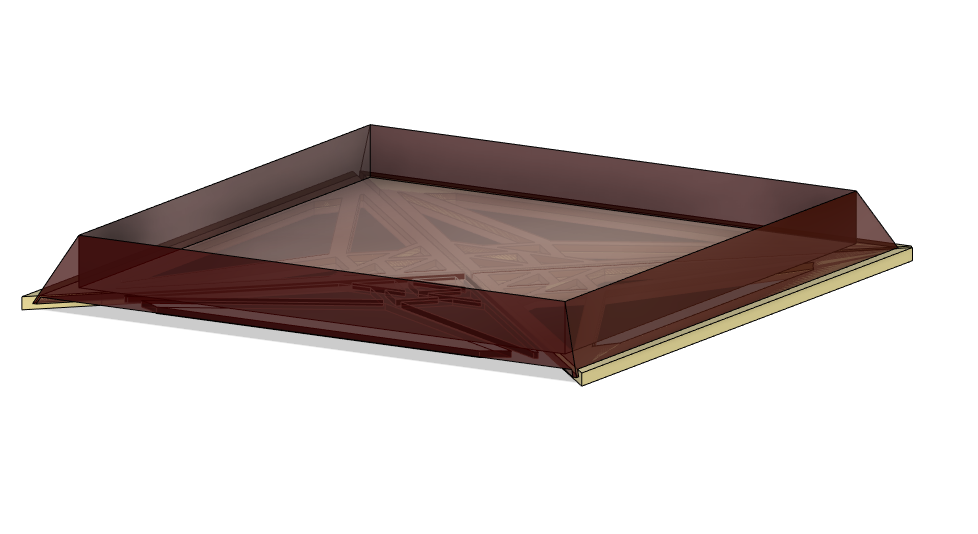
This is intended for multiple materials, translucent filament/resin for the pyramid and opaque filament/resin for the inlay. With 4 or 5 LEDs, it's also intended to be wirelessly powered from a stand although how you build it is up to you, there are multiple options. If you can make the pyramid itself completely transparent, you can also put something inside to display.
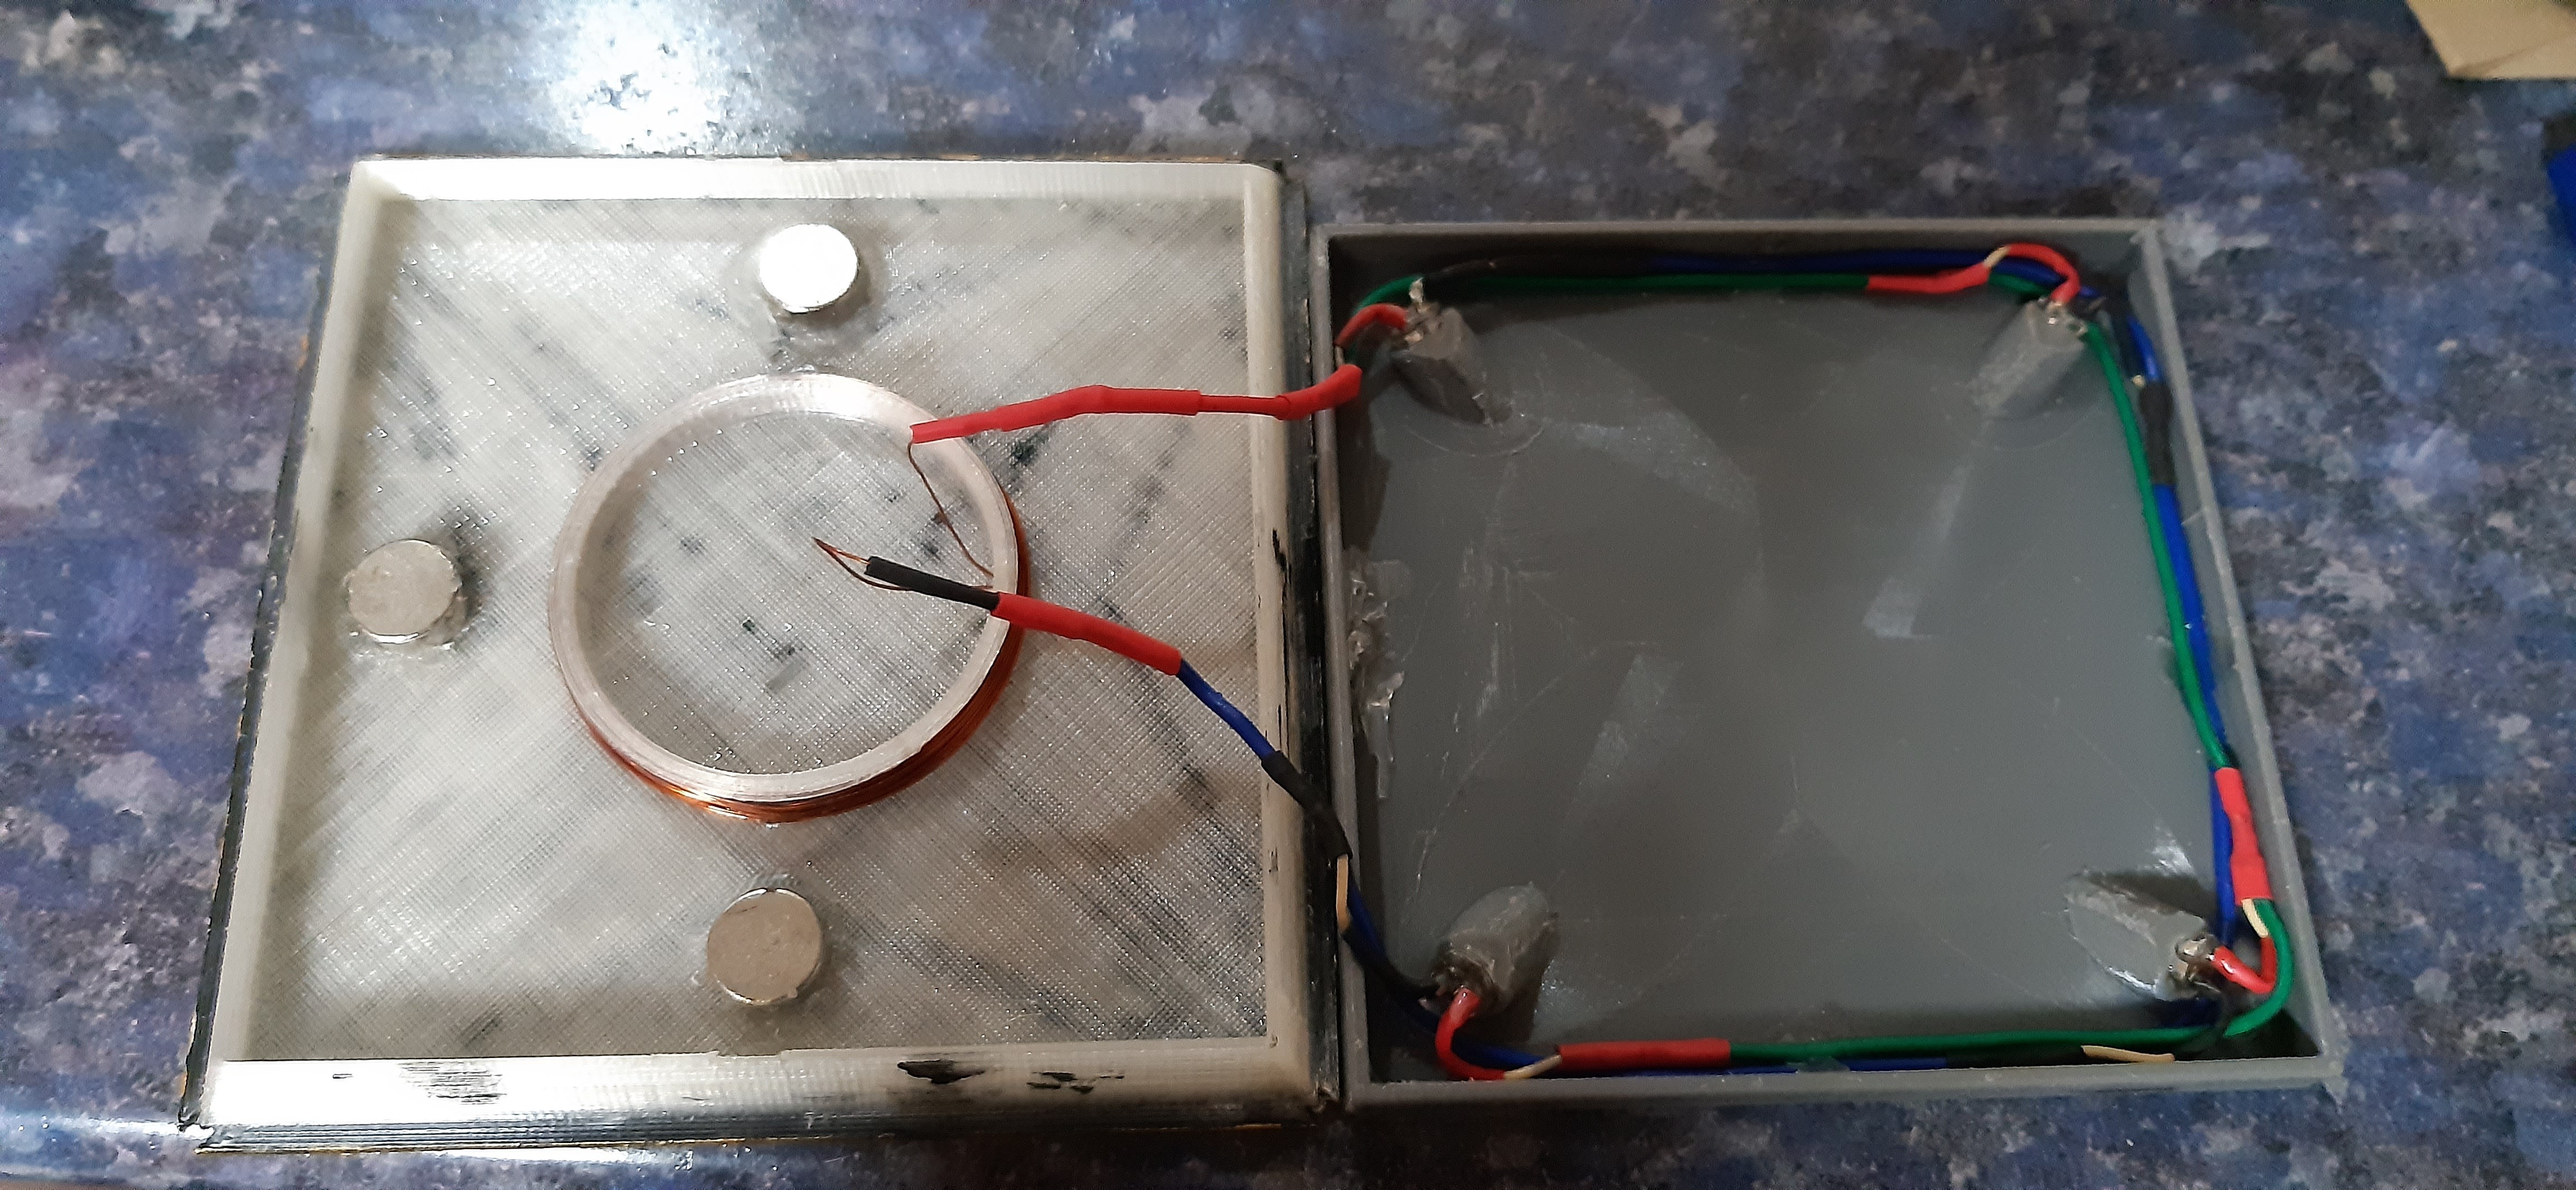
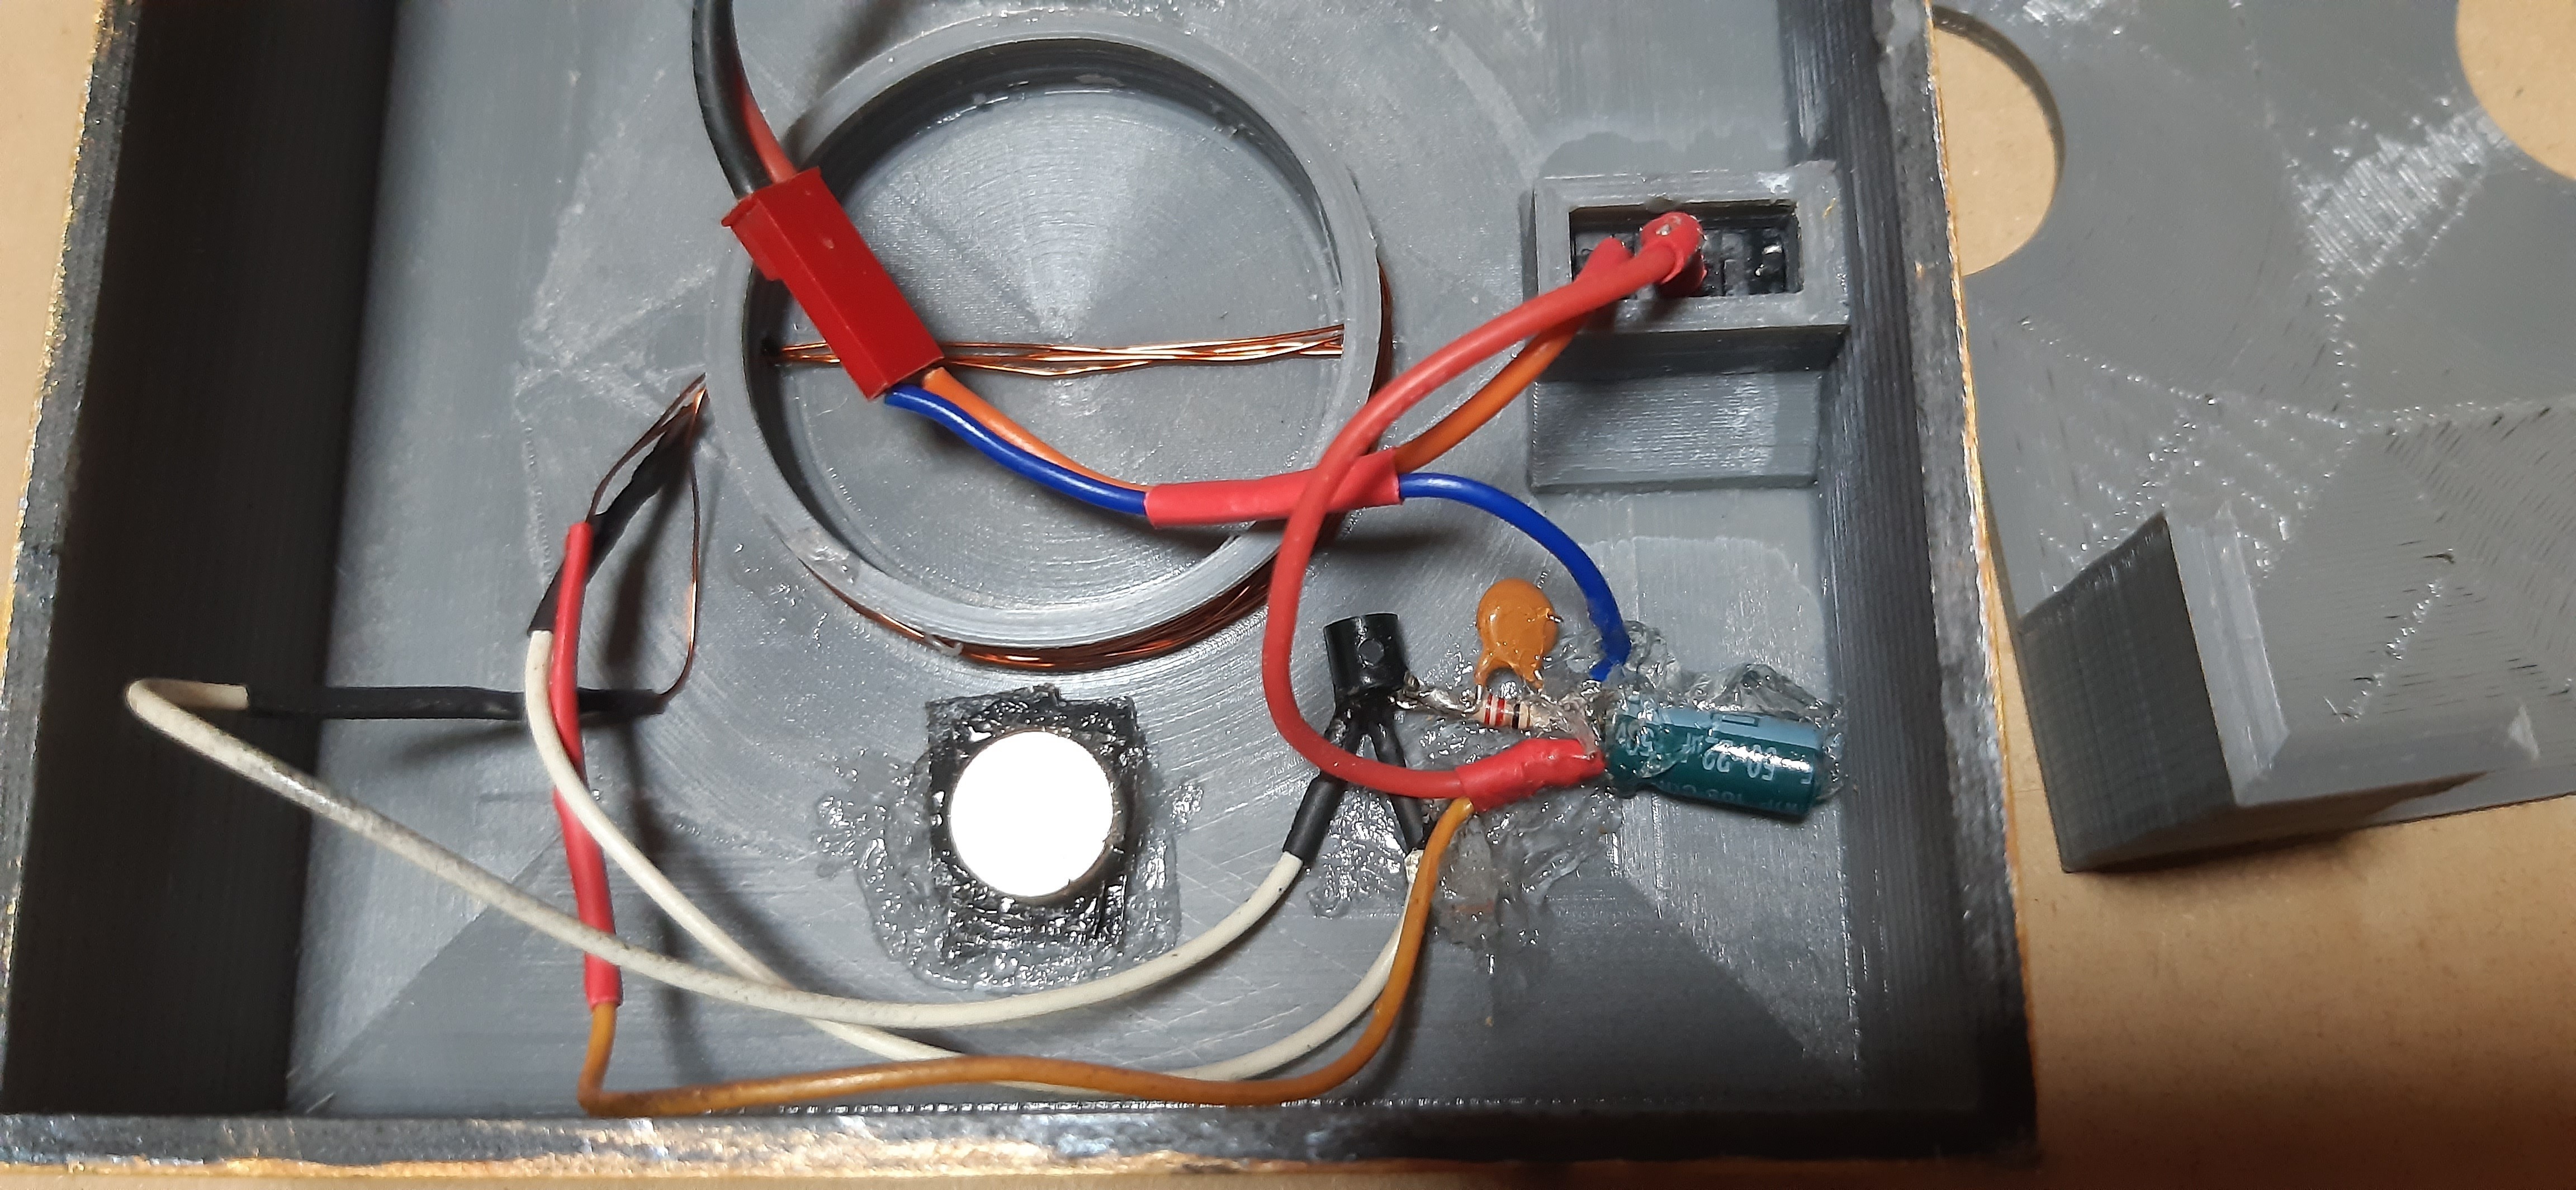
There are versions of the Stand and Base that have spools for winding coils around, 40mm and 70mm in diameter, these should be paired. However if you want to use batteries, (or other customisation) there are versions without the spools, and versions of the base that have a pin hole for activating a switch if you want. As you can see from the photos, I went with 40mm coils and a magnetically actuated momentary (mouse button) switch mounted in the stand. I STRONGLY recommend carefully considering your switch solution, you do not want power flowing through the power transmssion coils while the Holocron is not on the Stand, as this wastes power. Having said that, I did add a bypass on/off switch to mine (well, a 2 pin jumper) for convenience.
This is the circuit I based mine on, just with 3 more LEDs and 2 switches in parallel between the circuit and the +1.5-9v input. I DO NOT ADVISE USIN|G A 9v BATTERY I can smell something worrying when I do, so just DONT. 5v is plenty.
https://www.electrothinks.com/2020/04/Wireless-power-transmission-circuit-using-any-npn-transistor.html
I WILL ADD MY VERSION OF THE CIRCUIT SOON AND REMOVE THIS, IT WILL BE MORE SPECIFIC AND ADDRESS COIL WINDING NUMBERS vs VOLTAGE
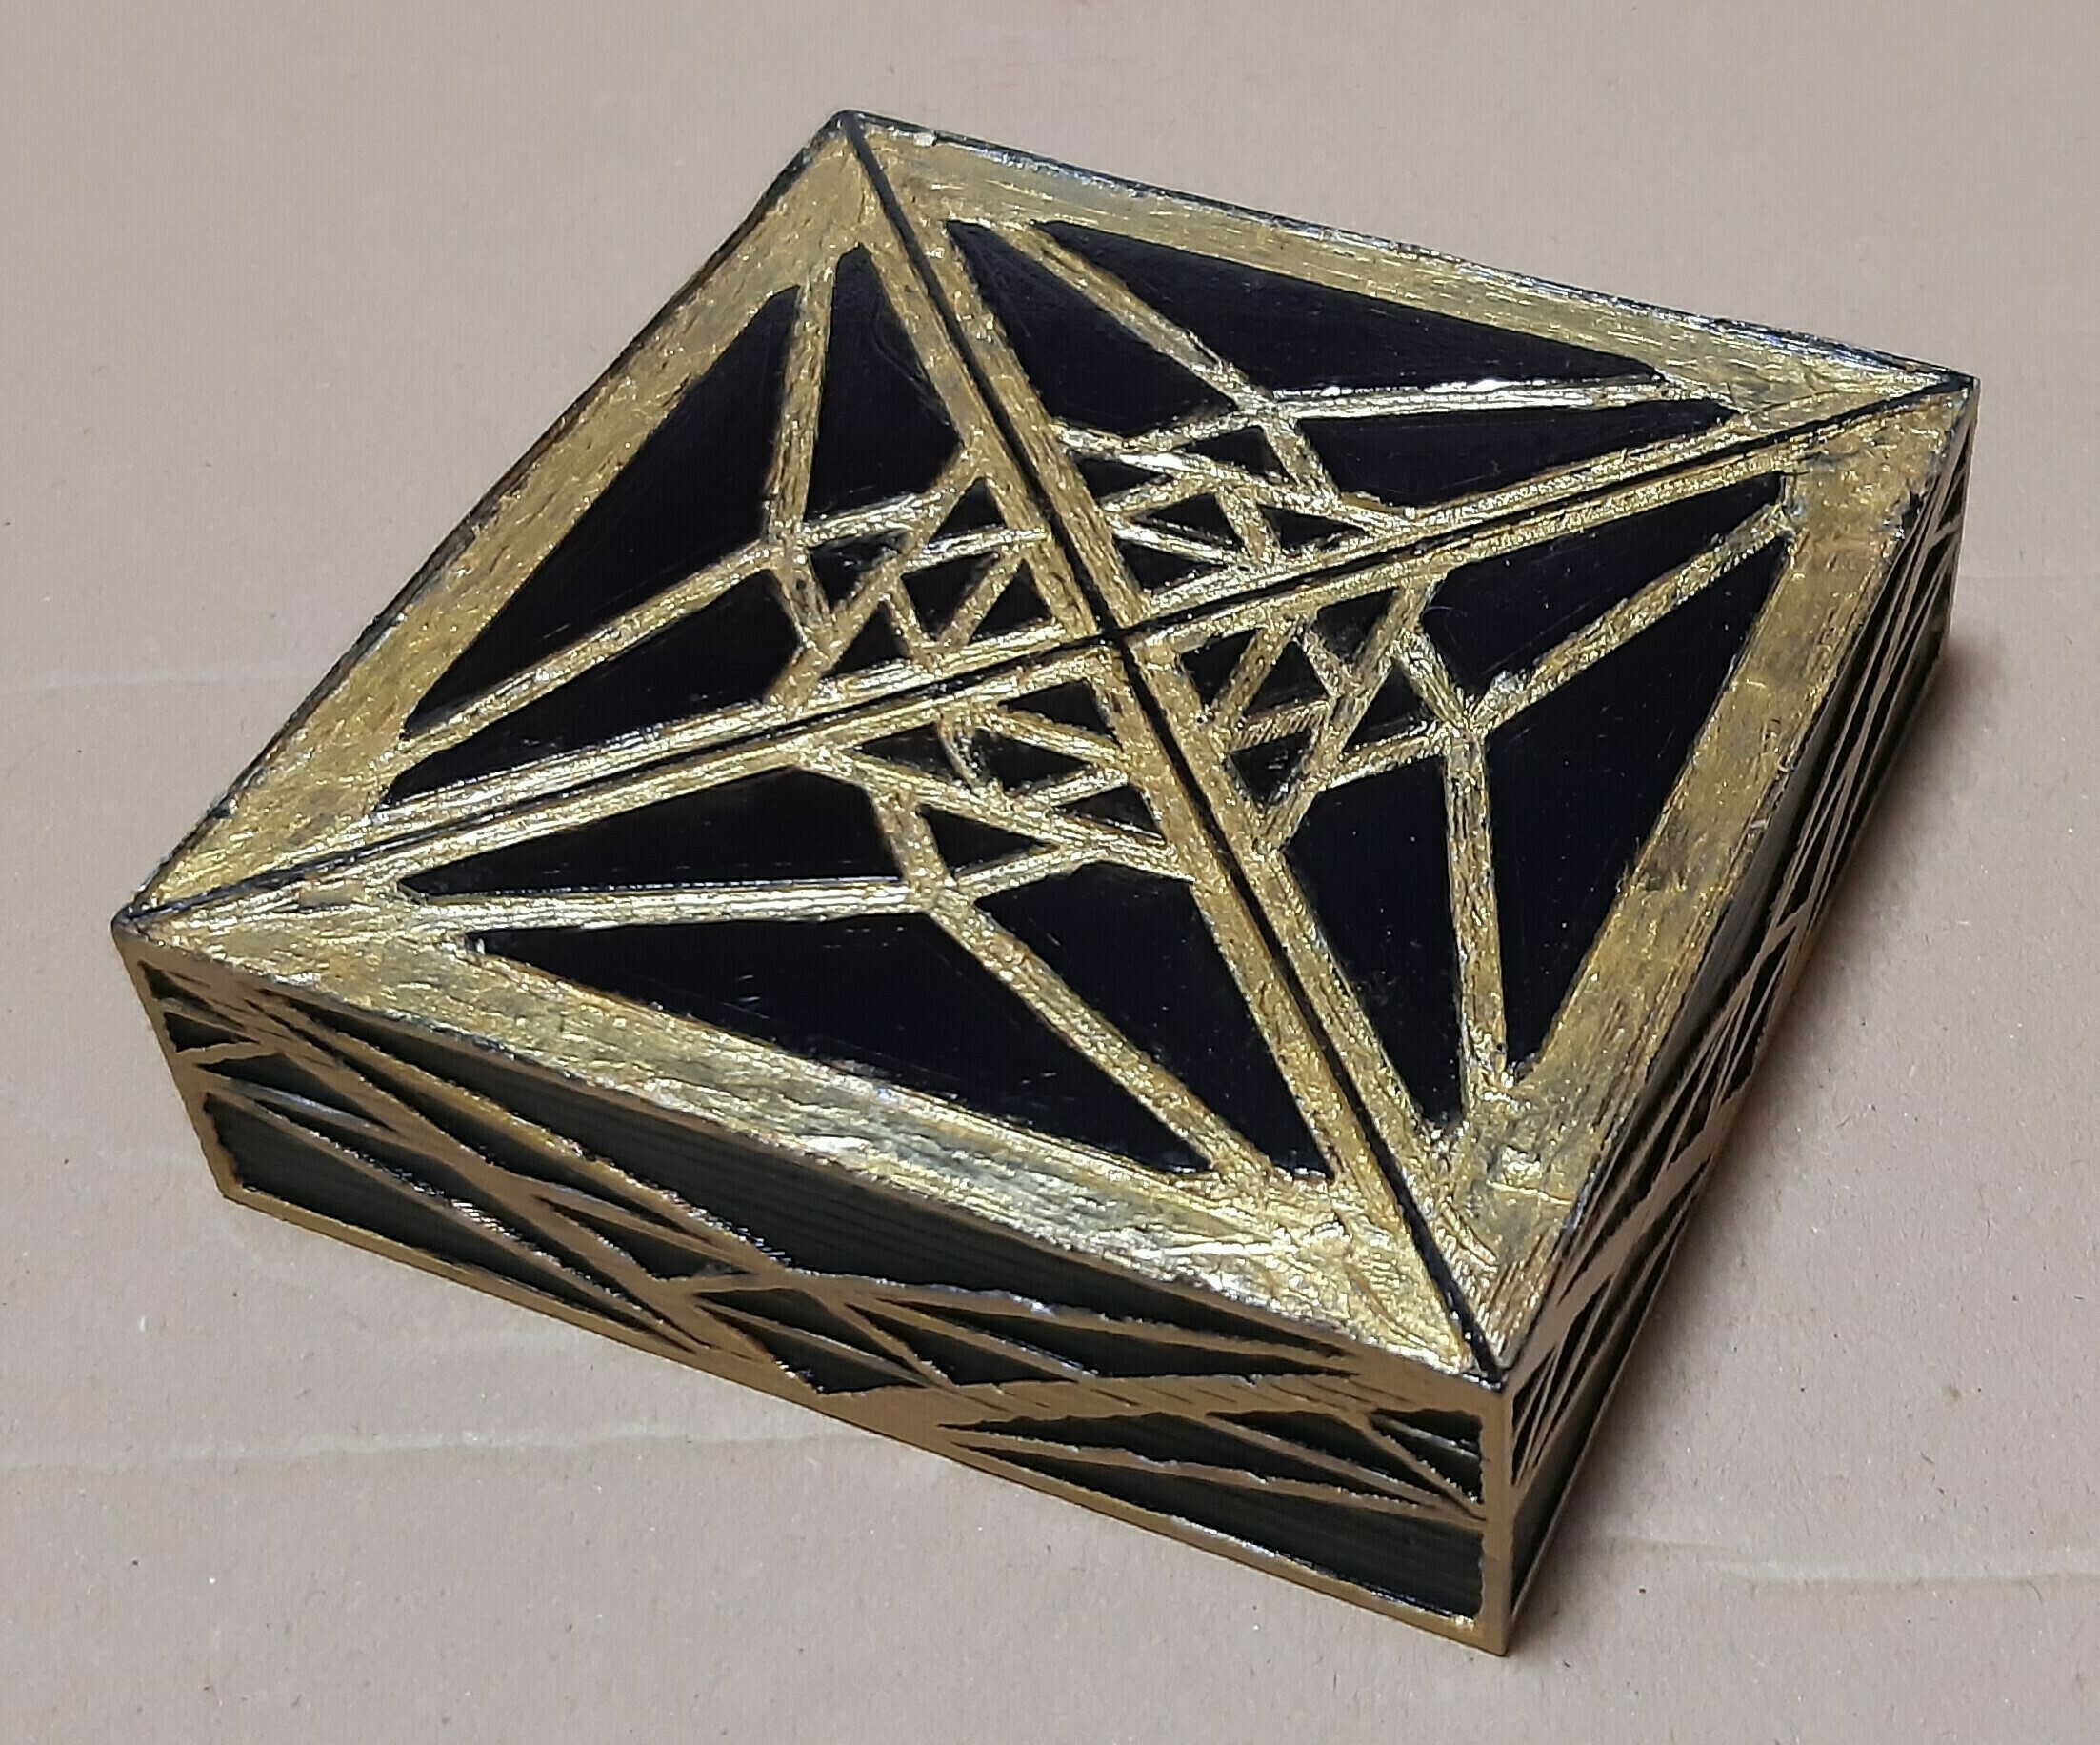
Depending on your printer/experience/etc there are several options for builting the actual pyramid part. As one piece, as 4 pieces, either embossed or recessed for inlay. This then fits onto the base, with or without a defuser to soften the LED lights. The base is either embossed or recessed for inlay, either as a solid piece or as 2 parts, (base A) with 40mm or 70mm coils, or without coils (with or without hole) and (base B) with holes for 4 or 5 LEDs, or no holes. Versions of base B for use with 5v LED strips will follow.
The stand comes with patterned sides, but have included blank sided versions for easy customisation.
If you are using a magnetic switch, you will need to make sure that the magnet in the base, REPELLS the magnet in the stand. The magnet needs to push the switch to activate it, this is so that you can't accidentally switch on the power with a peice of metal placed on the stand (accidentally or otherwise) You will then want to use at least 2 more pairs of mutually attracting magnets to counteract the repulsive force of the switch magnets. Mine just floated there without activating the power without the 2 extra magnet pairs.
At the moment, the holocron is designed to be glued and sealed. I used superglue on the inlay and between the pyramid panels and the base A part, then used a fairly thick UV resin to seal the panels together around the seams. I'm considering various ways of leaving 1 side panel able to be removed in order to place small items inside to display, which as you can probably guess requires clear transparent side panels, which I can't do without clear 3d printer resin (or normal resin and making a silicon mould or other R&D type stuff). Any additional variations will be added to these files.
Above all I'm designing this for customisation, go nuts! It can be anything from a basic shape of painted PLA to a usb power brick with wireless phone charging capability and touch activated miniature display case. Which, coincidentally, is what I'll be doing with it next. If this does well, I'll be investing the proceeds into 3d printer resin, so I can make use of my friends anycubic, along with the various components needed to make it a reality. At which point I will update these files with any additional/alternate parts, along with a full description/parts list/instructions to make it.
I will be continuing R&D on this project and updating it with any new variations of parts, I will also be taking feedback into consideration, so if you have a specific request for a specific variation to accomodate your version of this build, feel free to let me know. I can't promise anything, but any new parts that do get designed will (you guessed it) be added to these files.
I reserve the right to modify this description for clarity etc for any reason. (There will be things I've forgotten to mention or worded badly :)
[UPDATE]
I now have a resin printer and am semi-actively working on version 2. Once I wrestle my newbie360 mistakes out of the project files, I will be able to proceed.


-Foil-coated-BaseB-wired-and-ready-to-join.jpg)

.png)


-Inlay.png)
.png)