Reduced Price!!
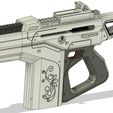
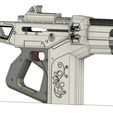
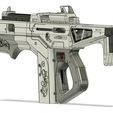
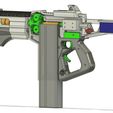
This is a cosplay replica of the Monte Carlo Automatic Rifle. This printable design can be used as a cosplay prop or it can be assembled with popular NERF community components to be a fully functional foam dart blaster. See below for a list of components and links. As a blaster, it is designed to be a solenoid flywheel blaster. The system can be printed on any rigid material of choice and it can be setup as a semi-auto or as a fire-select type blaster with a Narfduino and a 3 Position Rocker Toggle Switch. The rails on top are standard picatinny.
It is setup to take the Worker Dominator 40 dart mag which can accept 41 darts, to match the actual rifle capacity. It works best using waffle darts.
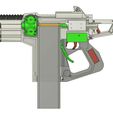
The trigger is a two-stage switch setup with two OMRON style switches. The flywheel switch goes without the actuating bar and the trigger switch requires the bar. The trigger is also designed with a friction stop in the first stage (flywheel spin) to ease identification of the second stage (solenoid pusher). It is designed to keep the flywheels spinning until manually released. For safety, the trigger is also designed to release in case the blaster is dropped.
The solenoid is a 35mm long stroke solenoid. If you buy the standard e-bay version you will need to upgrade the spring for proper operation. If you buy the FTW solenoid, you should be good.
The flywheel cage has a 43mm motor spacing with a Stryfe geometry. Containment crew inferno wheels with Kraken motors on 3S LiPo is an excellent setup for this blaster since the solenoid needs ~12V.
The battery compartment is built-in in the stock. The battery cover opens and closes via thumbscrew. The stock also has provisions to add a standard voltmeter display in the stock to keep track of your battery voltage. You don’t want to go below 10.5V with a 3S LiPo. The stock pad should be printed in a soft material like TPU with a low fill percentage to resemble an actual pad.
Assembly in semi-auto configuration should be pretty straight forward for any intermediate to advanced Nerf Modder with standard nerf screws, trigger springs, etc, see below. All components fit on the right half of the core and can be fully tested prior to screwing everything together. Use lubricant in the trigger assembly for smooth operation. Full-auto setup with the Narfduino will require some decent soldering skills. If I get enough requests, I’ll put together an assembly guide. This is a living design so if you have requests or issues with the STLs let me know and I’ll update the design.
These files are for personal use and NOT distributable, please do not share or post these files.
Components:
Cosplay Only
-Nerf Screws– 31 needed
https://outofdarts.com/products/replacement-screw-screw-set-20x-nerf-brand-compatible?_pos=9&_sid=cb626ac45&_ss=r
-Mag Release Screws (M3 x 40mm) – 2 needed
https://www.amazon.com/gp/product/B012TE0Z4A/ref=ppx_yo_dt_b_search_asin_title?ie=UTF8&psc=1
Semi Auto Blaster Setup
-Wiring – 14 to 16 gauge silicon wiring
-Nerf Screws– 35 needed
https://outofdarts.com/products/replacement-screw-screw-set-20x-nerf-brand-compatible?_pos=9&_sid=cb626ac45&_ss=r
-Mag Release Screws (M3 x 40mm) – 2 needed
https://www.amazon.com/gp/product/B012TE0Z4A/ref=ppx_yo_dt_b_search_asin_title?ie=UTF8&psc=1
-Solenoid Support Screws (M4-0.7 Thread Size, 10 mm Length) – 2 needed
https://www.amazon.com/gp/product/B00F33UIJ2/ref=ppx_yo_dt_b_search_asin_title?ie=UTF8&psc=1
-Battery Compartment ThumbScrew– 1 needed
https://outofdarts.com/products/demolisher-2-in-1-thumb-screw?_pos=2&_sid=cb626ac45&_ss=r
-Mag Release Spring (0.4mmx10mmx15mm) – 1 needed
https://www.amazon.com/gp/product/B076MGMWYP/ref=ppx_yo_dt_b_search_asin_title?ie=UTF8&psc=1
-Trigger Spring (15mm OD,1mm Wire Size cut to desired length) – 1 needed
https://www.amazon.com/gp/product/B08FDVNV91/ref=ppx_yo_dt_b_search_asin_title?ie=UTF8&psc=1
-Flywheel Switch – 1 needed
https://outofdarts.com/products/16a-microswitch-genuine-omron-d3v-16-1a5-k?_pos=2&_sid=295cf215a&_ss=r
-Trigger Switch – 1 needed
https://outofdarts.com/products/21a-microswitch-genuine-omron-v-212-1c6-spdt?_pos=1&_sid=295cf215a&_ss=r
-Voltmeter .36” – 1 needed
https://outofdarts.com/products/voltage-meter-36-4-colors?_pos=3&_sid=3930606f8&_ss=r
Full Auto Blaster Setup (in addition to the semi-auto setup)
-Wiring – 14 to 16 gauge silicon wiring
-Toggle Switch (KCD1-5-103) (3 Position Round Boat Rocker Switch) – 1 needed
https://www.amazon.com/gp/product/B07MV5K2JV/ref=ppx_yo_dt_b_search_asin_image?ie=UTF8&psc=1
https://outofdarts.com/products/3-position-round-boat-rocker-switch?_pos=1&_sid=22cfd8226&_ss=r
-Narfduino Smart Board V1.6 – 1 needed
https://outofdarts.com/products/narfduino-smart-board?_pos=1&_sid=eed14ba11&_ss=r

/https://fbi.cults3d.com/uploaders/17047364/illustration-file/9bb86db2-1667-4723-ac82-dbd6d436a2fb/MC-Left-Side.jpg)
