Skip to content

A20M Dual Fan

Advertising
?
Creation quality: 5.0/5 (1 vote)
Evaluation of members on the printability, utility, level of detail, etc.

  • 1.6k views
  • 2 likes
  • 15 downloads

License
3D design format
STL Folder details Close
  • 25MMCapV1.stl
  • 25MMCapV2.stl
  • 25MMFinal.stl
  • 30MMCapV2.stl
  • 30MMCapV3.stl
  • 30MMFinal.stl

Learn more about the formats

Publication date 2021-03-14 at 03:31
?
Published to Thingiverse on: 2019-04-19 at 07:31
Design number 330330

3D printer file info

3D model description

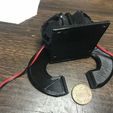
Ok all Im going to start with a DISCLAMER this setup takes a little work I feel that you need basic knowledge of soldering and be tech savvy its not the easiest setup so with that being said if you feel comfortable to do that I think the payoff is worth the work it is a pretty sweet fan setup.

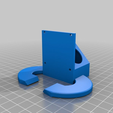
Alrighty than there is two different setups a 25MM and a 30MM both install the same just choose what size you want to go with, the 25MM setup will get the job done if you want to go with smaller and lighter they work ok at about 80-100% but the 30MM setup works great with plenty of power I'm usually between 50-70% and the 30MM fans seems to run smoother but it just might be that the 25MM fans were pretty cheap so you might be able to find something better.

-Setup-
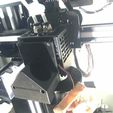
I used two 12V fans is series instead of 24V fans with this design mainly because I already had a few 25MM 12V fans already so that is what I started with and than I decided to go to 30MM so I kept it the same also it seems way easier to get 12V than 24V fans, you defiantly can go with two 24V fans in parallel and it would probably be easier but I opted to go with dual 12V fans in series instead, just refer to the pictures I think its enough information. I did already have the connectors from RC hobbies over the years and a capacitor I striped from some electronics I had laying around so you might have to make a trip to the hobby shop or come up with a similar setup. I used the capacitor too smooth out the fans and to help the startup (pay attention to the polarity) if you do the two 24V fans in parallel that is probably not needed but won't hurt. Also very IMPORTANT I used a Neoprene washer to insulate the extruder from the arms I picked it up from ACE for a few bucks I believe it was 2.5"X1/8 the burn point is around 260 degrees it works well otherwise it will for sure melt the arms.

Also if when you first try it and your fans or 1 doesn't spin reverse the polarity on 1 or both it won't hurt anything if they are reversed it just won't spin, test it before you button it up.

3D printing settings

-

Advertising


Issue with this design? Report a problem.

Would you like to support Cults?

You like Cults and you want to help us continue the adventure independently? Please note that we are a small team of 3 people, therefore it is very simple to support us to maintain the activity and create future developments. Here are 4 solutions accessible to all:

  • ADVERTISING: Disable your banner blocker (AdBlock, …) and click on our banner ads.

  • AFFILIATION: Make your purchases online by clicking on our affiliate links here Amazon.

  • DONATE: If you want, you can make a donation via Ko-Fi πŸ’œ.

  • WORD OF MOUTH: Invite your friends to come, discover the platform and the magnificent 3D files shared by the community!


Sharing and downloading on Cults3D guarantees that designs remain in makers community hands! And not in the hands of the 3D printing or software giants who own the competing platforms and exploit the designs for their own commercial interests.

Cults3D is an independent, self-financed site that is not accountable to any investor or brand. Almost all of the site's revenues are paid back to the platform's makers. The content published on the site serves only the interests of its authors and not those of 3D printer brands who also wish to control the 3D modeling market.

100% secure payment by credit card, PayPal, Apple Pay, Google Pay, etc.
View all payment options.