Skip to content

Mini M&M Rocket

Advertising
Advertising
?
Creation quality: 5.0/5 (1 vote)
Evaluation of members on the printability, utility, level of detail, etc.

  • 1.8k views
  • 2 likes
  • 10 downloads

License
3D design format
STL Folder details Close
  • 13mm_MotorBlock.stl
  • MM_Rocket_Nosecone.stl
  • M_M_Rocket_Fins.stl
  • M_M_Rocket_Fins_BT-5.stl
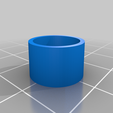
  • M_M_Rocket_retainer.stl

Learn more about the formats

Publication date 2021-03-23 at 01:55
?
Published to Thingiverse on: 2019-10-28 at 02:10
Design number 338254

3D printer file info

3D model description

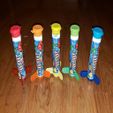
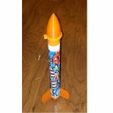
While joking with my son that I need to stop buying Pringles because I keep making rockets out of the tubes, he held up a package of mini M&Ms we'd just bought for my grandson and said "I bet you'd make a rocket out of this!"

So I did. And here it is.

Build instructions:

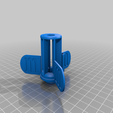
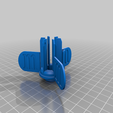
There are two different versions of the fin unit.

1) Uses a BT-5 (13mm) motor tube. You'll need a motor block if you build that one. It's slightly lighter than the all plastic one, but more hassle. It works though. I built one this way. I believe the weight difference is negligible but this one may hold up better long term than the all plastic one.
2) An all plastic one sized for Estes 13mm motors. Held up fine for the one launch I've done so far, time will tell if it lasts for long.

Build Notes:
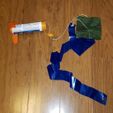
* I use 250lb kevlar string as a shock cord. It's fire proof...enough.
* I also use a small square of nomex cloth instead of wadding. These are both visible in the photo.
* Use a streamer for recovery, it's a light rocket.
* Drill a hole in the cap and run the shock cord through it, knotting it above the cap and gluing it in place. Then cut off the hinge. I didn't do this at first and 3 of the five rockets lost their cap at apogee when it got blown off the rocket. That hinge is NOT strong enough.
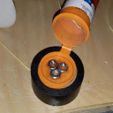
* I had to glue 3 10-24 hex nuts to the lid for weight. They came off on the initial launch, you can kind of tell as it reaches max height in the video. Be sure to sand the lid before you epoxy them down (which is what I did the second time - and photo'd).
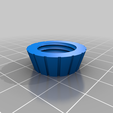
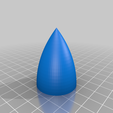
* As an alternative, you can print the nosecone I've now included with this thing. 20% infill should be fine and it will weight the nose without gluing on nuts. There is a recess in the nosecone for the knot from the shock cord to fit.
This nose cone doesn't look as "stock", but it works fine and may improve performance.
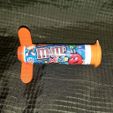
* These mini M&M containers have a seam from the molding you can see about 2mm from the bottom, I just cut there and sanded smooth. The fin unit then slips inside. Epoxy it in, then epoxy the fins down.

It's meant to be a fun cheap disposable rocket, basically, and I expect that over a few launches the tube might warp from the heat. But its easy to build and fun to launch.

I used an A10-3T in the video, but I think it was a bad batch as none of the four launches I did went as high as they should have. This rocket empty is only 27g, so I expected the flight to be higher. Nevertheless it flew fine as you can see in the video below.

https://www.youtube.com/watch?v=DaicyF86u1s&feature=youtu.be

3D printing settings

-

Tags

Advertising


Issue with this design? Report a problem.

Would you like to support Cults?

You like Cults and you want to help us continue the adventure independently? Please note that we are a small team of 3 people, therefore it is very simple to support us to maintain the activity and create future developments. Here are 4 solutions accessible to all:

  • ADVERTISING: Disable your banner blocker (AdBlock, …) and click on our banner ads.

  • AFFILIATION: Make your purchases online by clicking on our affiliate links here Amazon.

  • DONATE: If you want, you can make a donation via Ko-Fi πŸ’œ.

  • WORD OF MOUTH: Invite your friends to come, discover the platform and the magnificent 3D files shared by the community!


Sharing and downloading on Cults3D guarantees that designs remain in makers community hands! And not in the hands of the 3D printing or software giants who own the competing platforms and exploit the designs for their own commercial interests.

Cults3D is an independent, self-financed site that is not accountable to any investor or brand. Almost all of the site's revenues are paid back to the platform's makers. The content published on the site serves only the interests of its authors and not those of 3D printer brands who also wish to control the 3D modeling market.

100% secure payment by credit card, PayPal, Apple Pay, Google Pay, etc.
View all payment options.