Skip to content

MP Select Mini V2 Z Axis

Advertising
Advertising
?
Creation quality: 0.0/5 (0 votes)
Evaluation of members on the printability, utility, level of detail, etc.

  • 1.5k views
  • 2 downloads

License
3D design format
F3D and STL Folder details Close
  • Bearing_Mount.stl
  • Cap.stl
  • Mini_Axis_v10.f3d

Learn more about the formats

Publication date 2021-03-26 at 12:06
?
Published to Thingiverse on: 2017-05-22 at 04:41
Design number 342148

3D printer file info

3D model description

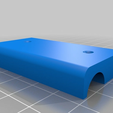
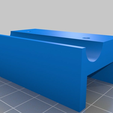
This I made for my new MP Select Mini V2. Possible just my luck but the new V2 mini seemed to have a longer X-axis arm which made the old clap system not work. It was off by about 4mm so I made this new clap. It worked great. I revised it a bit after using it for a while and added the counter sunk holes inside the bearing mount. I used screws identical to the bed screws on the MP Select Mini but any small taped head should work fine- you will need to use new screw (longer) to secure the bearing clap to the x-axis bar. I left the bar on my Mini since I think the extra support is needed.

Product Links:
M3 Screws: http://amzn.to/2q7PdFK
3M Glass Bed Tape: http://amzn.to/2qMBntD
Vibration Pads: http://amzn.to/2r7oGg9 (come in 2x2 and 4x4 work well)
PLA PRO- http://amzn.to/2q7UvkQ (great material in my opinion)
Bed Wires: https://www.youtube.com/watch?v=W1MqNMbGtDY (not my video)
Glass Bed- http://amzn.to/2rs14CN (or goto Lowes and get the to cut you one 2$)
MP WIKI- http://mpselectmini.com/mods

Bed Wire Option:
https://www.thingiverse.com/thing:2302588
https://www.thingiverse.com/thing:2179761 (move fan use fan holes)
3. Drill new hole like the video
Silicone WIre: http://amzn.to/2q7zG8Z

Things I learned about the V2- (fair and not so fair)
0. The control button has much better control and works decently now!
1. It still has issues :( the bed is the same, they added some cheap cotton blanket to the bottom that is barley taped in place. So you might to fix that before you ever start printing.
2. The bed I received was warped. High in the middle- I added a glass bed so that actually fixed the issue of the warped aluminum. I used 3M adhesive tape for the glass bed and it worked outstandingly well. Just cut the glass to leave your bed leveling screws access for removal and leveling.
3. The hot end is better- its a cheap E3D clone and performs as such. Not great but should be better in the long run.
4. This machine was louder than the last one. I even printed some Z-Axis stabilizers for the inside tower and it still did not quit rattling.
5. The bed wires are still an issue. My original mini cut the heated bed wires since they rub against the mounting blocks and pulley. I recommend rerouting them as the link shows below.
6. It printed fine for 3 days and then the bed thrmoresistor went out causing the bed to quit heating, this was after it was about 120 degrees Celsius and I thought it might burn it self up! lol
7. The X-axis pulley on the right side used to be metal, however the new one is plastic for some ungodly reason. After a few days printing this pulley and gear fell apart almost and shelled plastic pieces all over the X-axis arm. Terrible design change in my opinion.
8. When it prints the prints are pretty decent for a 220$ machine. With some mods and tweaking I think its still almost worth the 220$ if you want to tinker with it.
9. Cooling fan seems to be much quieter which is great, the cooling shroud however I am not to sure on how well it will cool the parts. Its an odd design in my opinion and leaves little air flow left for part cooling.

Unfortunately I had to RMA this unit, due to all the issues above- I have not had the best of luck with these cheap machines and hopefully the new replacement will fair better.

3D printing settings

-

Advertising


Issue with this design? Report a problem.

Would you like to support Cults?

You like Cults and you want to help us continue the adventure independently? Please note that we are a small team of 3 people, therefore it is very simple to support us to maintain the activity and create future developments. Here are 4 solutions accessible to all:

  • ADVERTISING: Disable your banner blocker (AdBlock, …) and click on our banner ads.

  • AFFILIATION: Make your purchases online by clicking on our affiliate links here Amazon.

  • DONATE: If you want, you can make a donation via Ko-Fi πŸ’œ.

  • WORD OF MOUTH: Invite your friends to come, discover the platform and the magnificent 3D files shared by the community!


Sharing and downloading on Cults3D guarantees that designs remain in makers community hands! And not in the hands of the 3D printing or software giants who own the competing platforms and exploit the designs for their own commercial interests.

Cults3D is an independent, self-financed site that is not accountable to any investor or brand. Almost all of the site's revenues are paid back to the platform's makers. The content published on the site serves only the interests of its authors and not those of 3D printer brands who also wish to control the 3D modeling market.

100% secure payment by credit card, PayPal, Apple Pay, Google Pay, etc.
View all payment options.