Skip to content

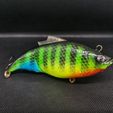
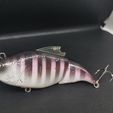
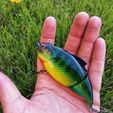
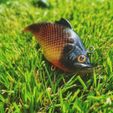
Fishing lure type "vatalion" 110mm

Advertising
Advertising
?
Creation quality: 4.8/5 (2 votes)
Evaluation of members on the printability, utility, level of detail, etc.

  • 10.5k views
  • 11 likes
  • 57 downloads
  • 1 collection

License
3D design format
STL Folder details Close
  • filament corps.stl
  • filament embout.stl
  • filament queux.stl
  • resine corps.stl
  • resine queux.stl

Learn more about the formats

Last update 2021-07-27 at 15:43
Publication date 2021-04-05 at 21:23
Design number 358284

3D printer file info

3D model description

Hello, here is my latest creation, a lure type "vatalion" which allows to fish all depths mainly for pike.

The lure is designed in 2 versions, filament printing and resin

          Filament version:

-required for mounting :

Piano wire

Threaded insert with eyelet (https://a.aliexpress.com/_vWDD3h)

Epoxy glue

Glue

Plastic

Sanding paper

Lead

1- print all parts

2- install the pitons, first screwed into the body of the lure and then ensure the proper fixation using glue, to place them at the joint, you must leave half a centimeter before the loop of the eyelet of the piton to allow the lure freedom. Equip the eyelets with hooks in order to proceed to the balancing.

3- Sanding of the elements then deposit of the lead (2/3 in the front part and 1/3 in the back part), it is necessary to make tests of leaded in order to ensure a good balance, once this validated, it is enough to stick the cover with the glue and to sand the whole once dry

4- painting and varnishing

Finished bravo! =D

         Resin version:

-required for mounting :

Piano wire

Threaded insert with eyelet (https://a.aliexpress.com/_vWDD3h)

Glue

Sanding paper

ball 8mm

decoy attachment size s (https://www.aliexpress.com/item/33030326000.html?spm=a2g0o.detail.1000023.4.6a847ed8CKu4RN)

1- print all parts

2- Punching the faces, placing the balls preferably heavier at the front of the decoy than at the back then gluing the 2 parts

3- Putting the pegs in the body of the lure then inserting the piano wire for the axis of the tail

4- painting and varnishing

Finished bravo! =D

3D printing settings

Filament printing

40% filling

Advertising


Page translated by automatic translation. See the original version.
Issue with this design? Report a problem.

Would you like to support Cults?

You like Cults and you want to help us continue the adventure independently? Please note that we are a small team of 3 people, therefore it is very simple to support us to maintain the activity and create future developments. Here are 4 solutions accessible to all:

  • ADVERTISING: Disable your banner blocker (AdBlock, …) and click on our banner ads.

  • AFFILIATION: Make your purchases online by clicking on our affiliate links here Amazon.

  • DONATE: If you want, you can make a donation via Ko-Fi πŸ’œ.

  • WORD OF MOUTH: Invite your friends to come, discover the platform and the magnificent 3D files shared by the community!


Sharing and downloading on Cults3D guarantees that designs remain in makers community hands! And not in the hands of the 3D printing or software giants who own the competing platforms and exploit the designs for their own commercial interests.

Cults3D is an independent, self-financed site that is not accountable to any investor or brand. Almost all of the site's revenues are paid back to the platform's makers. The content published on the site serves only the interests of its authors and not those of 3D printer brands who also wish to control the 3D modeling market.

100% secure payment by credit card, PayPal, Apple Pay, Google Pay, etc.
View all payment options.